Office 365 SSO enables easy authentication for SeamlessHR through Microsoft 365 accounts. This streamlines access while ensuring centralized control over user permissions.
Requirements
- Client URL: This is the URL you use to access Seamless HRMS. It's usually in the format {CUSTOMER_NAME}.seamlesshr.com e.g. company-xyz.seamlesshrms.com
- Client ID (Application ID): This will be generated/fetched from your Azure AD. It's usually in the format
123ab45c-1234-12a3-12a3-ab1c2345de6. . - Tenant ID: This will be generated/fetched from your Azure AD. It's usually in the format
123ab45c-1234-12a3-12a3-ab1c2345de6.. - Secret ID: This will be generated from your Azure AD. It's usually in the format
123ab45c-1234-12a3-12a3-ab1c2345de6. . - Secret Value: This will be generated/fetched from your Azure AD.
- Object ID: This will be generated/fetched from your Azure AD. It's usually in the format
123ab45c-1234-12a3-12a3-ab1c2345de6.
In addition, we will require that a Test Account be created on your Azure AD. The test account is what we use from our end to test login after Office 365 SSO is implemented. It enables us to act like an employee of yours and login to Seamless HRMS to test that Office 365 login is now fine: - Email: e.g. seamlesshr_test@{YOUR_OFFICE365_DOMAIN}.com
- Password: Password12345
After the credentials have been profiled, kindly share them with us via email. The following information will guide you with generating the credentials on your Azure AD:
Register the SeamlessHR application in Azure AD
The Office 365 Management APIs use Azure AD to provide secure authentication to Office 365 tenant data. To access the Office 365 Management APIs, you need to register the SeamlessHR app in Azure AD, and as part of the configuration, you will specify the permission levels the app needs to access the APIs.
Prerequisites
To register the app in Azure AD, you need a subscription to Office 365 and a subscription to Azure that has been associated with your Office 365 subscription. You can use trial subscriptions to both Office 365 and Azure to get started. For more details, see Welcome to the Office 365 Developer Program.
Use the Azure Portal to register the SeamlessHR application in Azure AD
After you have a Microsoft tenant with the proper subscriptions, you can register your application in Azure AD.
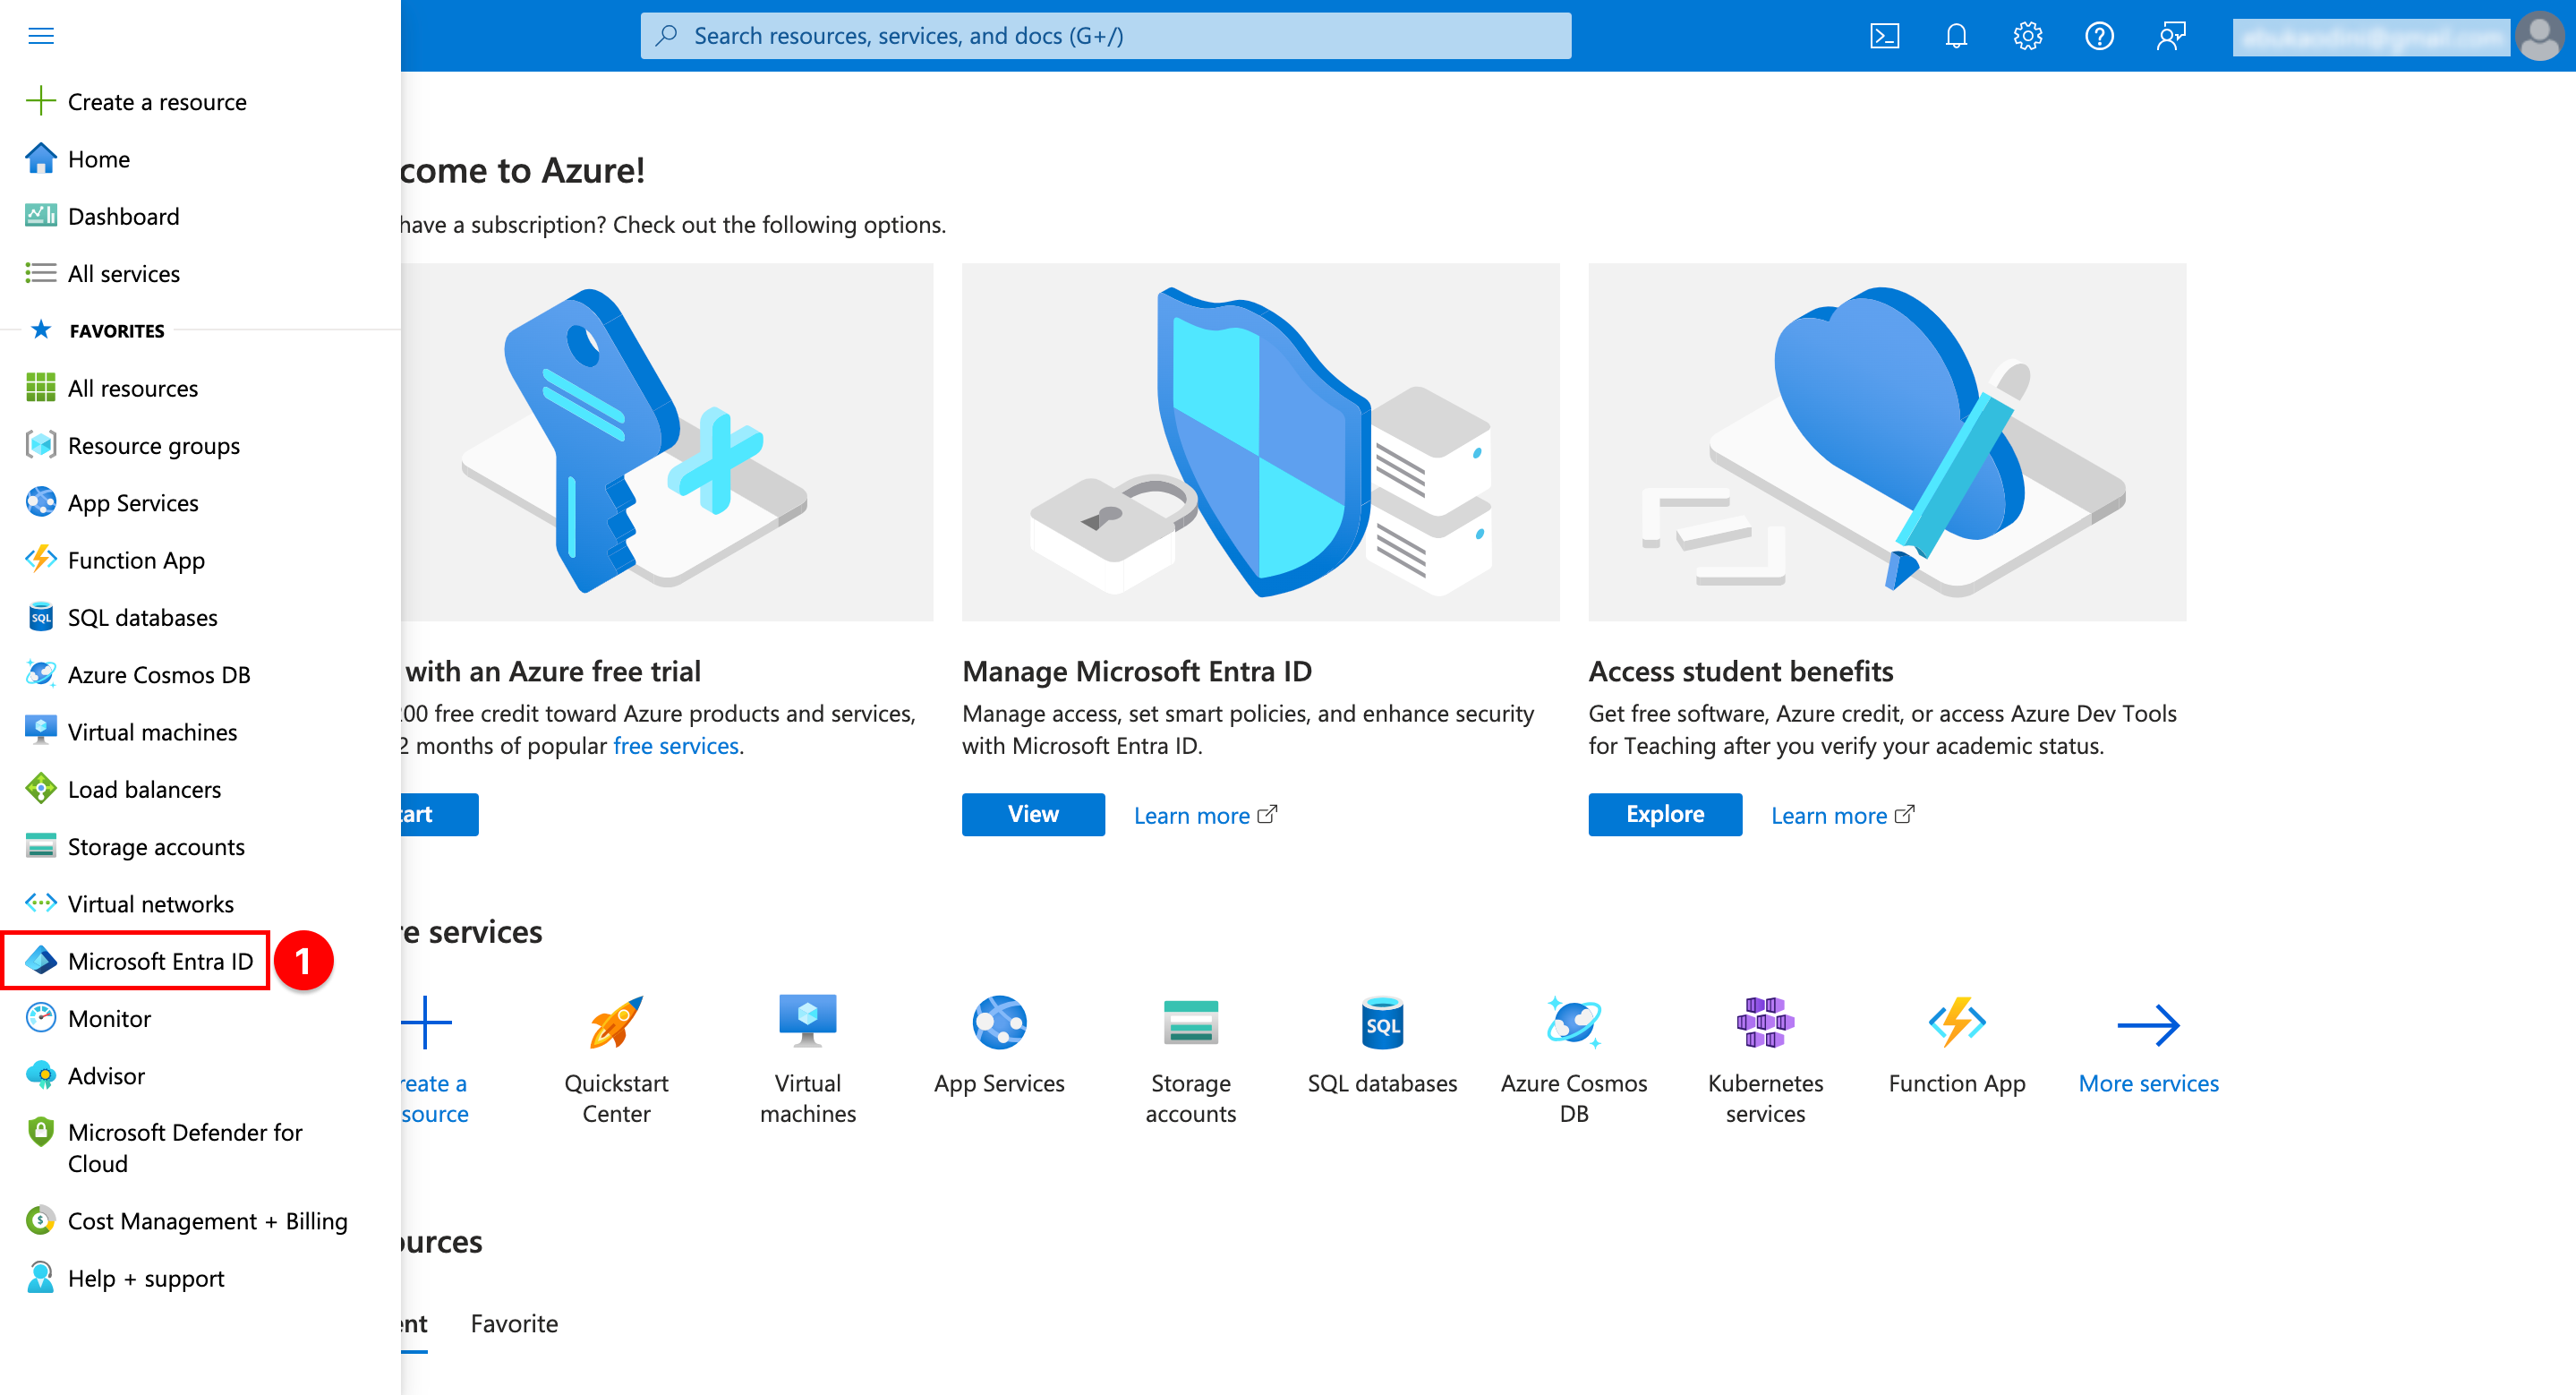
- Sign into the Azure portal, using the credential of your Microsoft tenant that has the subscription to Office 365 you wish to use. You can also access the Azure Portal via a link that appears in the left navigation pane in the Microsoft 365 admin center.
- In the left navigation pane, select Microsoft Entra ID (1)
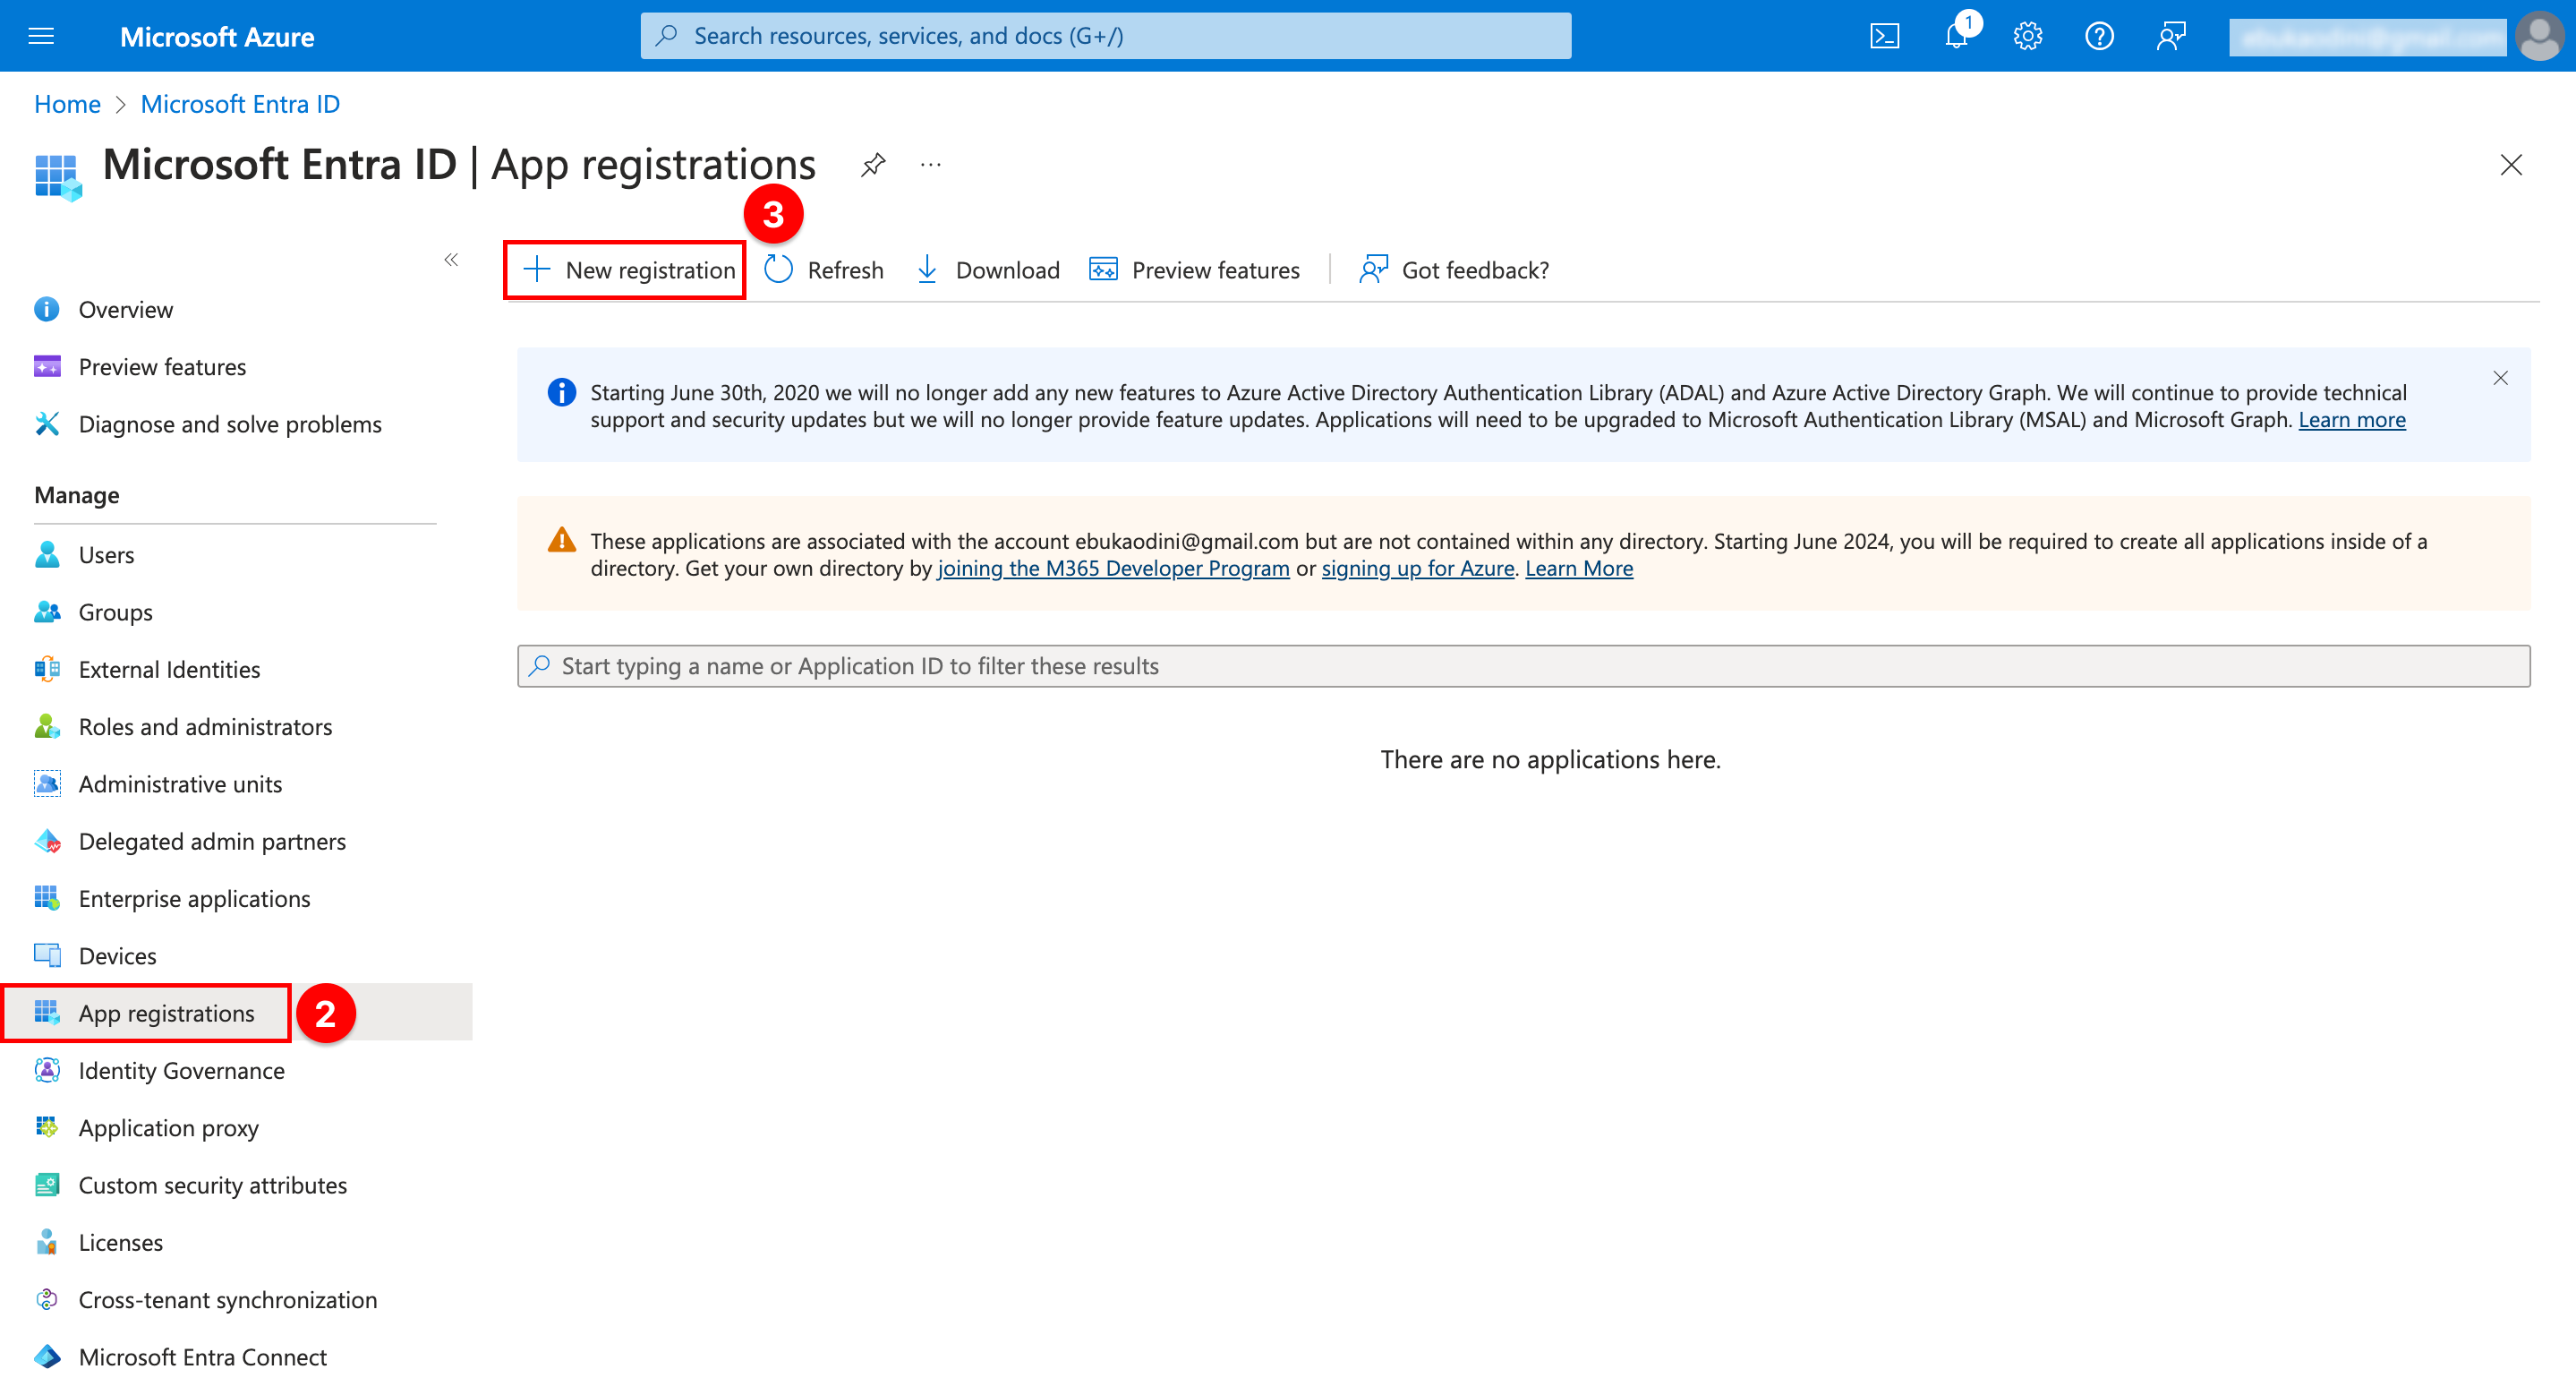
- On the Microsoft Entra ID page, select App registrations, and then select New registration.
-
On the App registrations page, select New registration.
A new page appears for you to start the registration of your app (i.e. the SeamlessHR app). -
On the Register an application page, do the following things:

- Name your app.
- Choose who can use the app and access the API.
- Set redirect URL for user redirect. This is where employees are redirected to after authentication. It is usually in the format https://{CUSTOMER_NAME_AS_IT_APPEARS_IN_CLIENT_URL}.seamlesshrms.com/365login/callback. For example, if your Client URL is https://company-xyz.seamlesshr.com, your callback URL will be https://company-xyz.seamlesshrms.com/365login/callback. Please remember that this must be set correctly.
- Click Register to register for the new app.
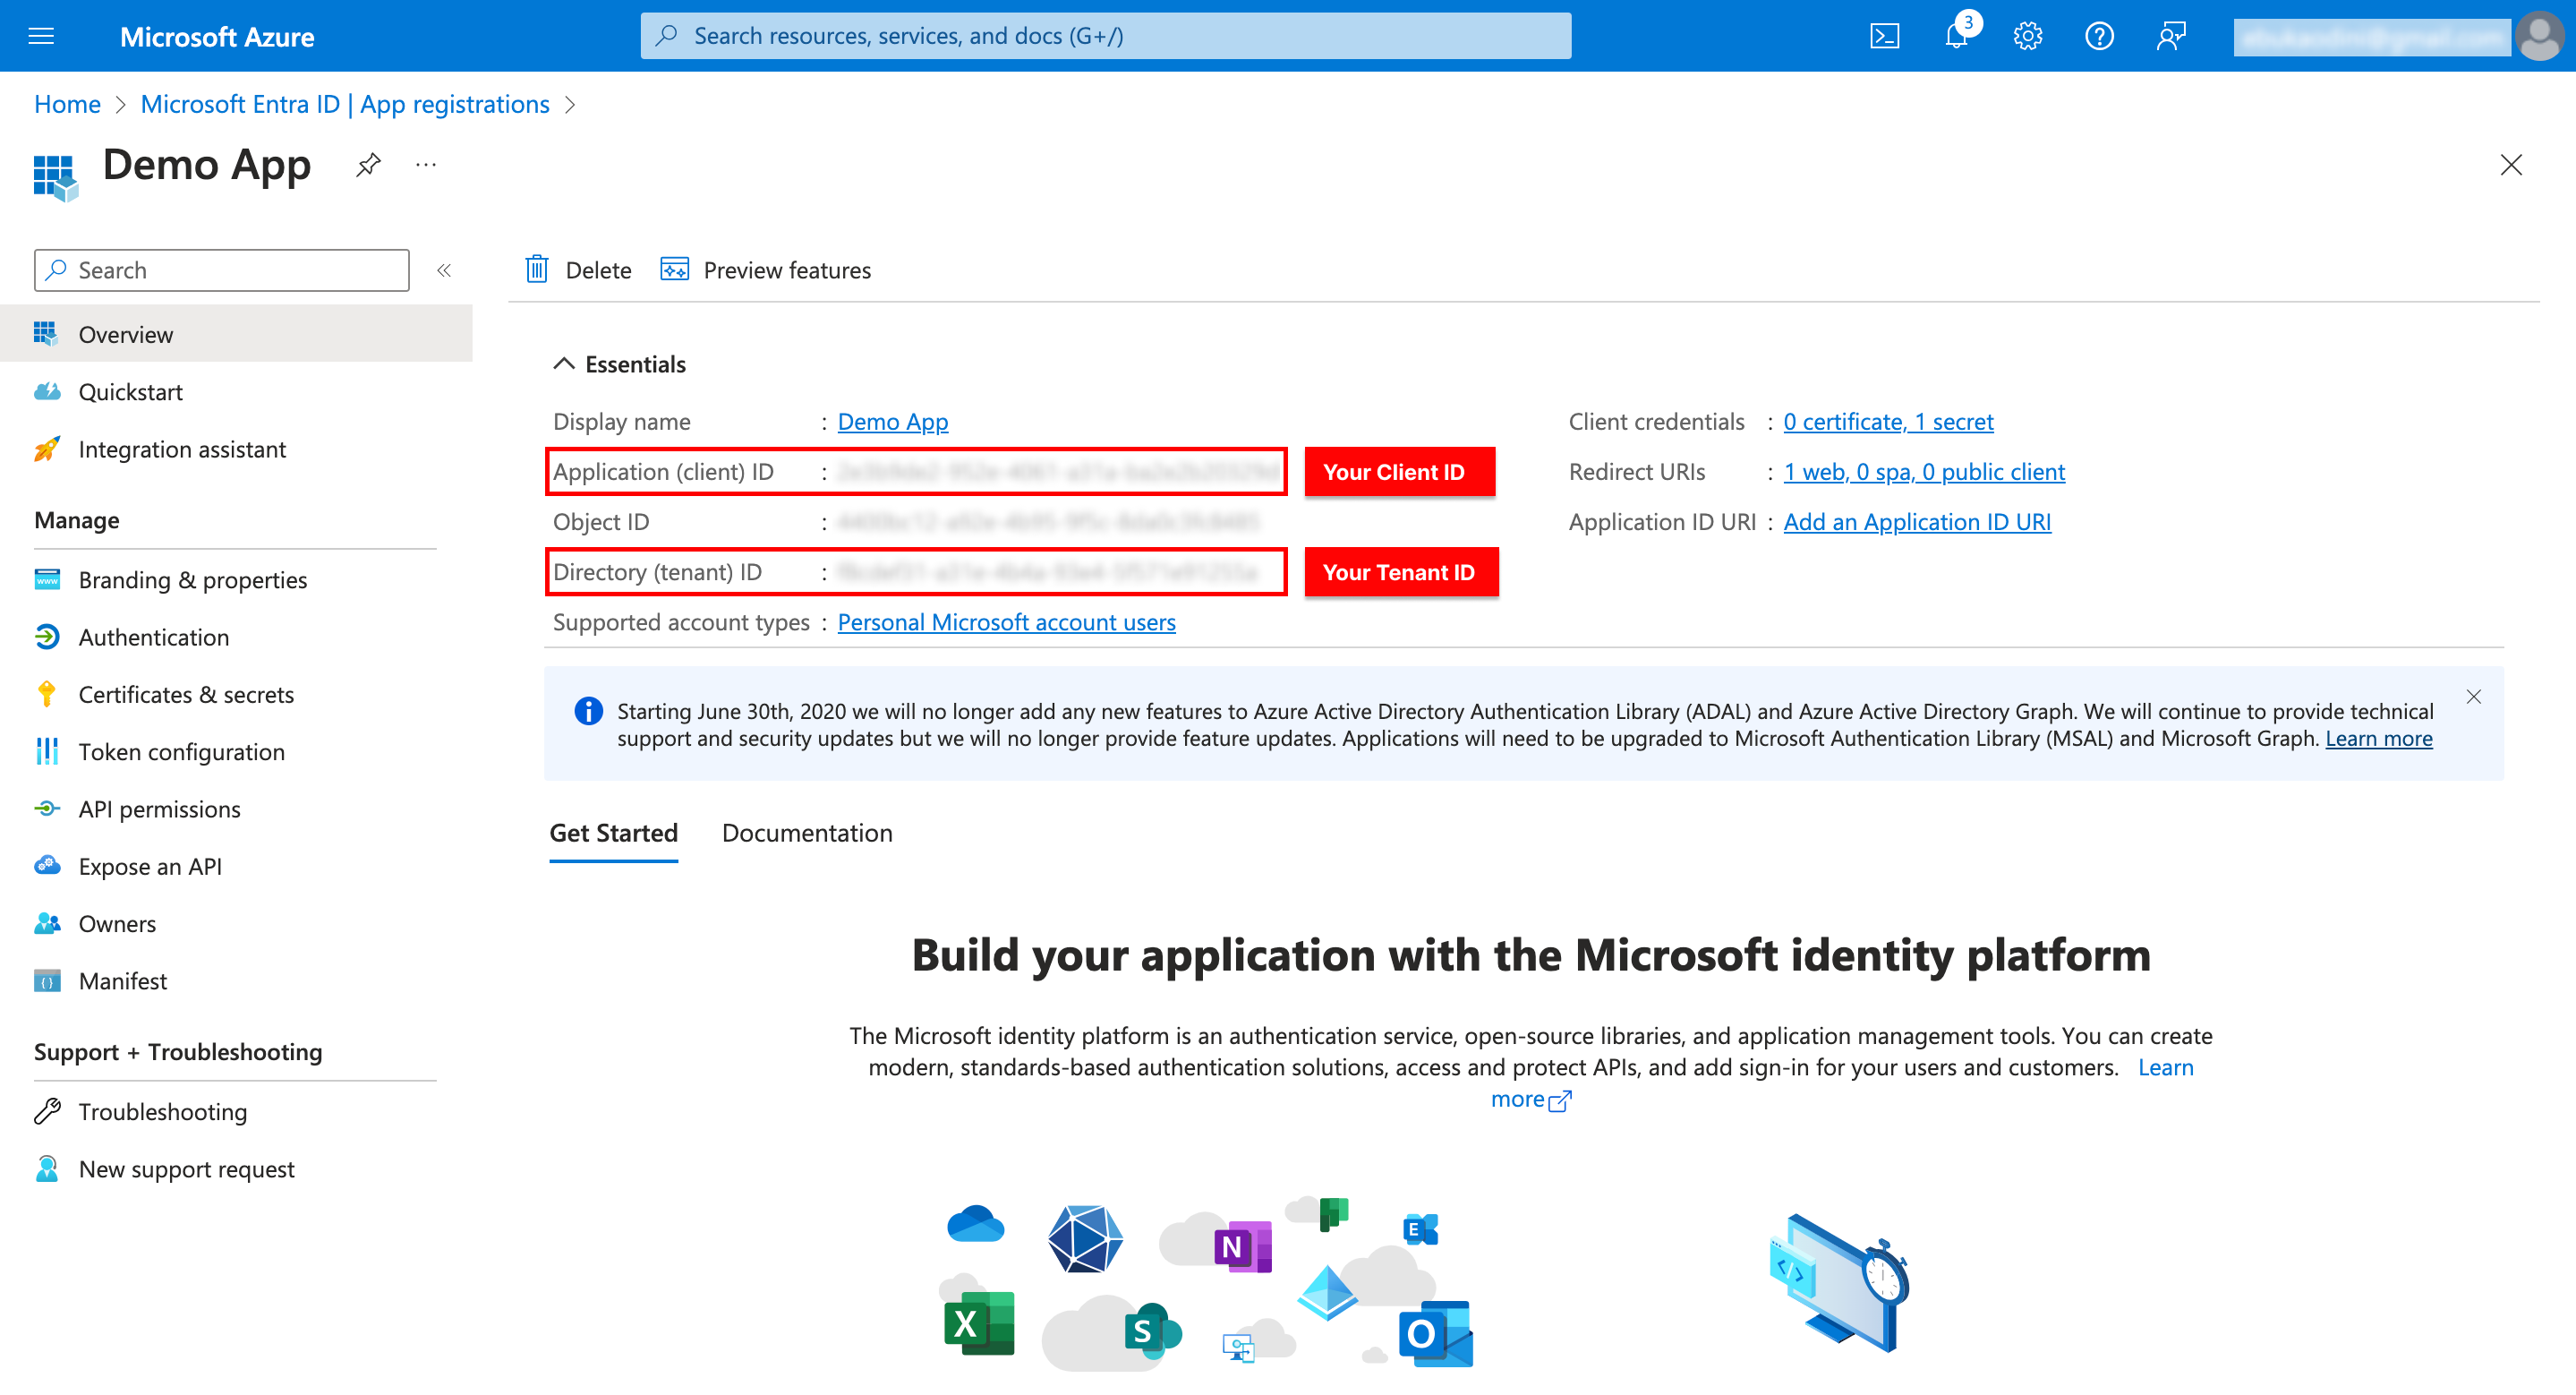
- The next page should be your application page with the following:
Configure the SeamlessHR application properties in Azure AD
Now that your application is registered, there are several important properties you must specify that determine how your application functions within Azure AD and how tenant admins will grant consent to allow your application to access their data by using the Office 365 Management APIs.
- Client ID: This value is automatically generated by Azure AD. Your application will use this value when requesting consent from tenant admins and when requesting app-only tokens from Azure AD.
- Application is multi-tenant: This property must be set to YES to allow tenant admins to grant consent to your app to access their data by using the Office 365 Management APIs. If this property is set to NO, your application will only be able to access your own tenant's data.
- Reply URL: This is the URL that a tenant admin will be redirected to after granting consent to allow your application to access their data by using the Office 365 Management APIs. You can configure multiple reply URLs as needed. Azure automatically sets the first one to match the sign-on URL you specified when you created the application, but you can change this value as needed.
Be sure to choose Save after making any changes to these properties.
Generate a new key for your application
Keys, also known as client secrets, are used when exchanging an authorization code for an access token.
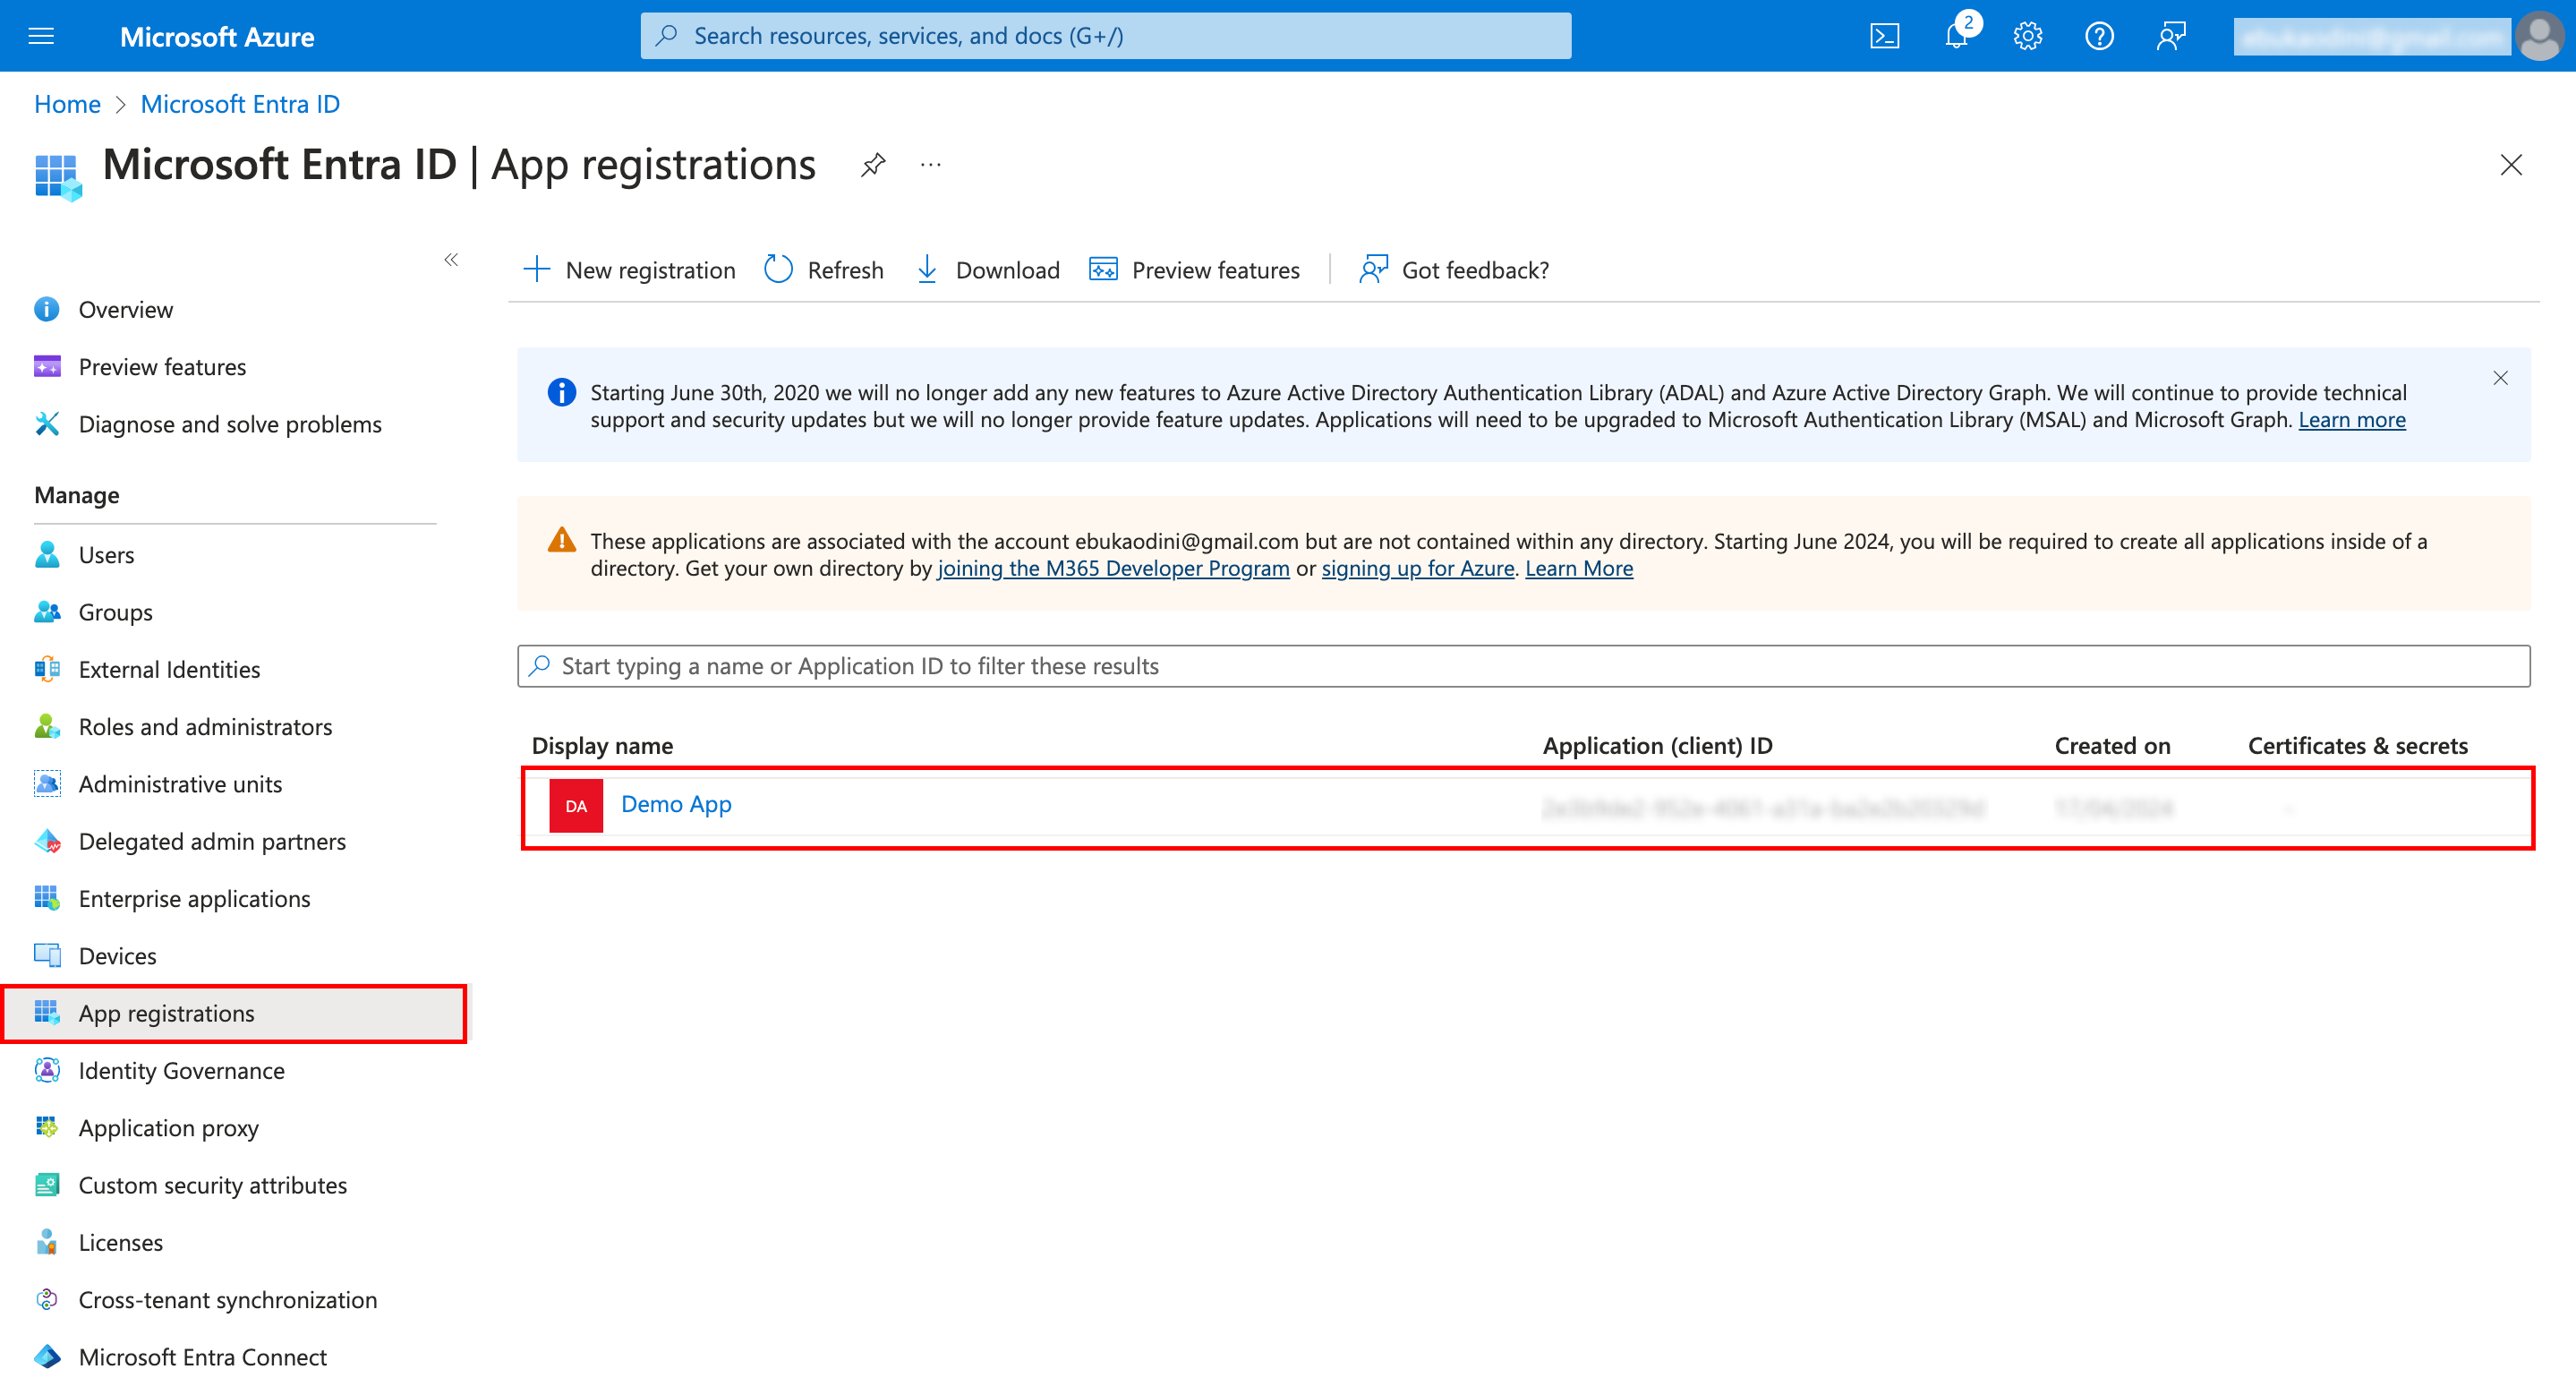
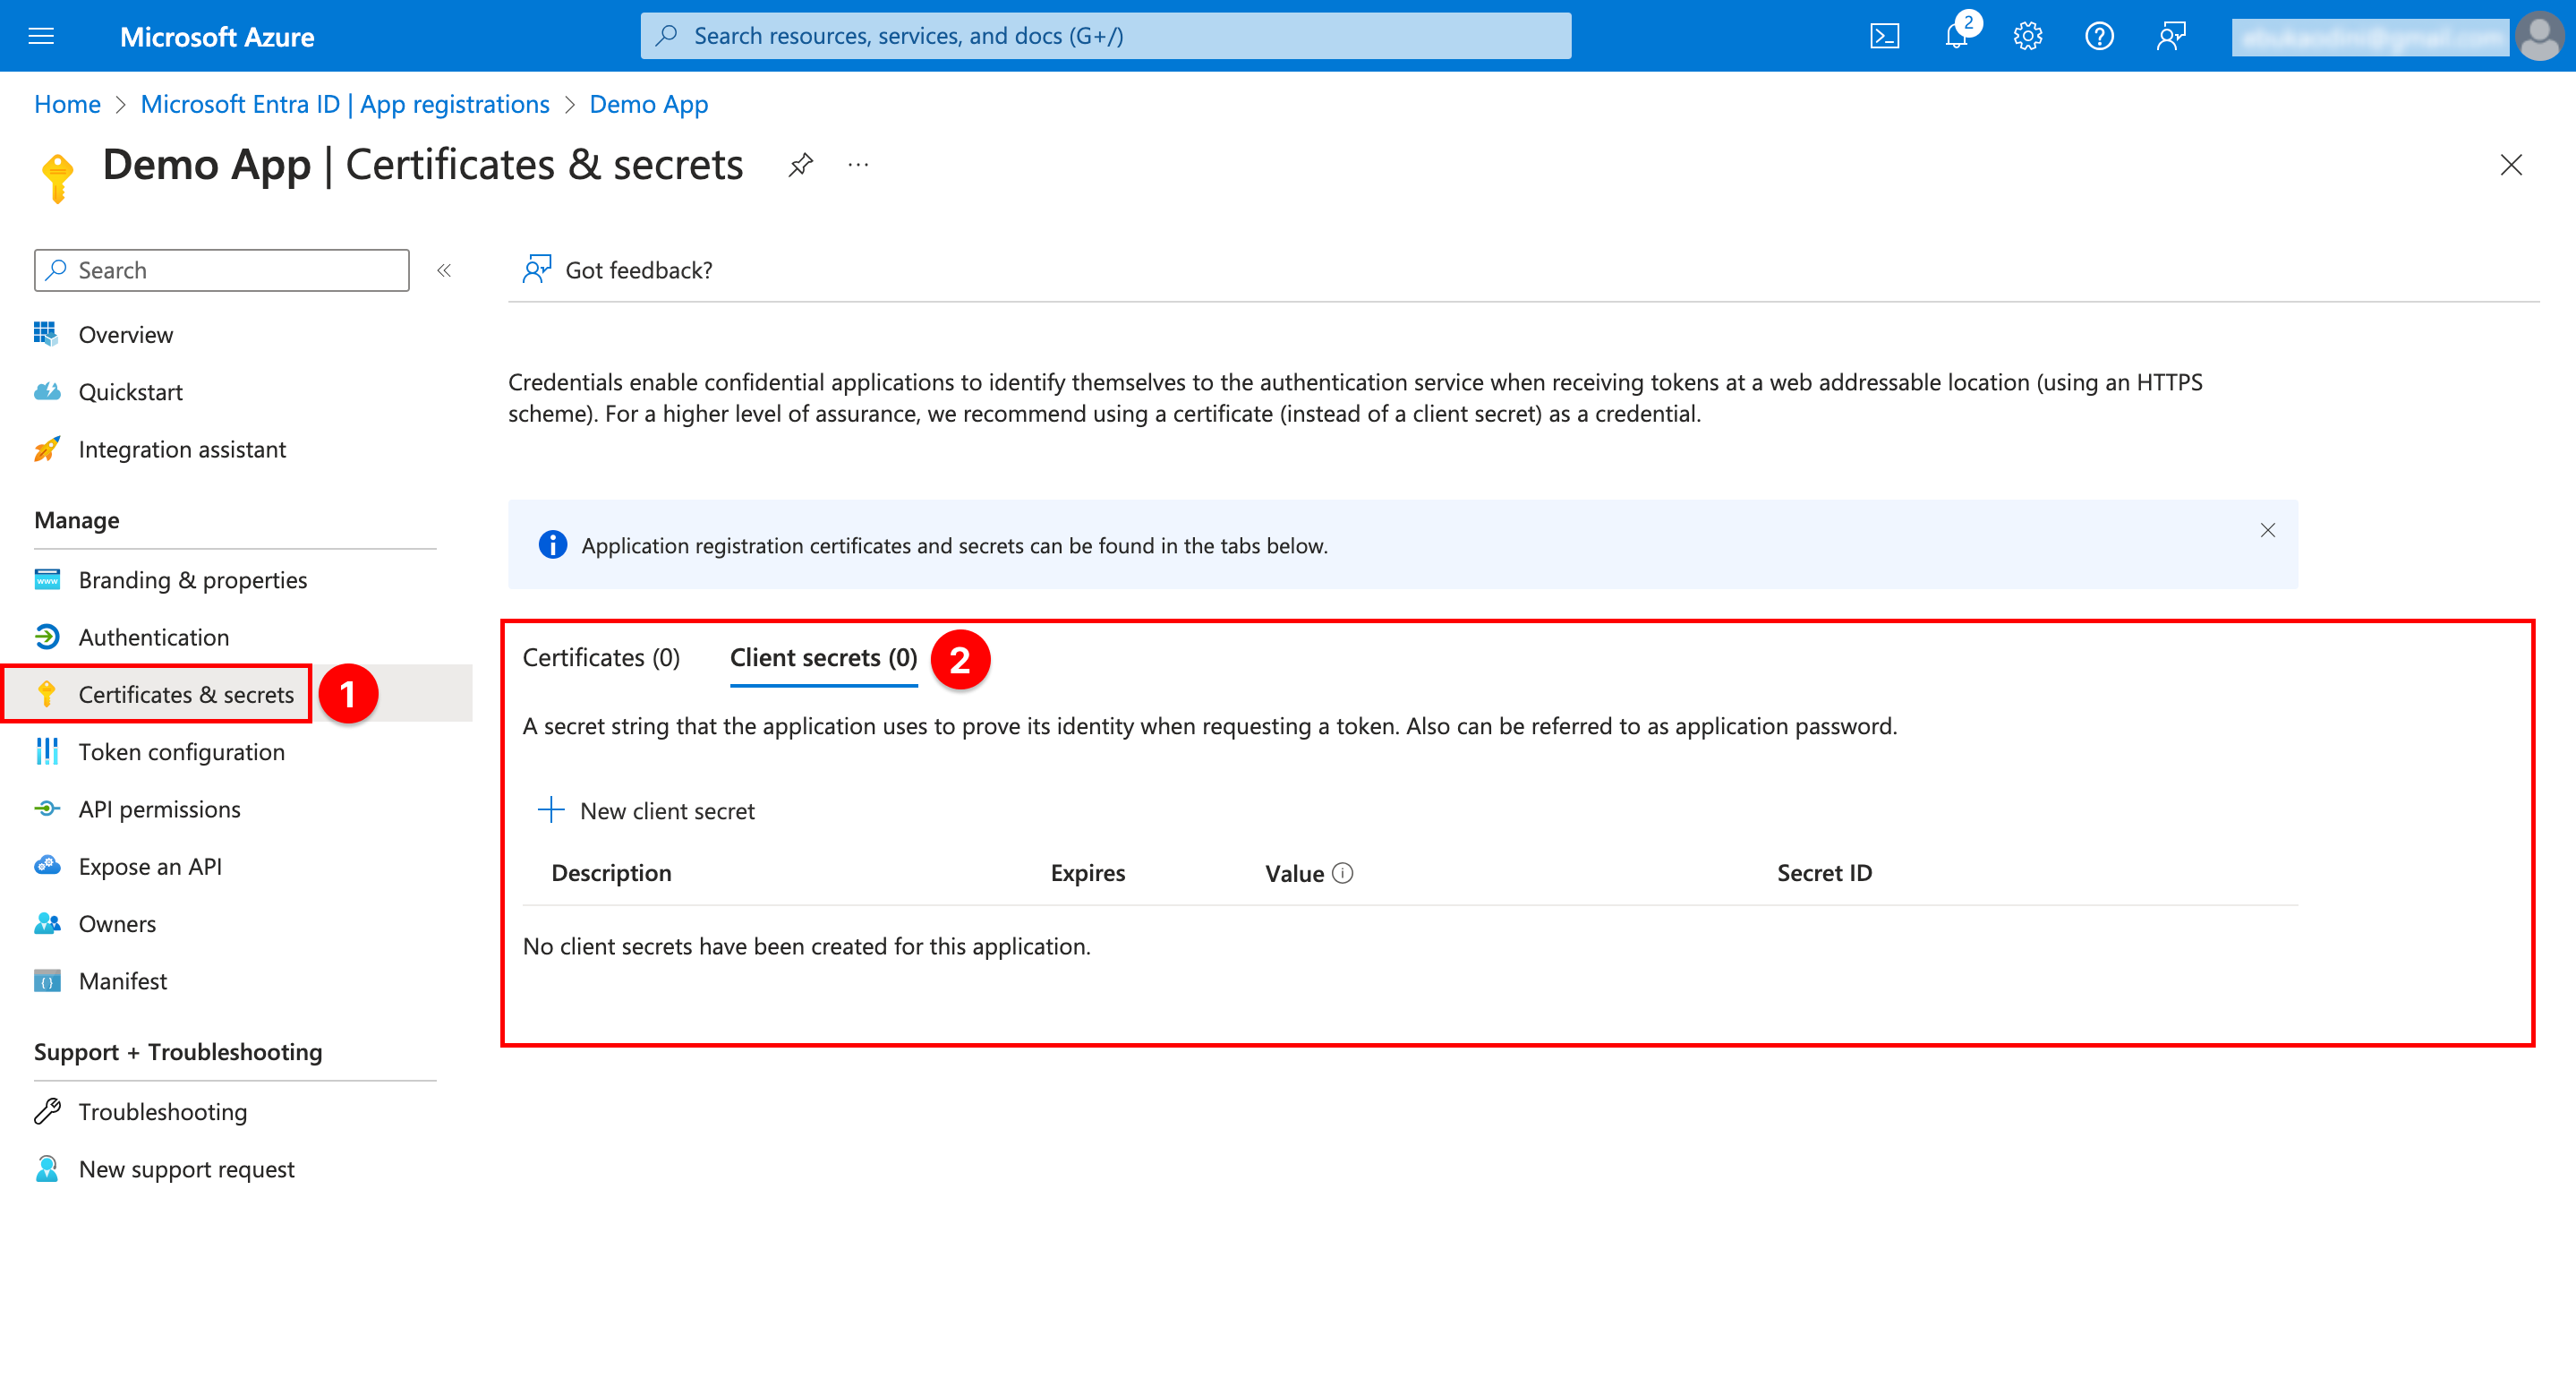
- On the Microsoft Entra ID page in the Azure portal, select App registrations, and then select your application.
- After the page for your app is displayed, select Certificates & secrets in the left pane. On this page, you can upload certificates and create new client secrets
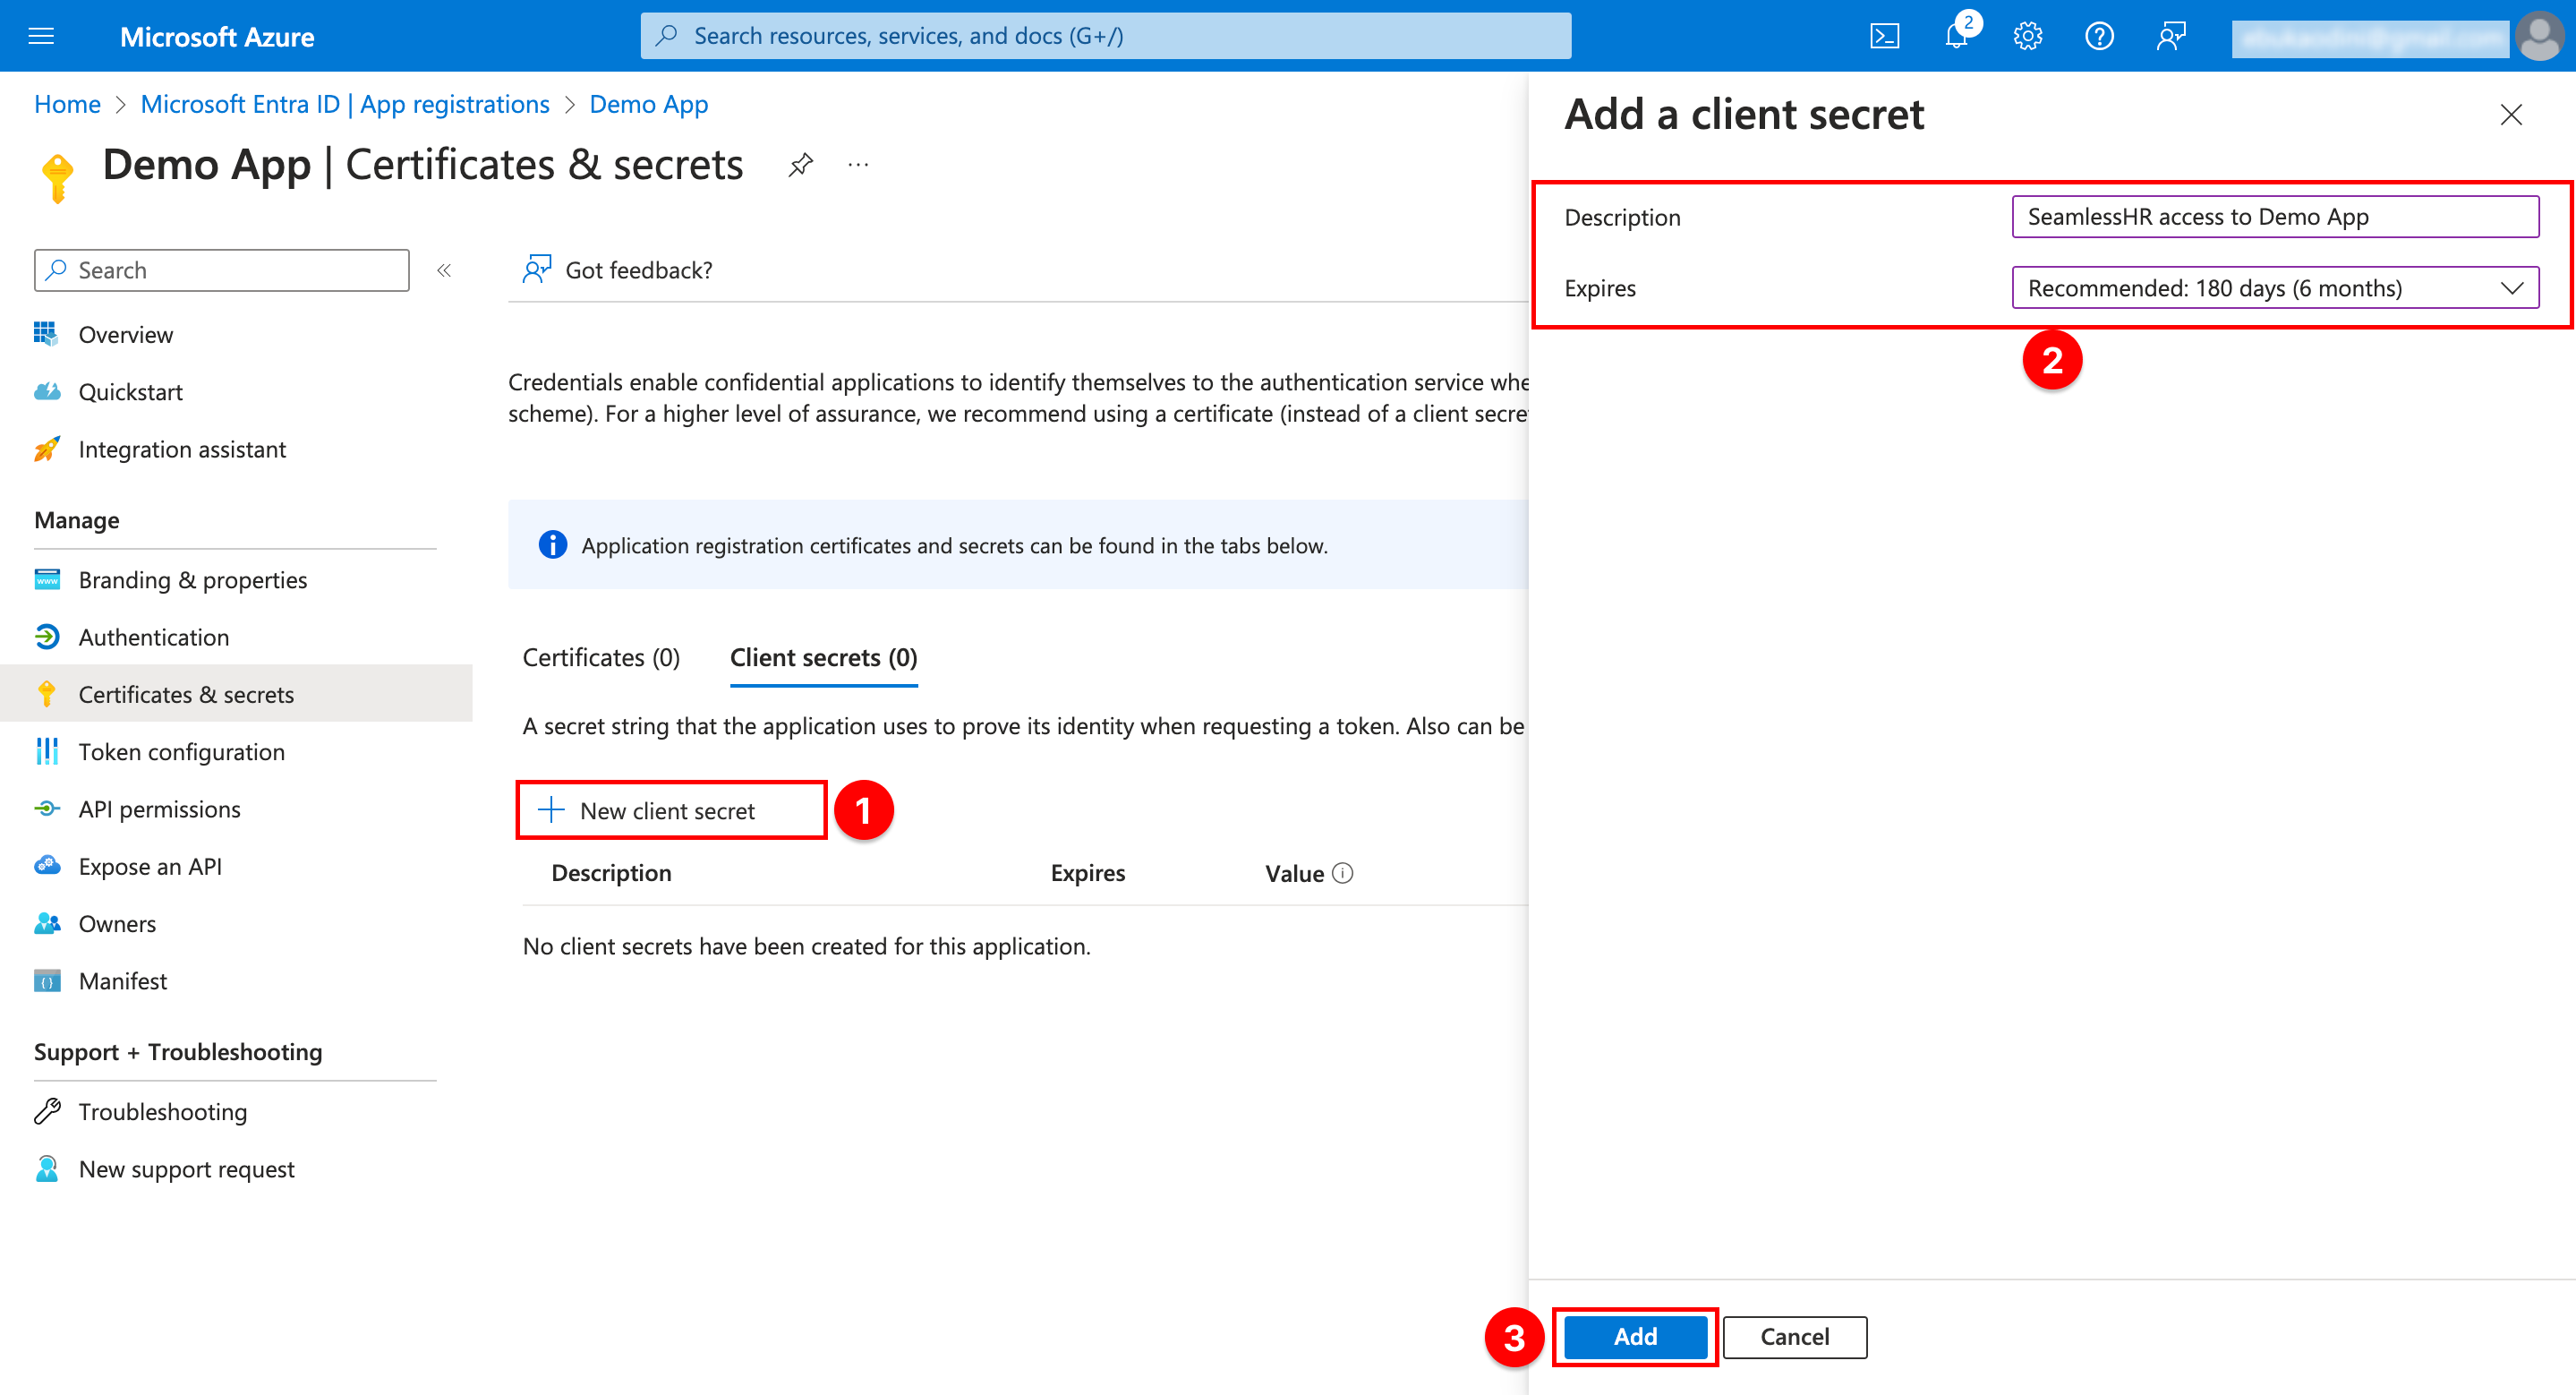
- On the Certificates & secrets page, click New client secret, type a description and select the duration for your key, and then click Add
- After creating the client secret, the value is displayed under Client secrets. Click the clipboard icon to copy the client secrets value to the clipboard.
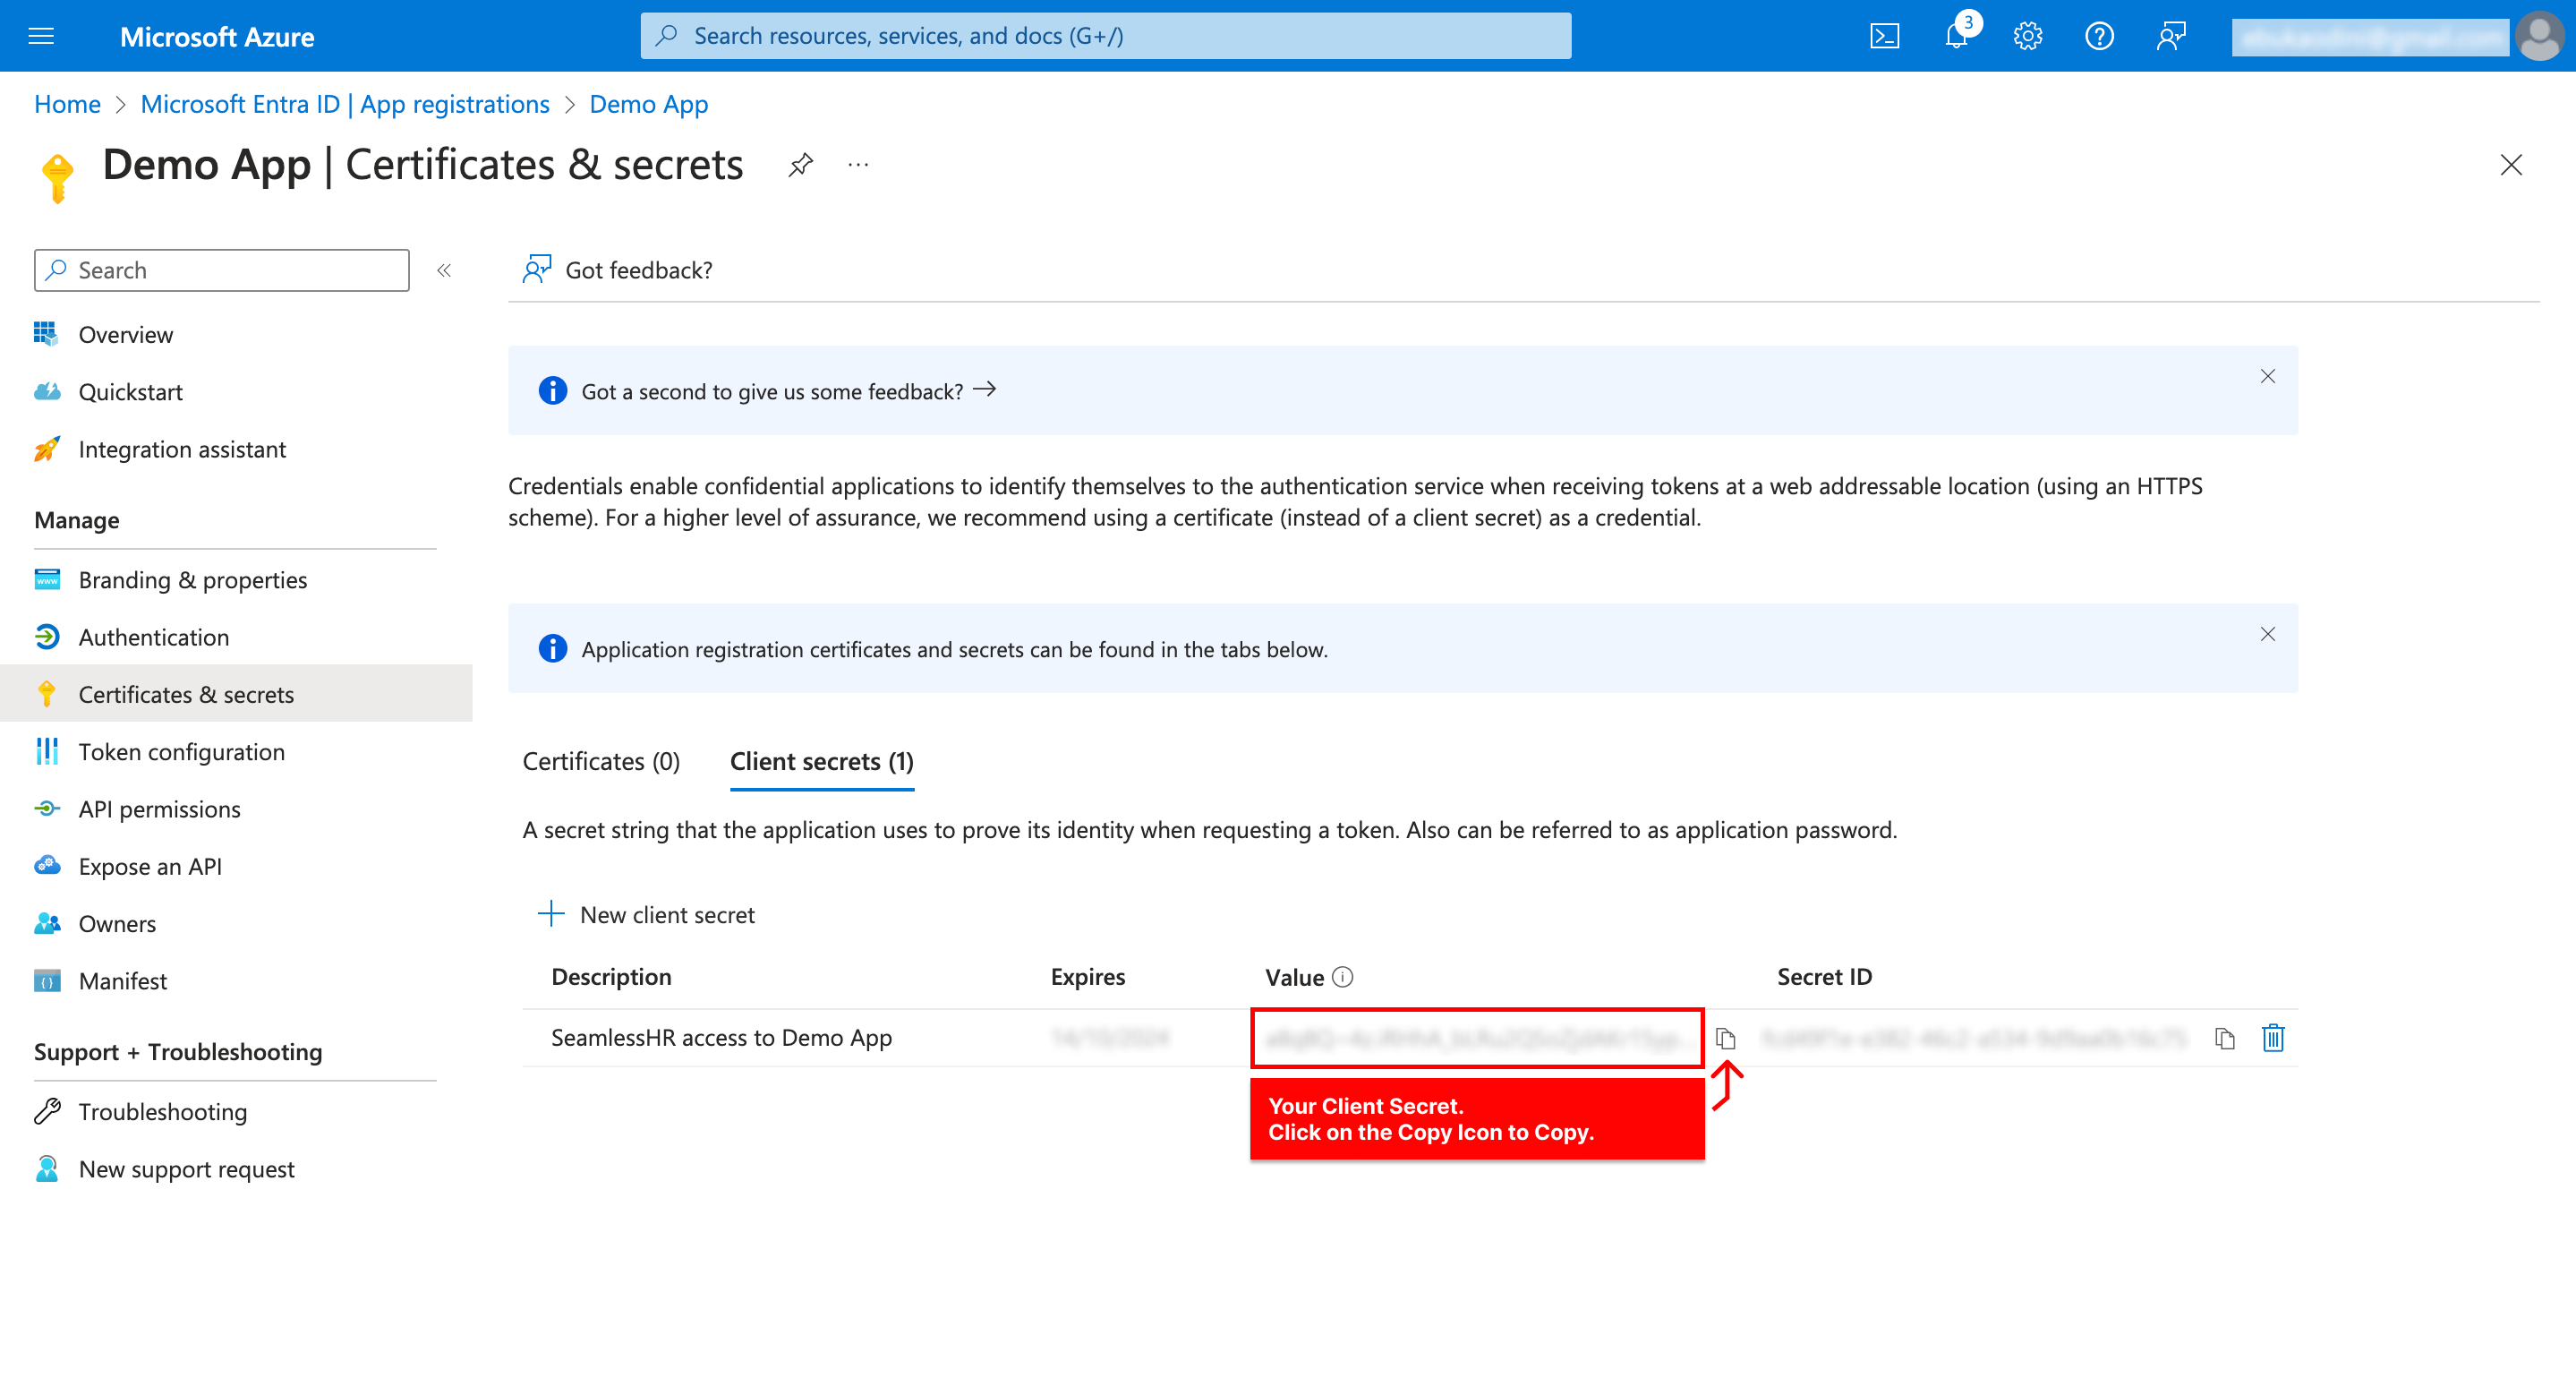
" ImportantAzure only displays the client secret value at the time you initially generate it. You can't go back to this page and retrieve the client secret value later. Be sure to copy it and save it to a secure location so you can use it later."
References
https://docs.microsoft.com/en-gb/office/office-365-management-api/images/azureappregistration6.png