We are glad you have decided to use Azure/Office365 SAML SSO to access the HRMS application. That way, your staff can access the application with the same credentials used across your organization without having to create a username and password. To set you up, we require some credentials.
Our Requirements
- Login URL
- Azure AD Identifier
- Certificate (Base64)
In addition, we will require a Test account to be created for SeamlessHR support staff to enable us to verify the integration. It enables us to act like an employee of yours and login to the HRMS application to test that the SSO login is now fine:
- Email: e.g. seamlesshr_test@{YOUR_DOMAIN}.com
- Password: Password12345
Registering an App on Azure AD
To register an app on the Azure platform, go to the link and sign in with your administrator account.
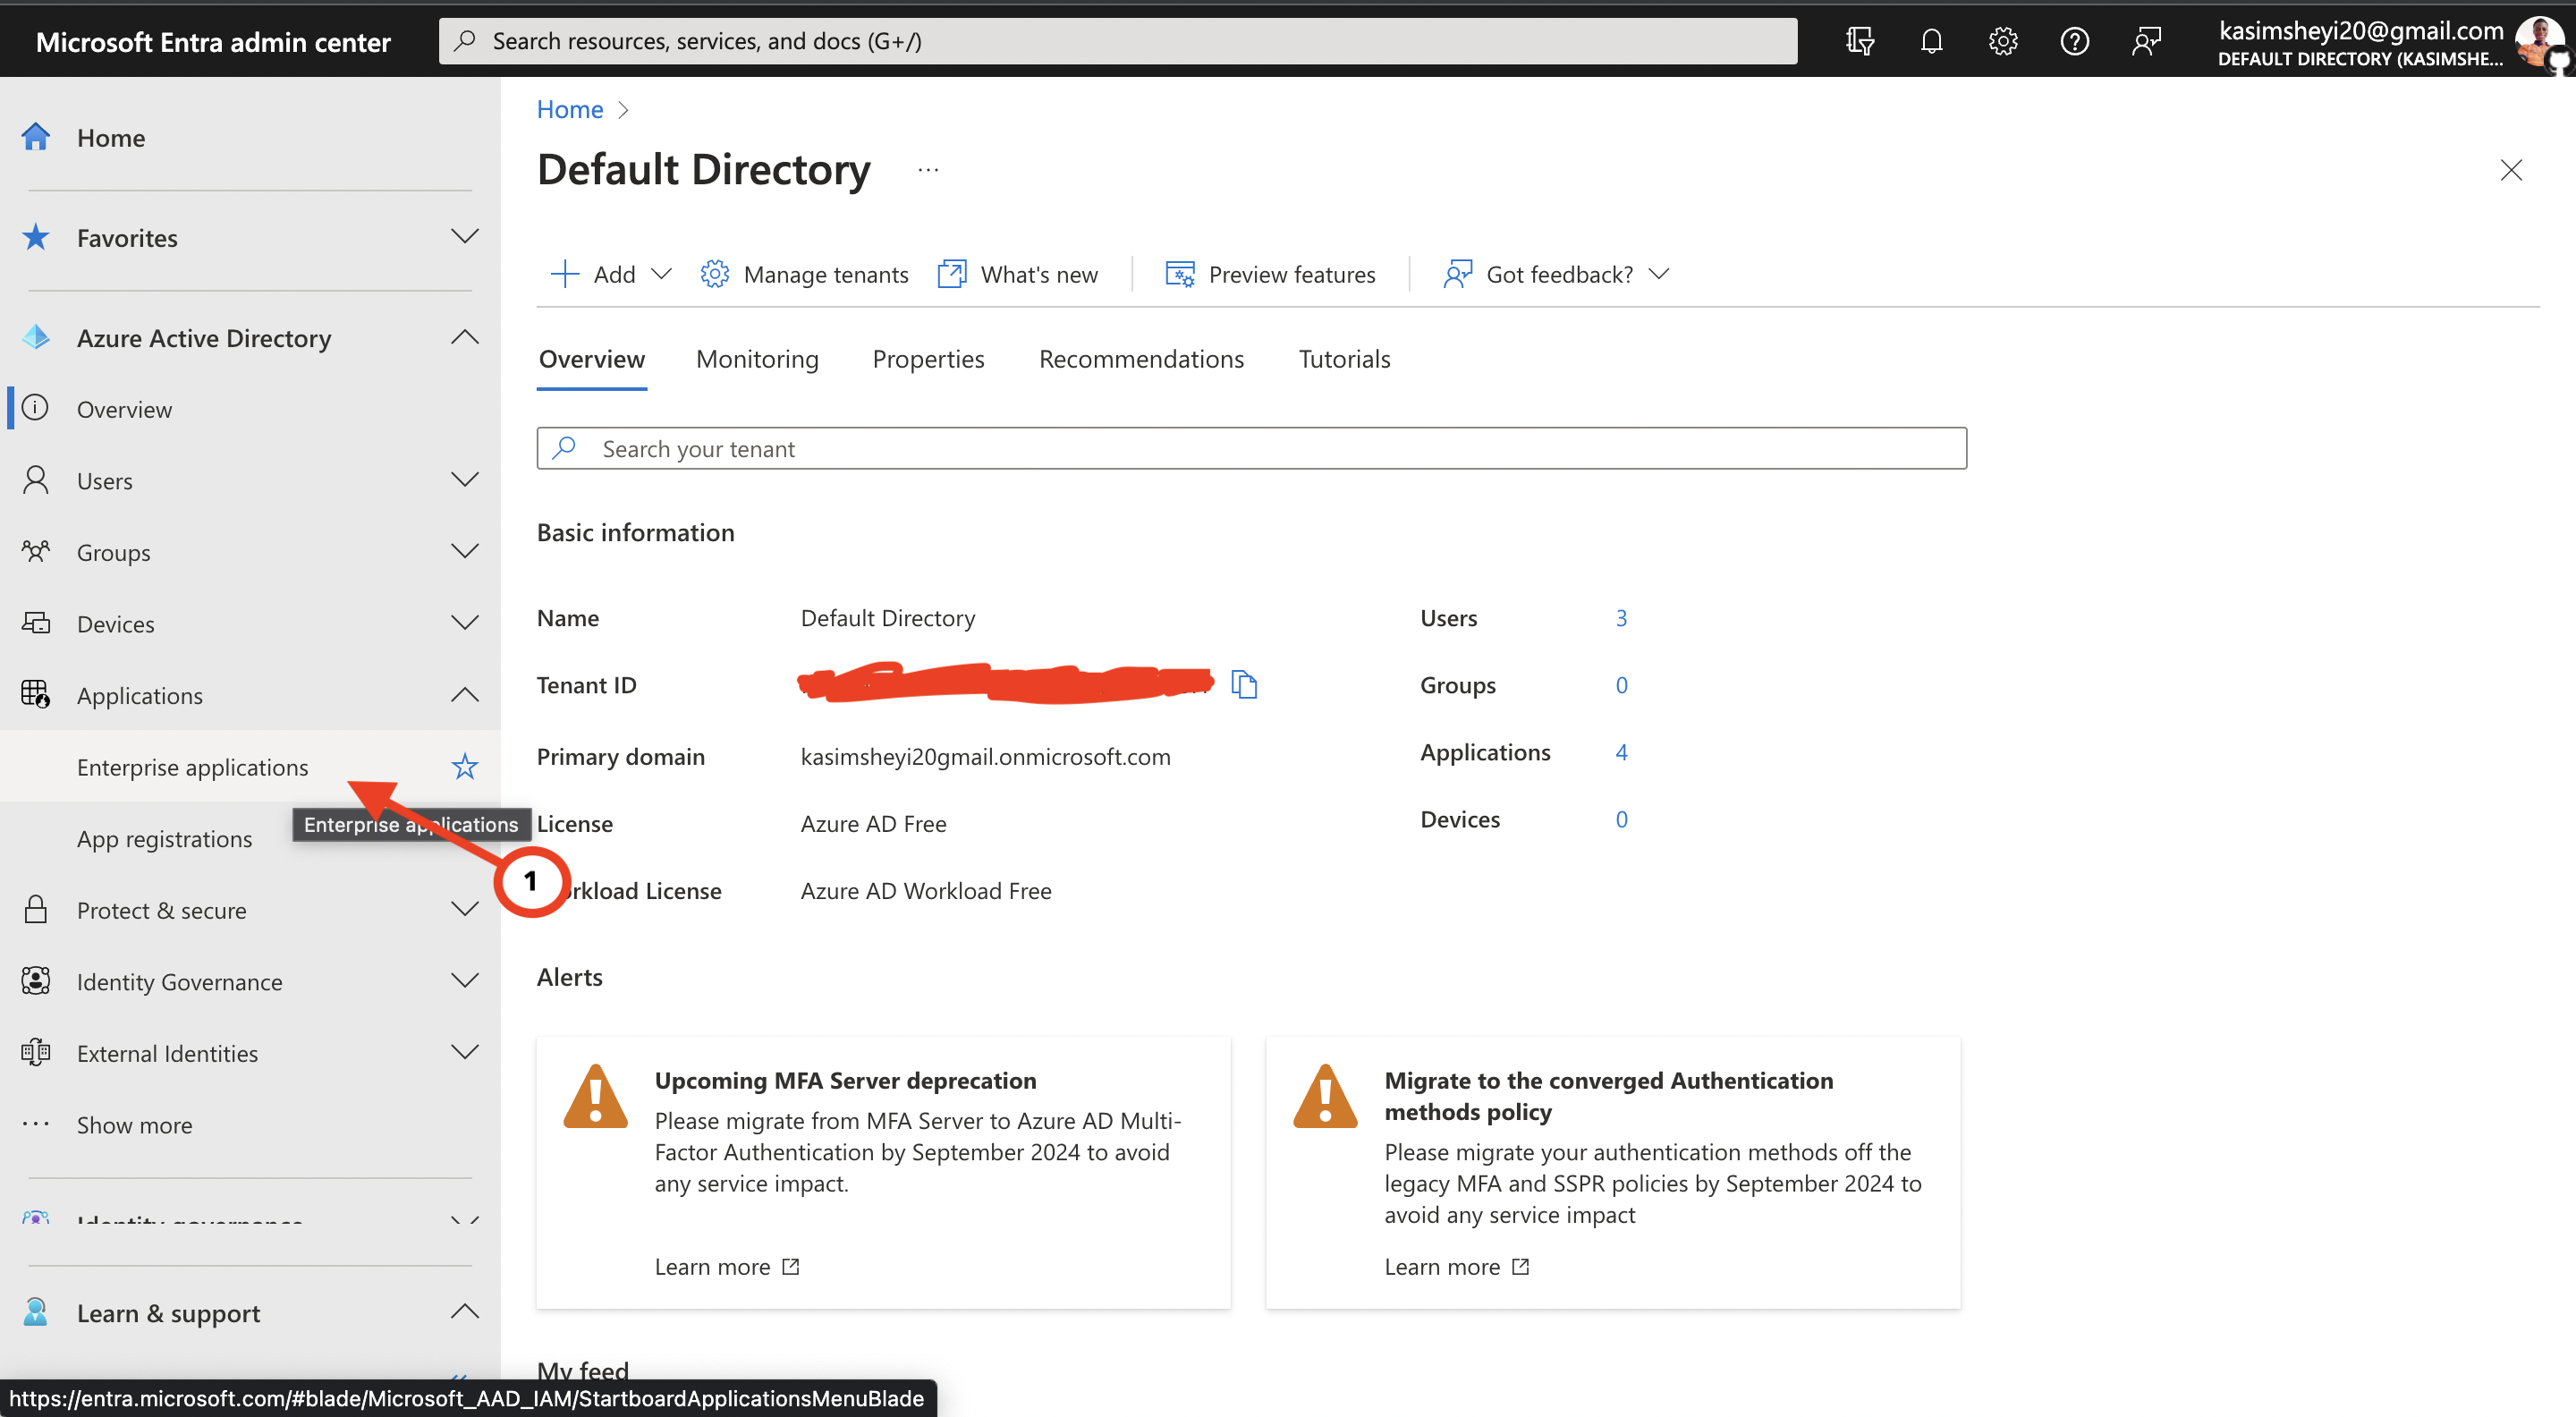
After successful sign-in, Select Azure Active Directory from the options on the sidebar then click on Applications then Enterprise applications.
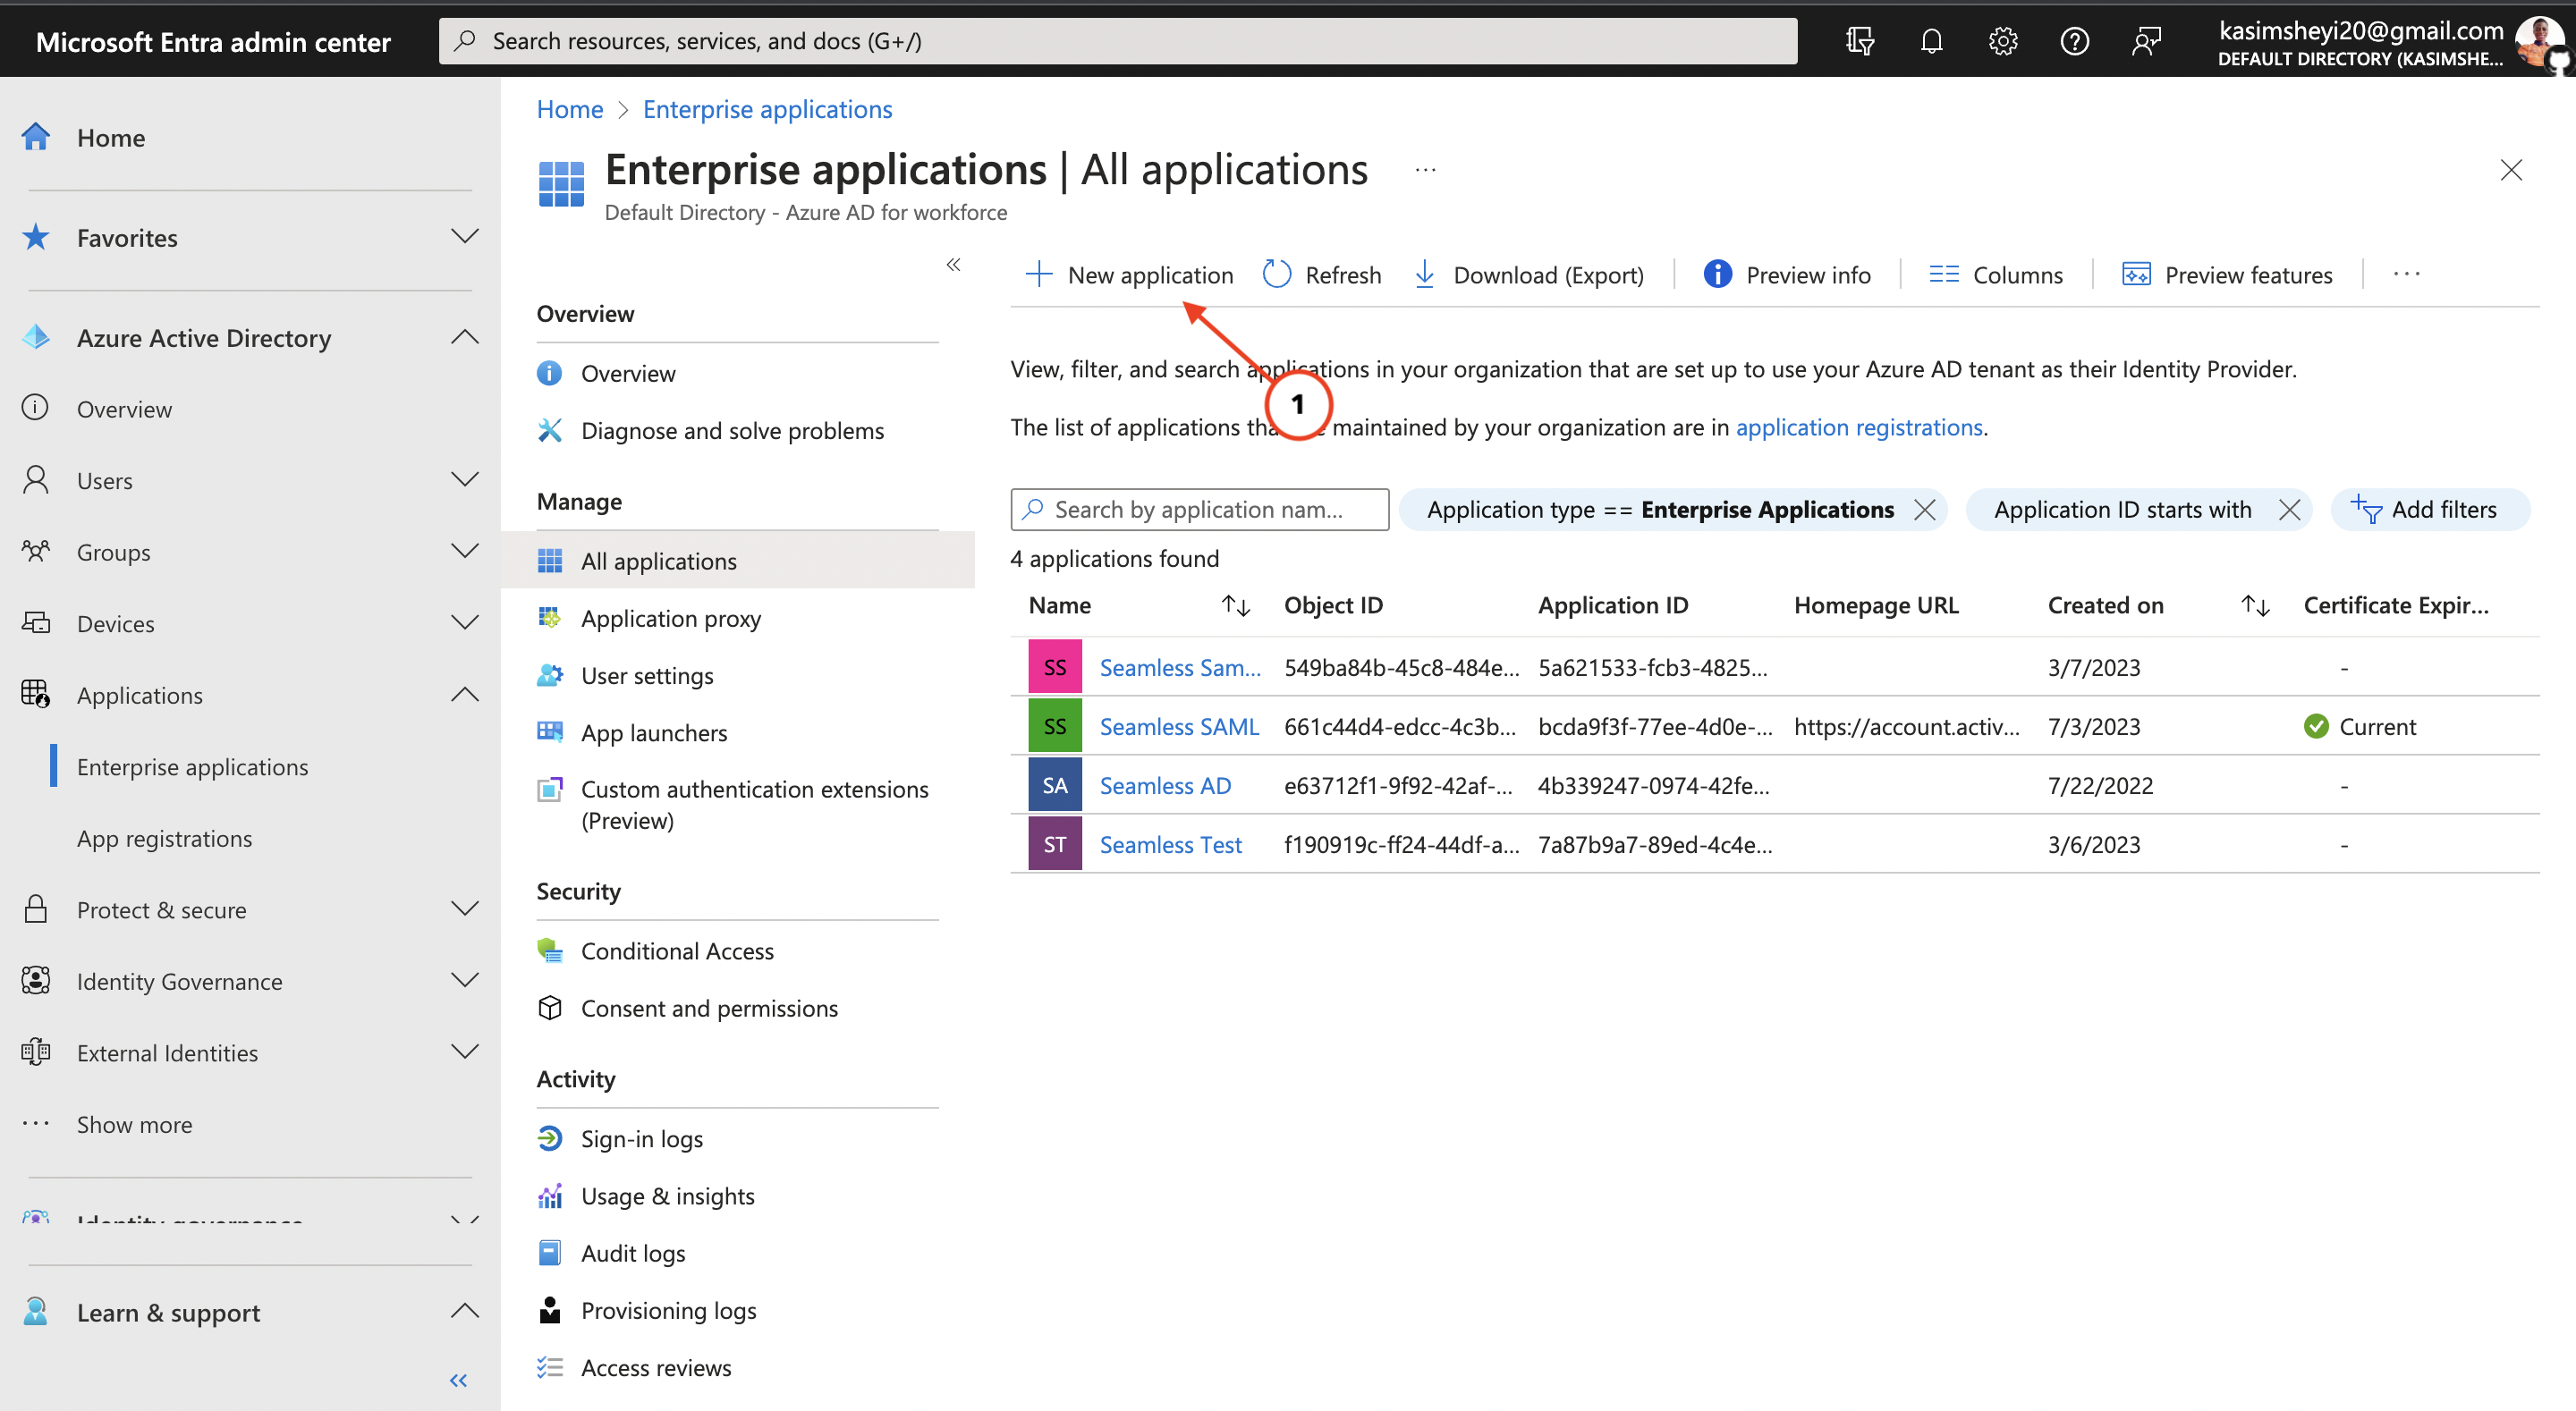
On the next screen displayed, click the New Application button at the top of your screen as seen in the image below.
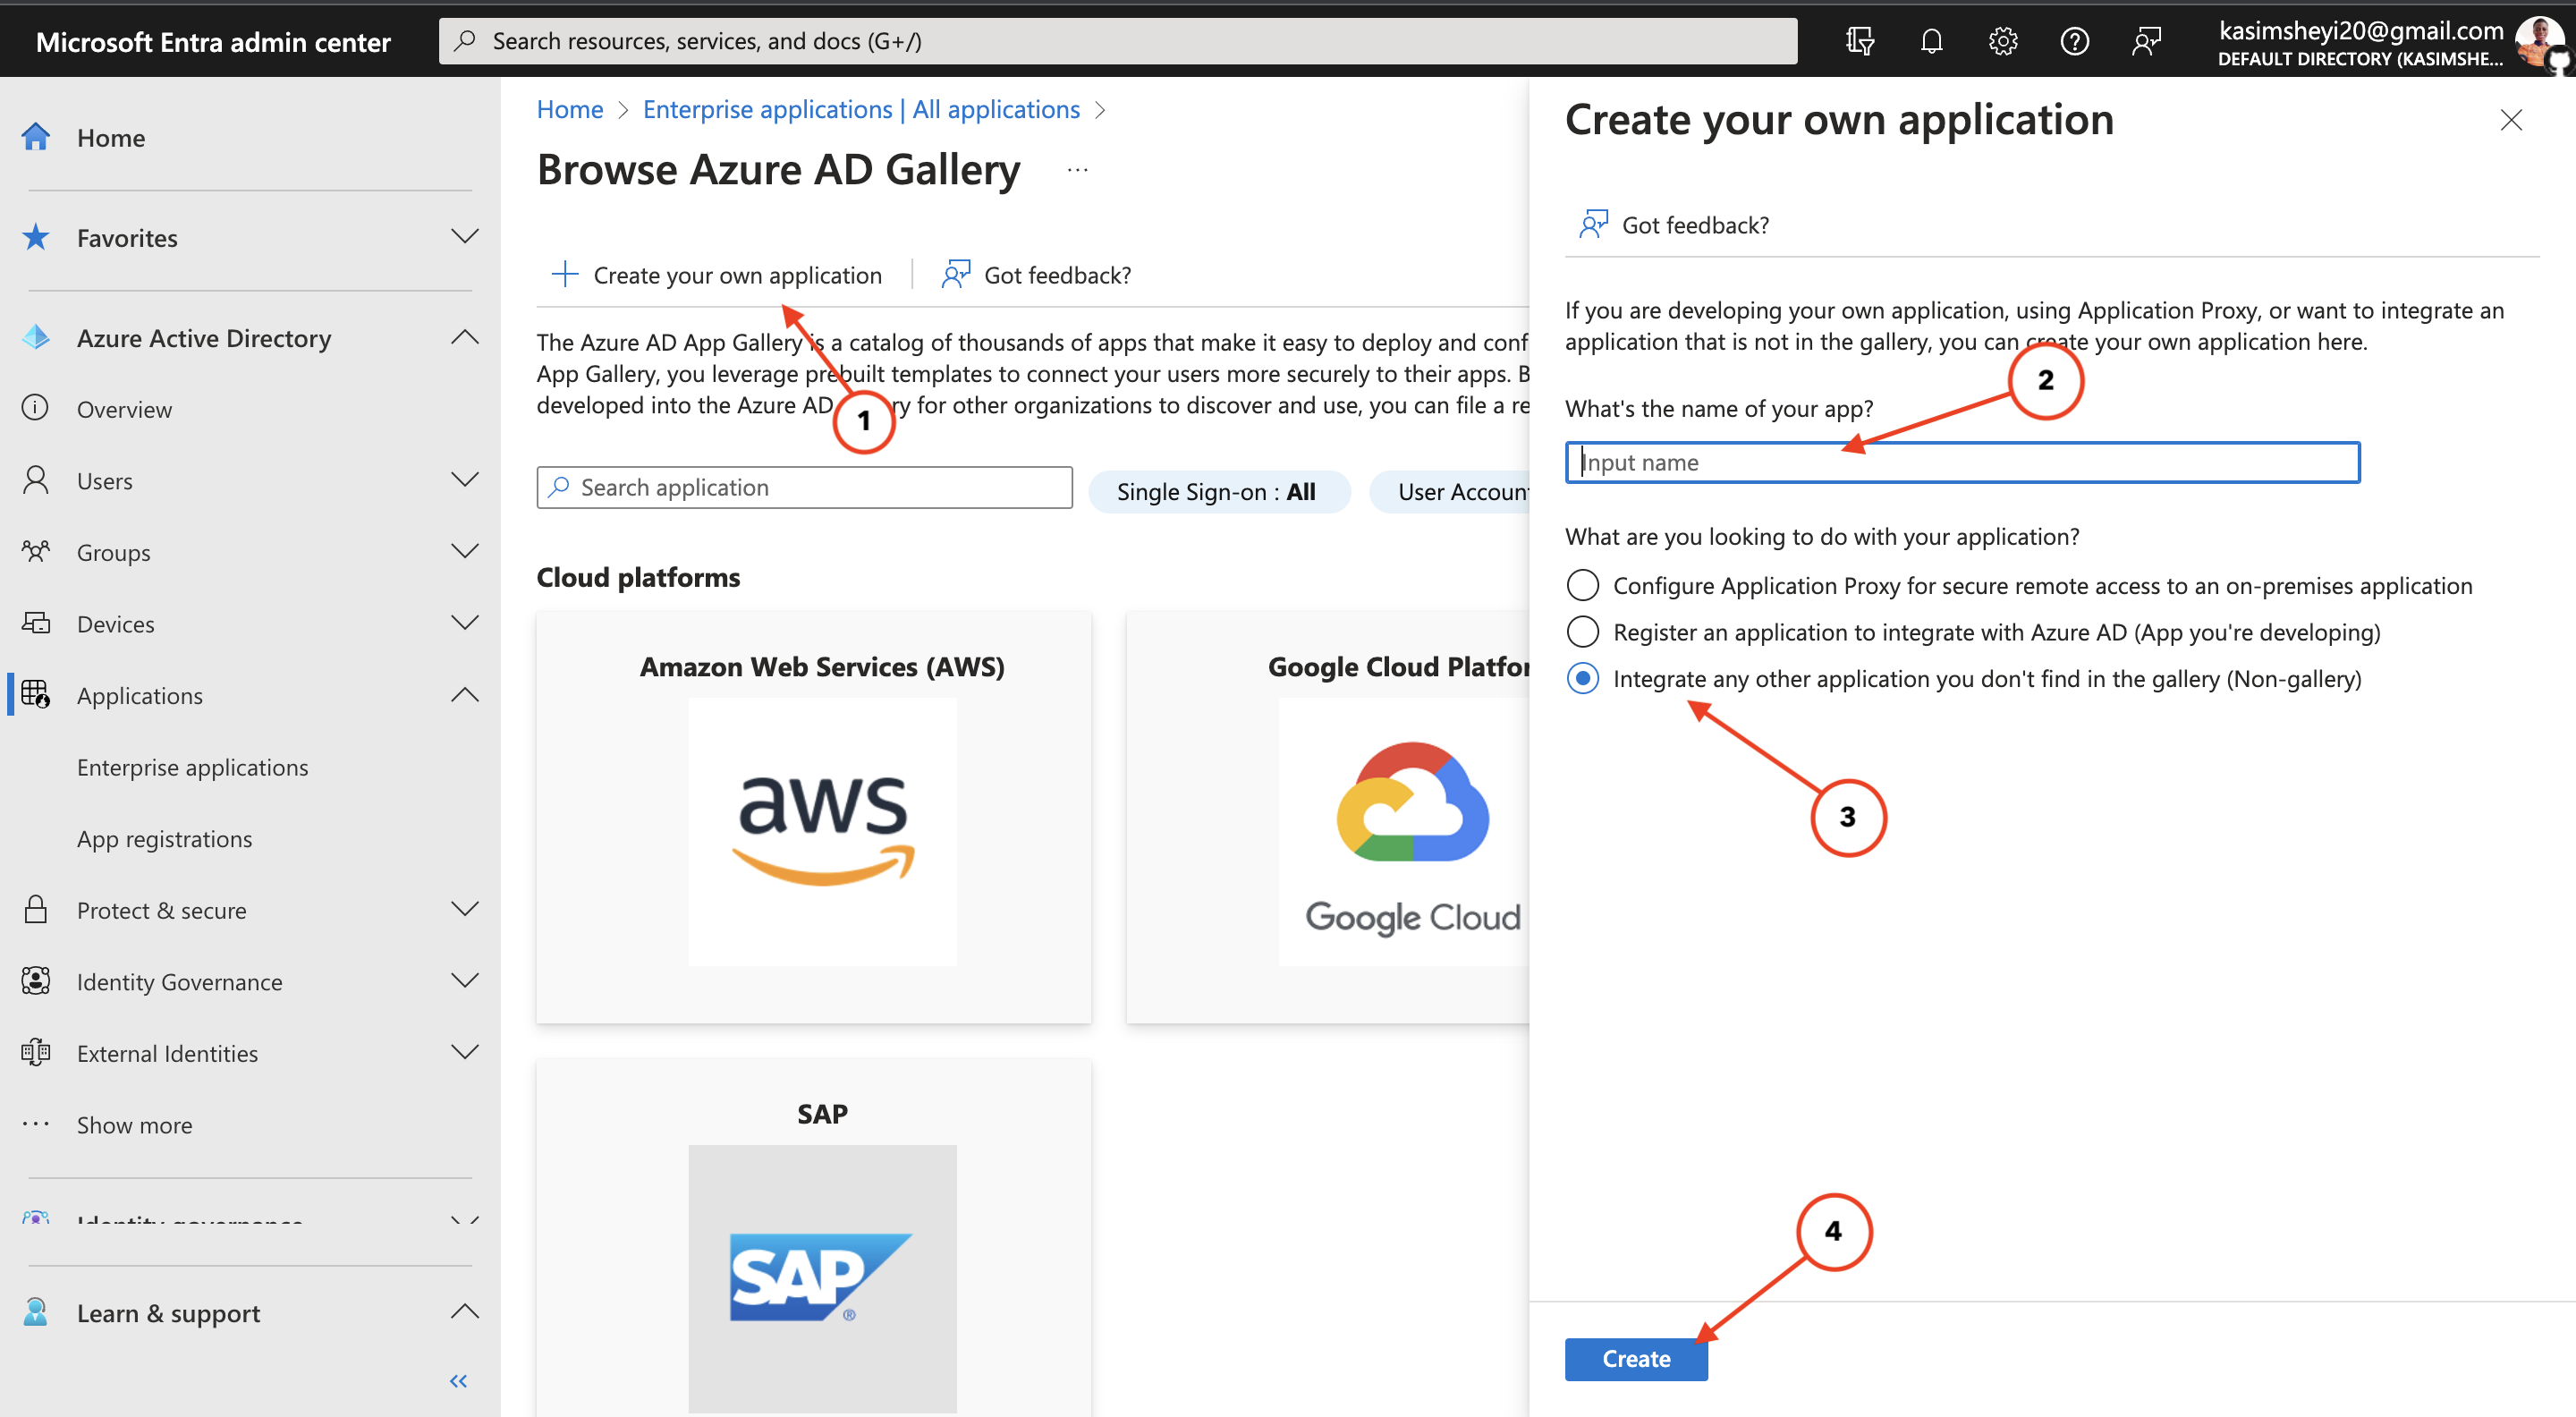
On the next screen, click the create your own application button at the top. You should have a modal displayed on the right side of your screen. Type in a name for the new application and select the third option then click the create button below the screen to register the application. You can find the steps in the image below.
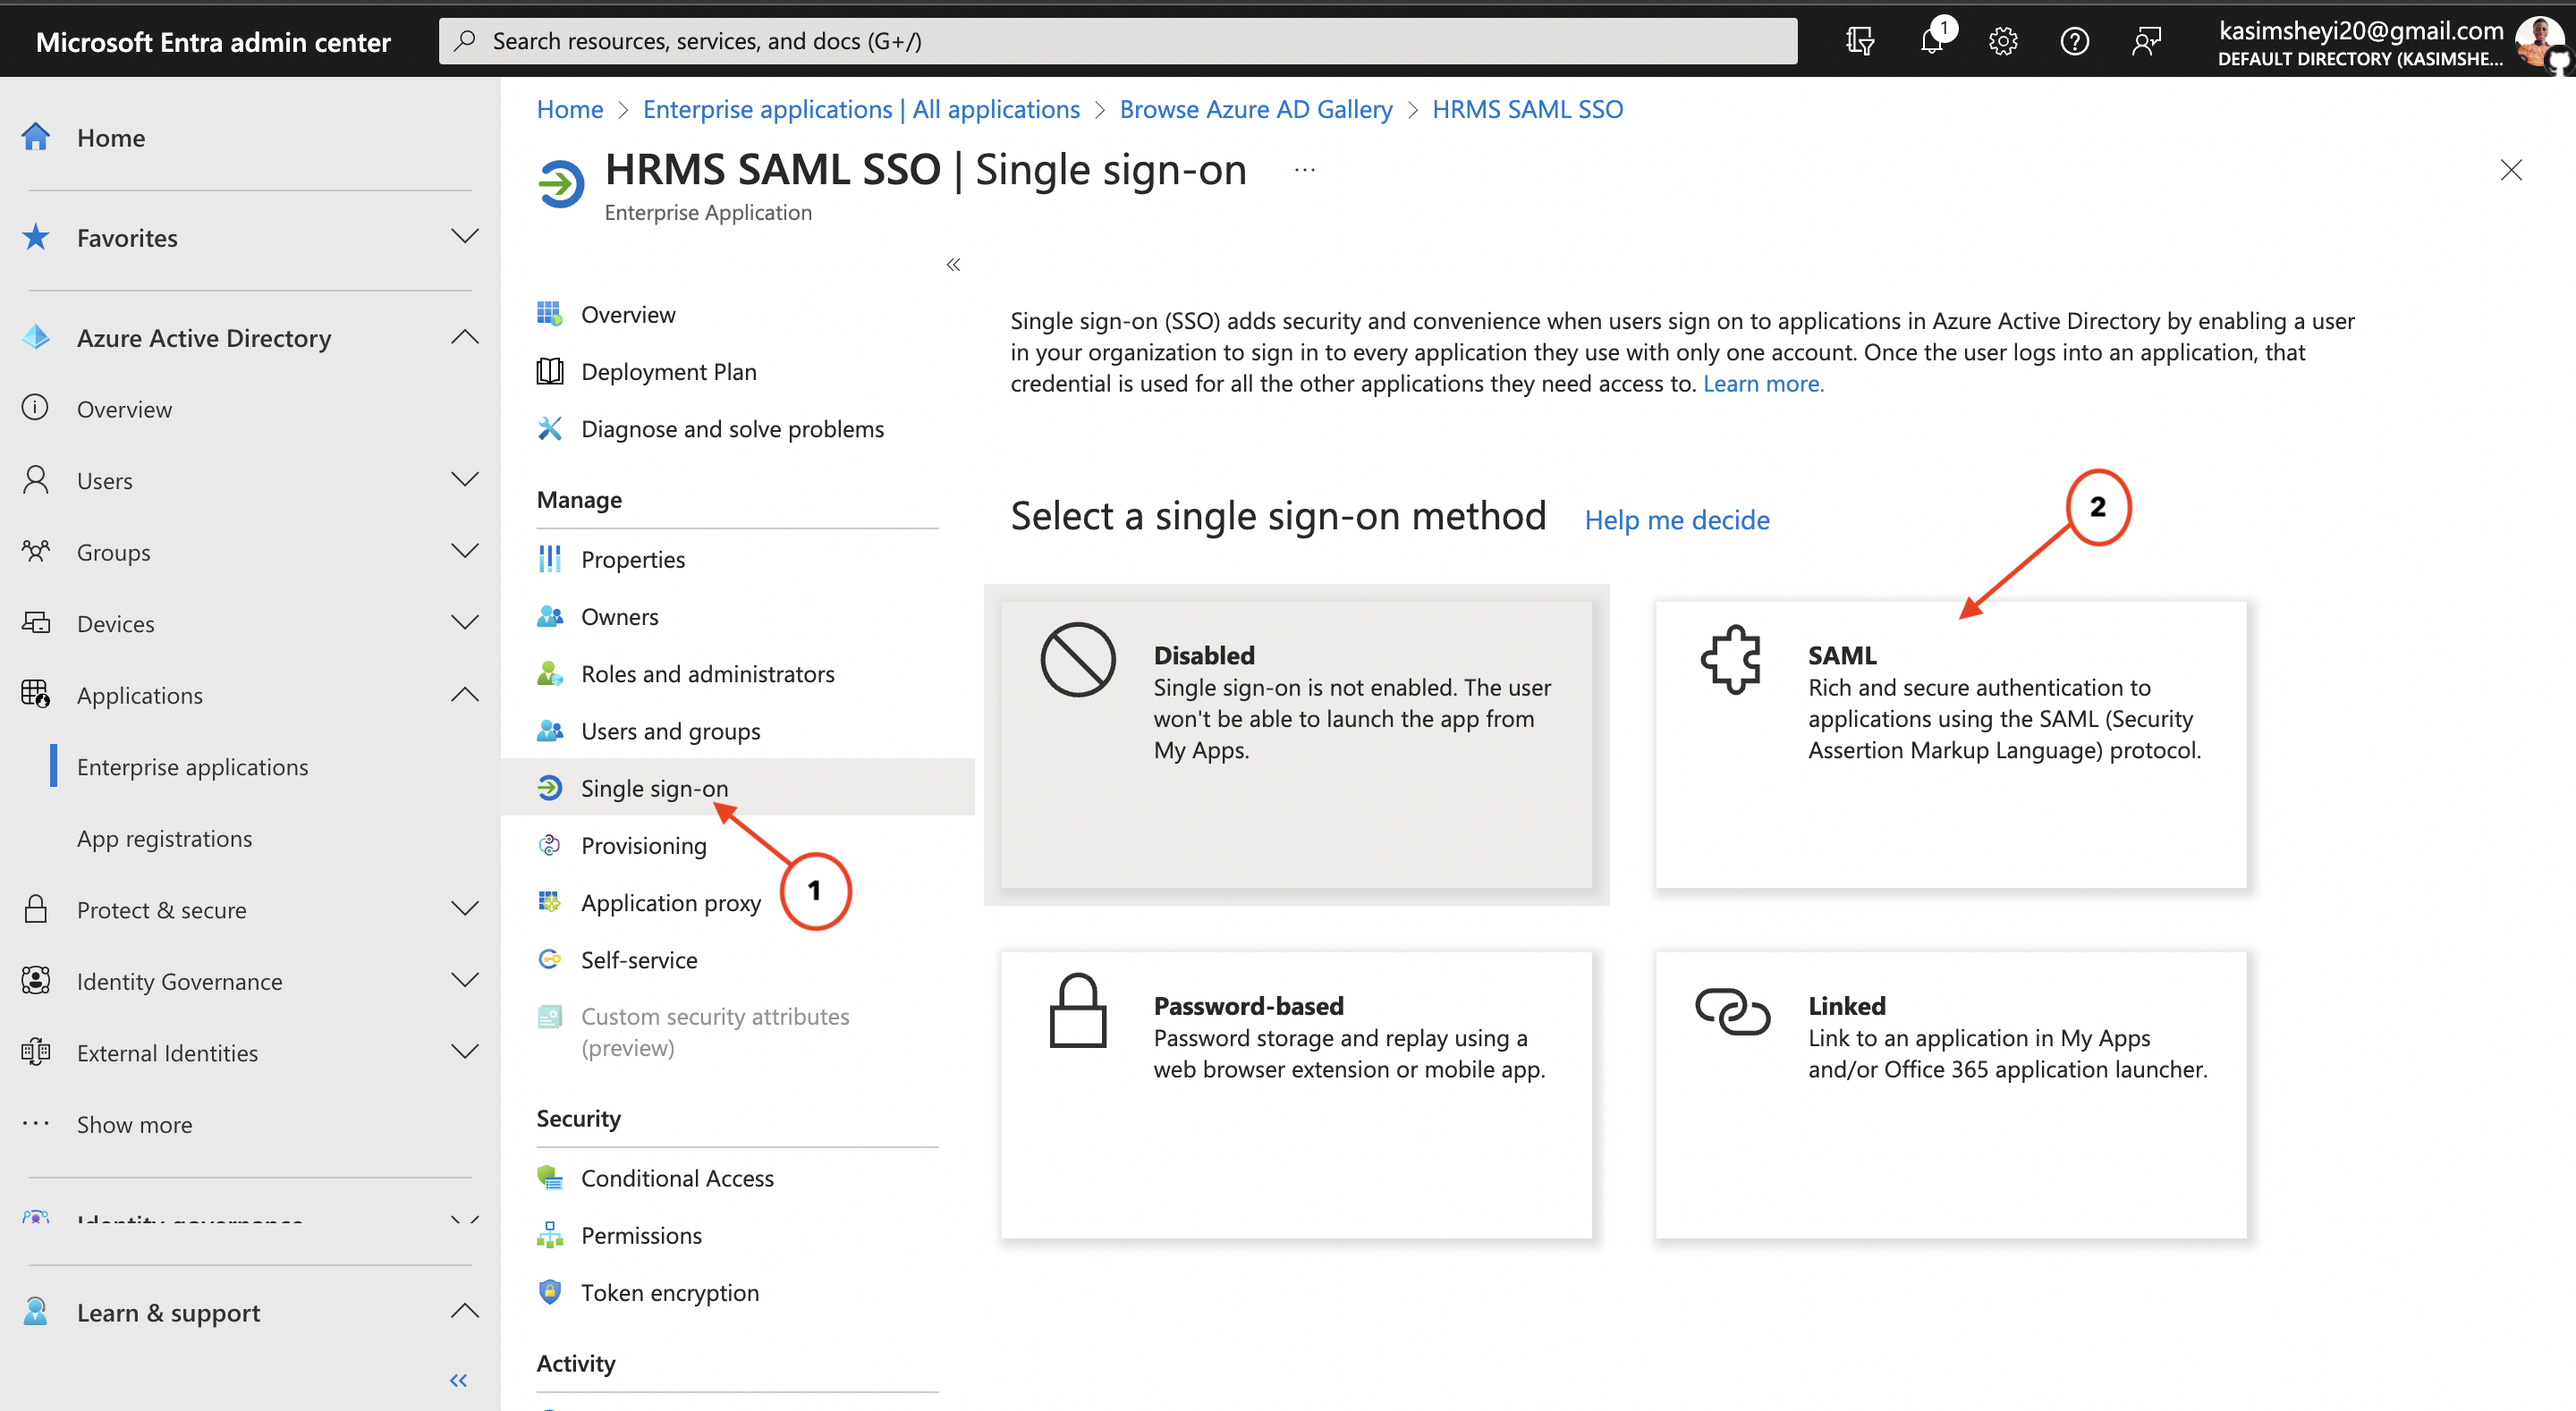
It will take some minutes for the application to be ready before you can continue. The next thing to do is to select the Single sign-on option and then click SAML as seen in the image below.
You should have a screen with (5) segments as seen in the image below. We will then continue by editing segment (1) - Basic SAML Configuration.
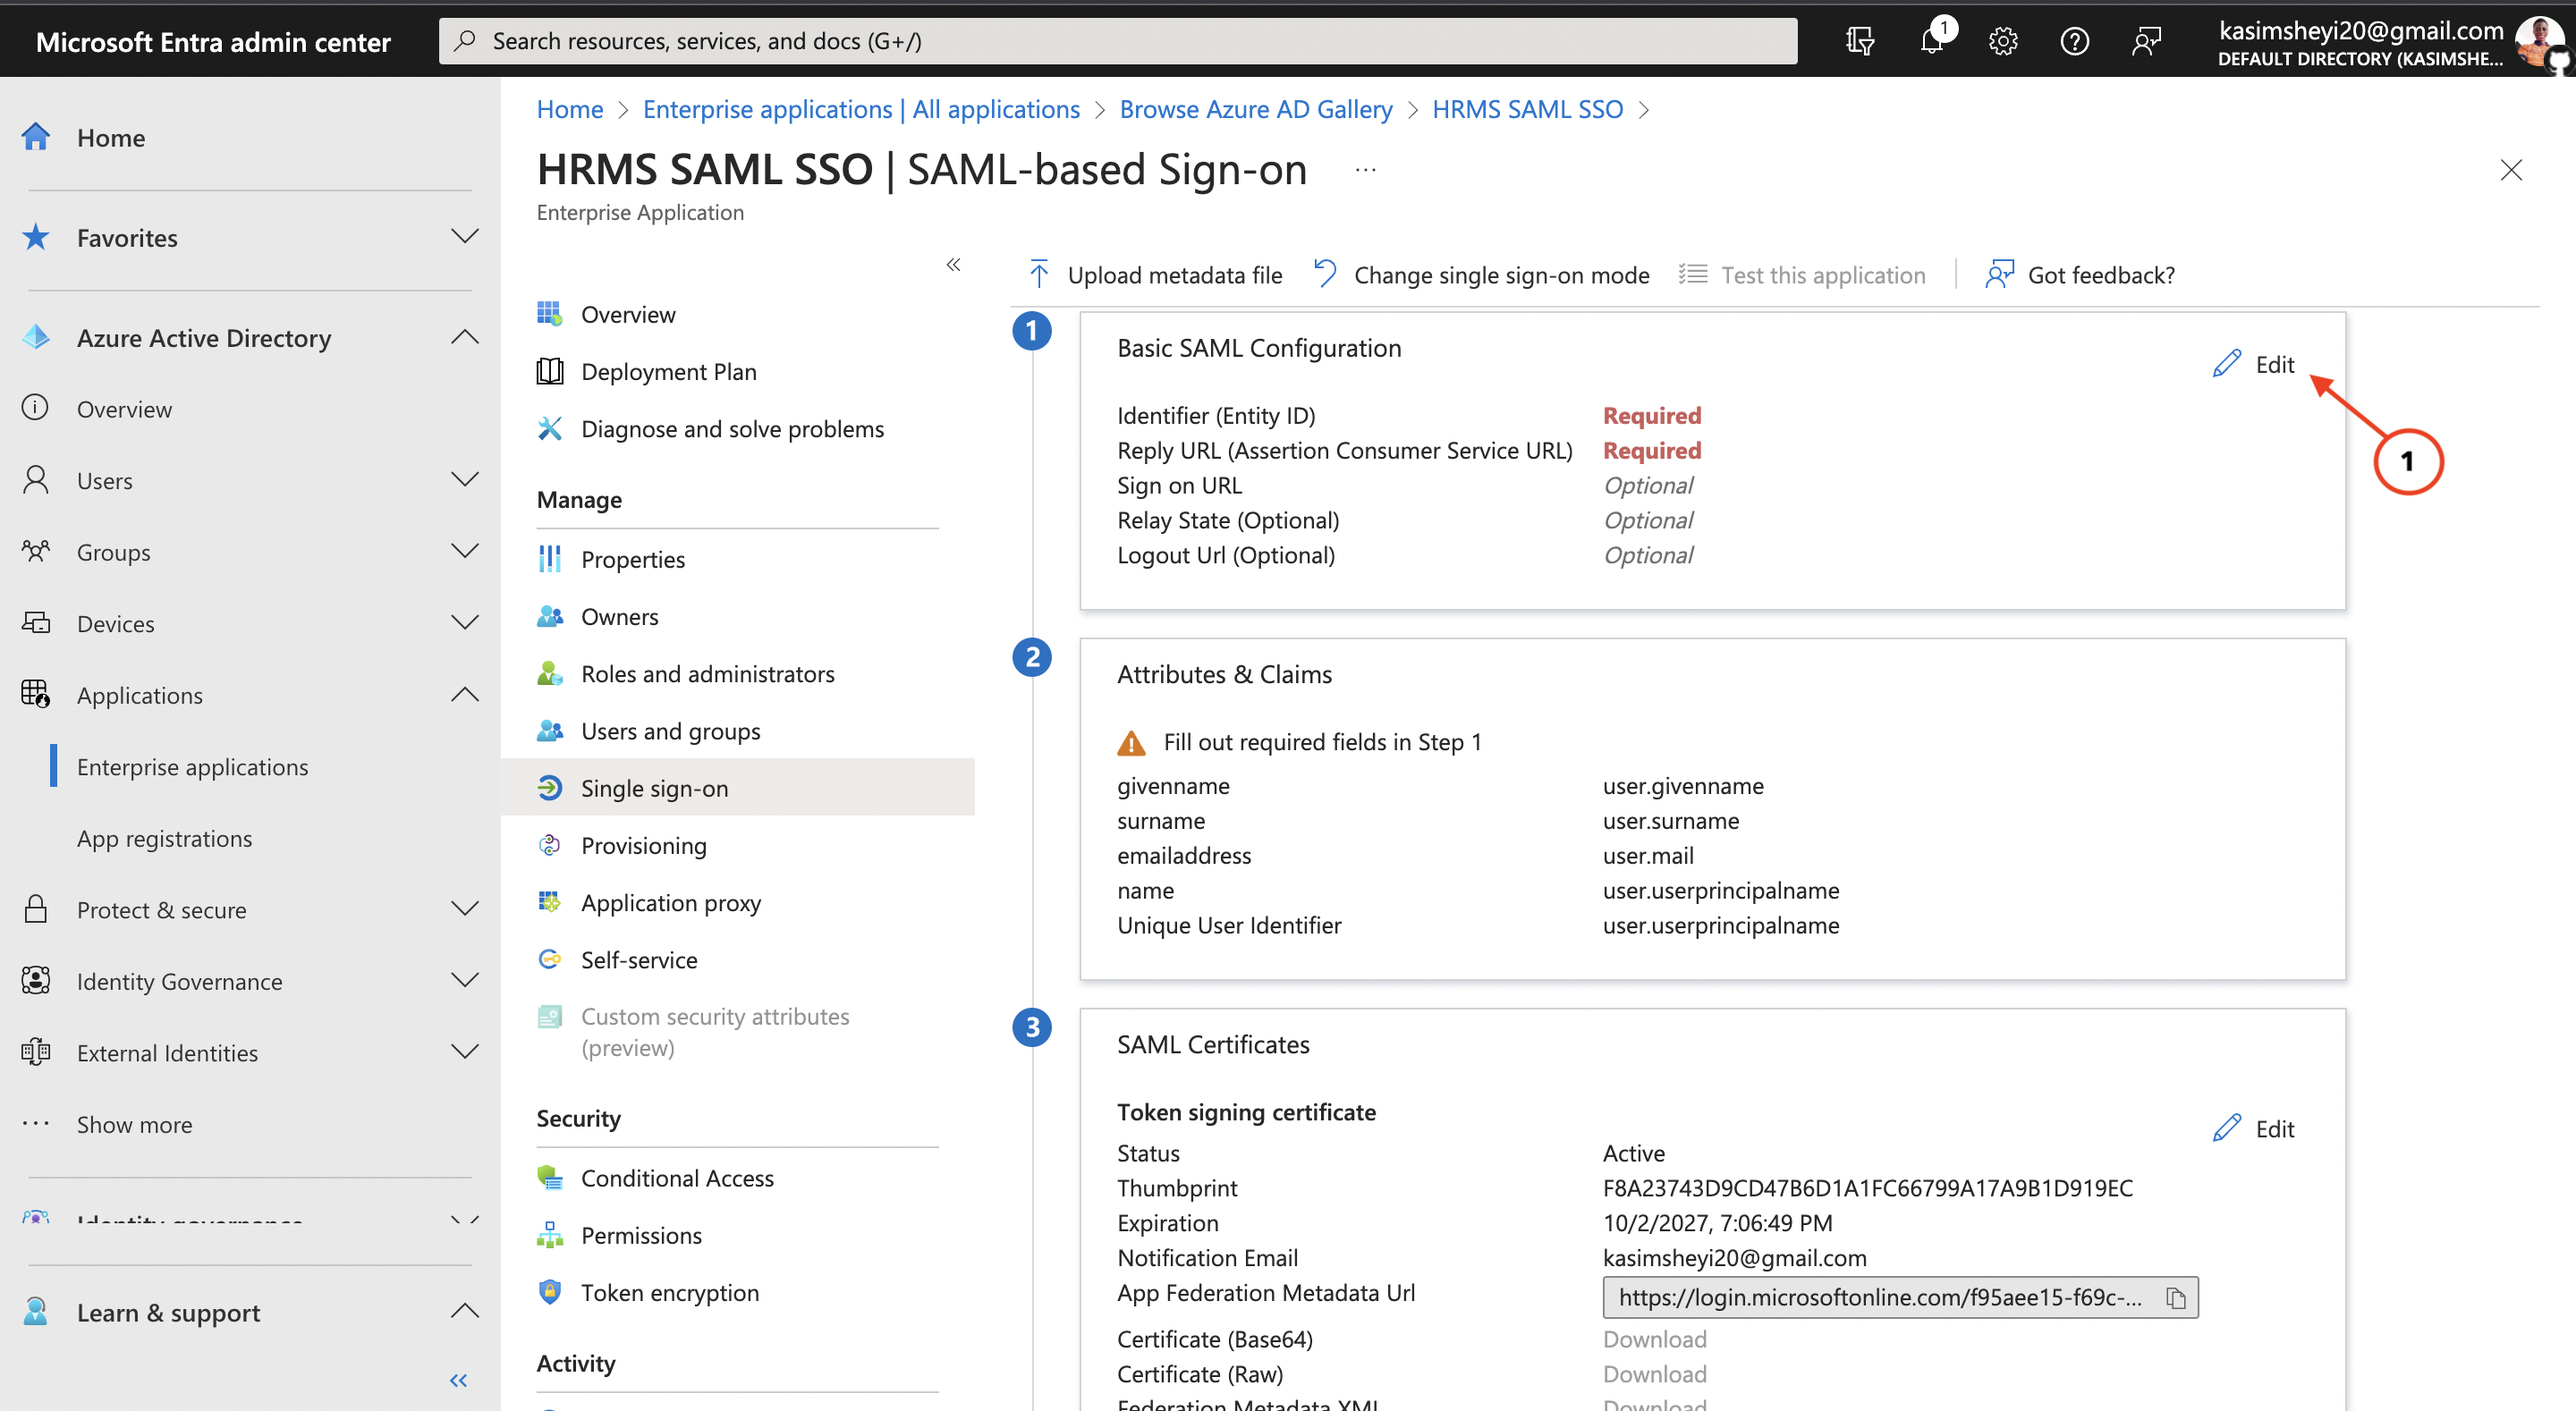
Before then, scroll down to Segment (4) - Set Up HRMS SAML SSO and copy the value for Azure AD Identifier as seen in the image below then scroll back to segment (1) - Basic SAML Configuration to start editing.

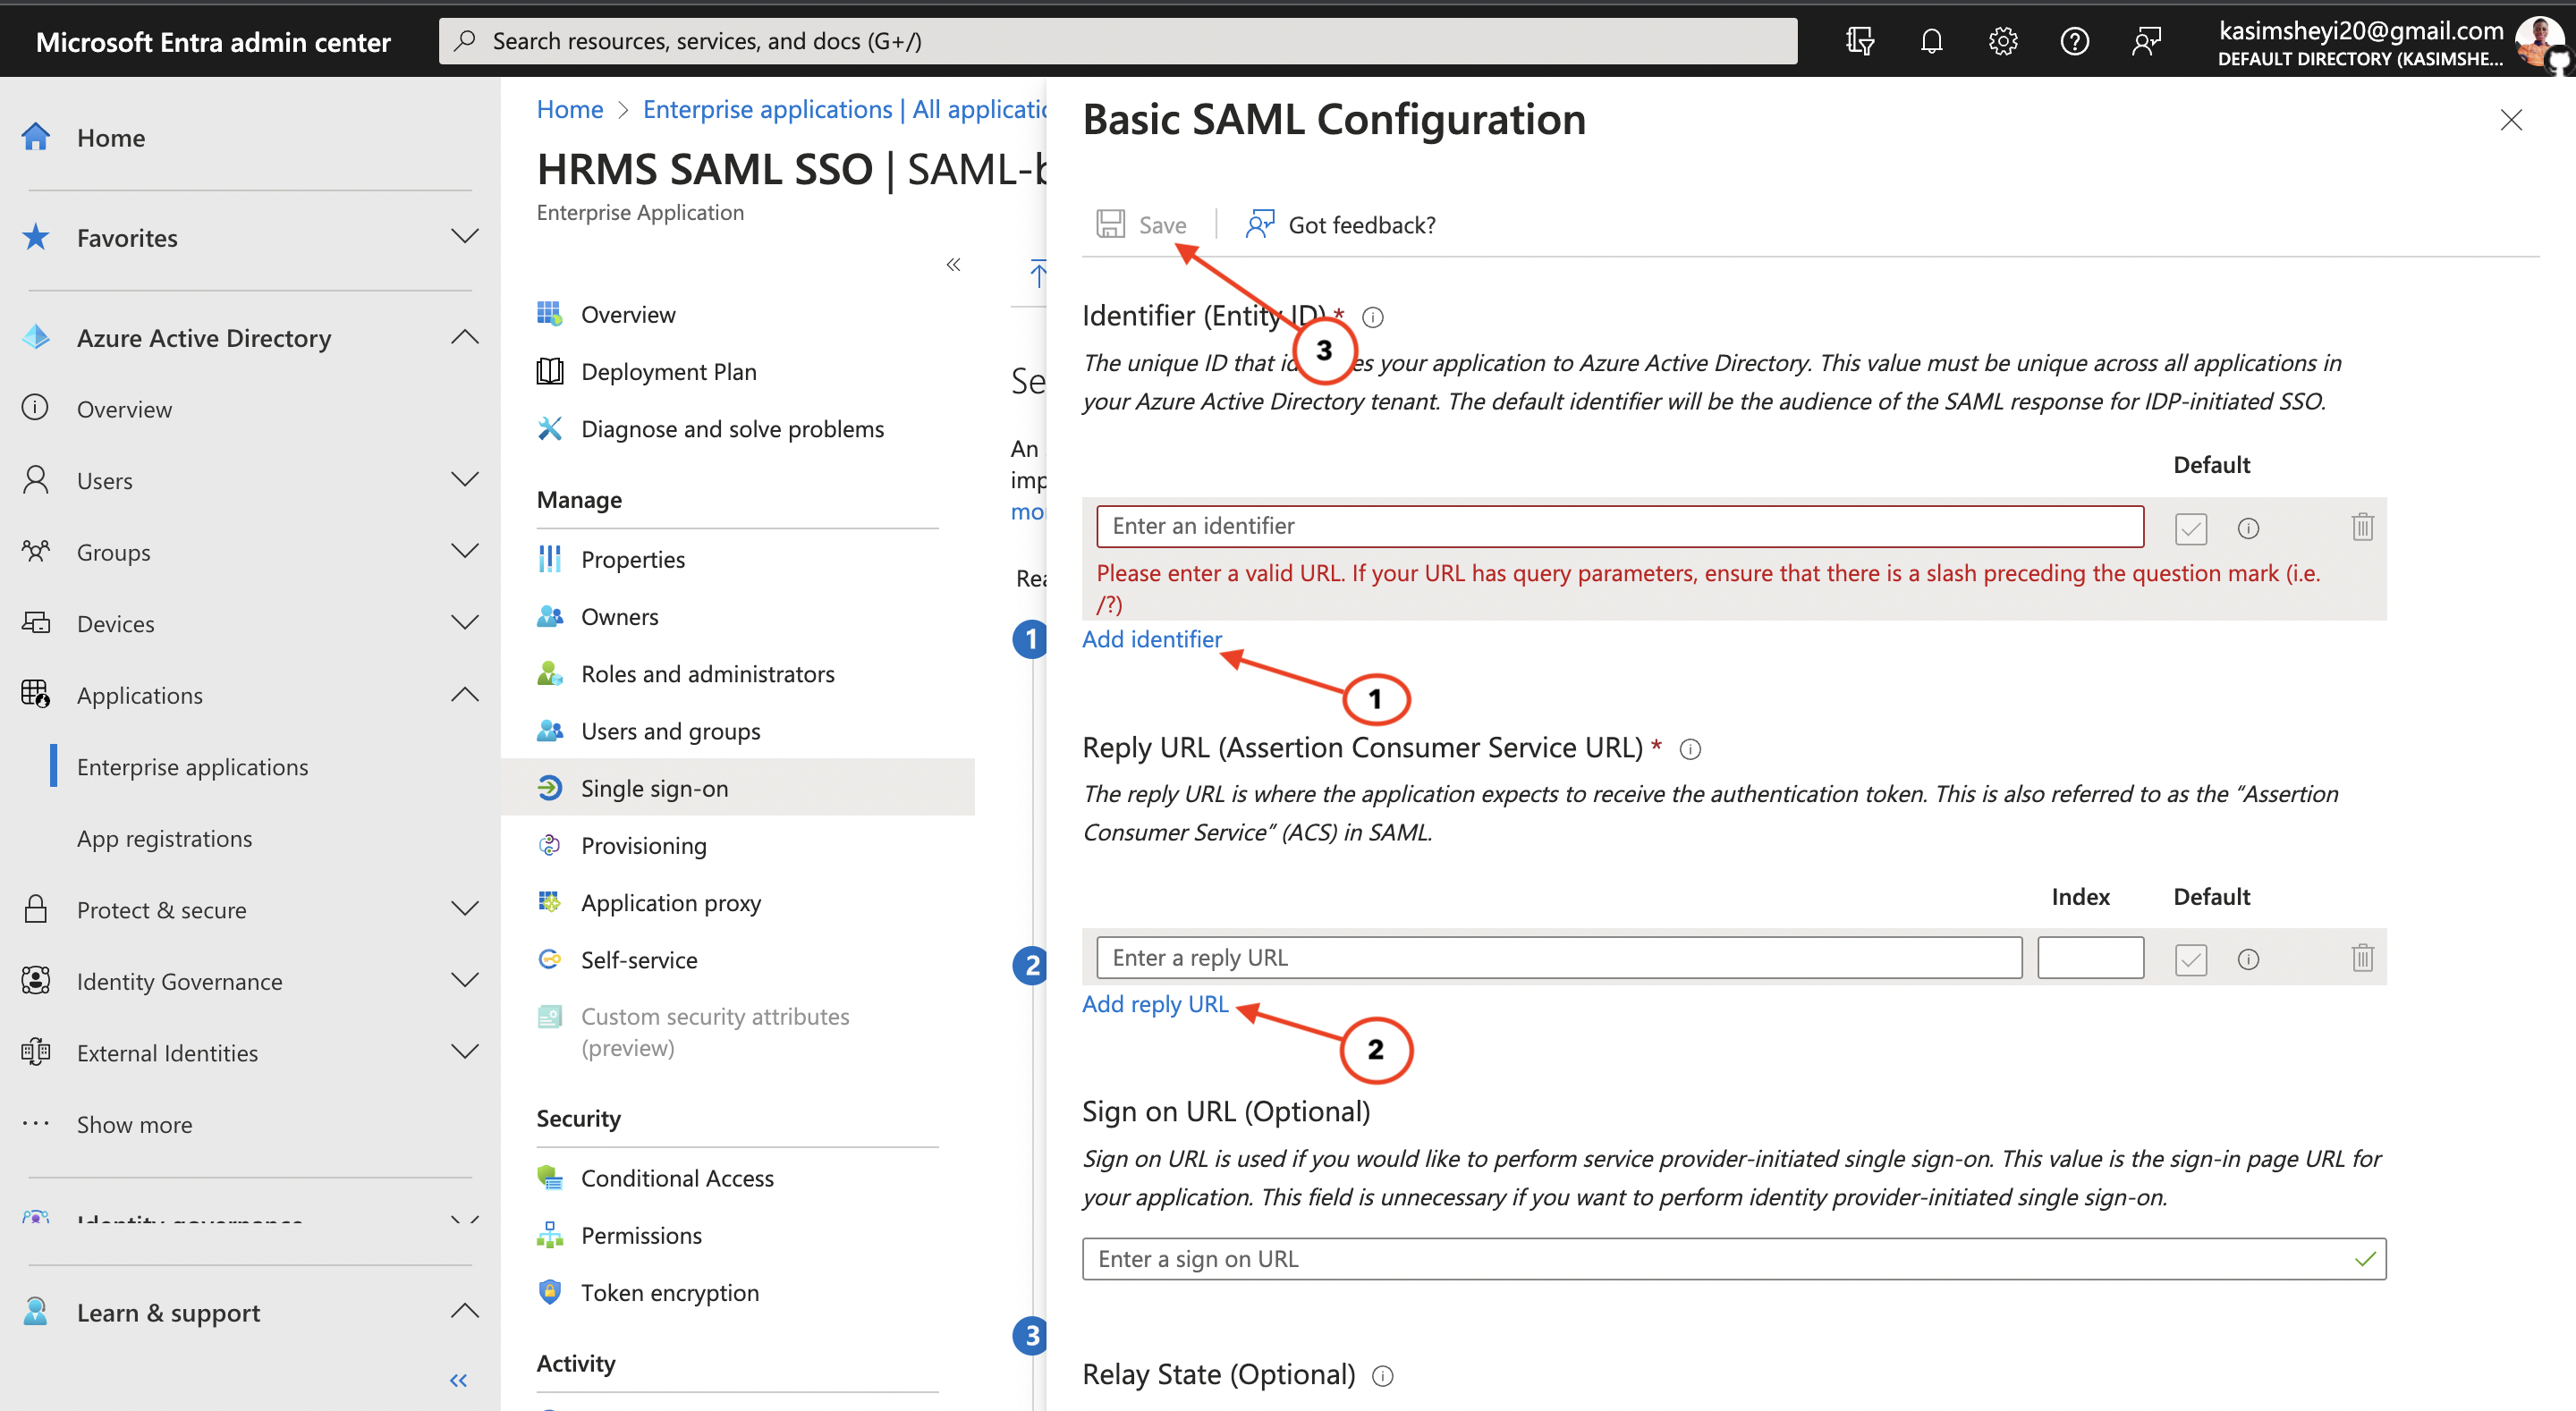
On the next screen displayed, click the Add identifier button and paste the value of the Azure AD identifier you copied from the previous step. The next thing is to add the Reply URL which will be in this format: https://your-seamlesshrms-domain/saml2/callback then click on the Save button as seen in the screenshot below.
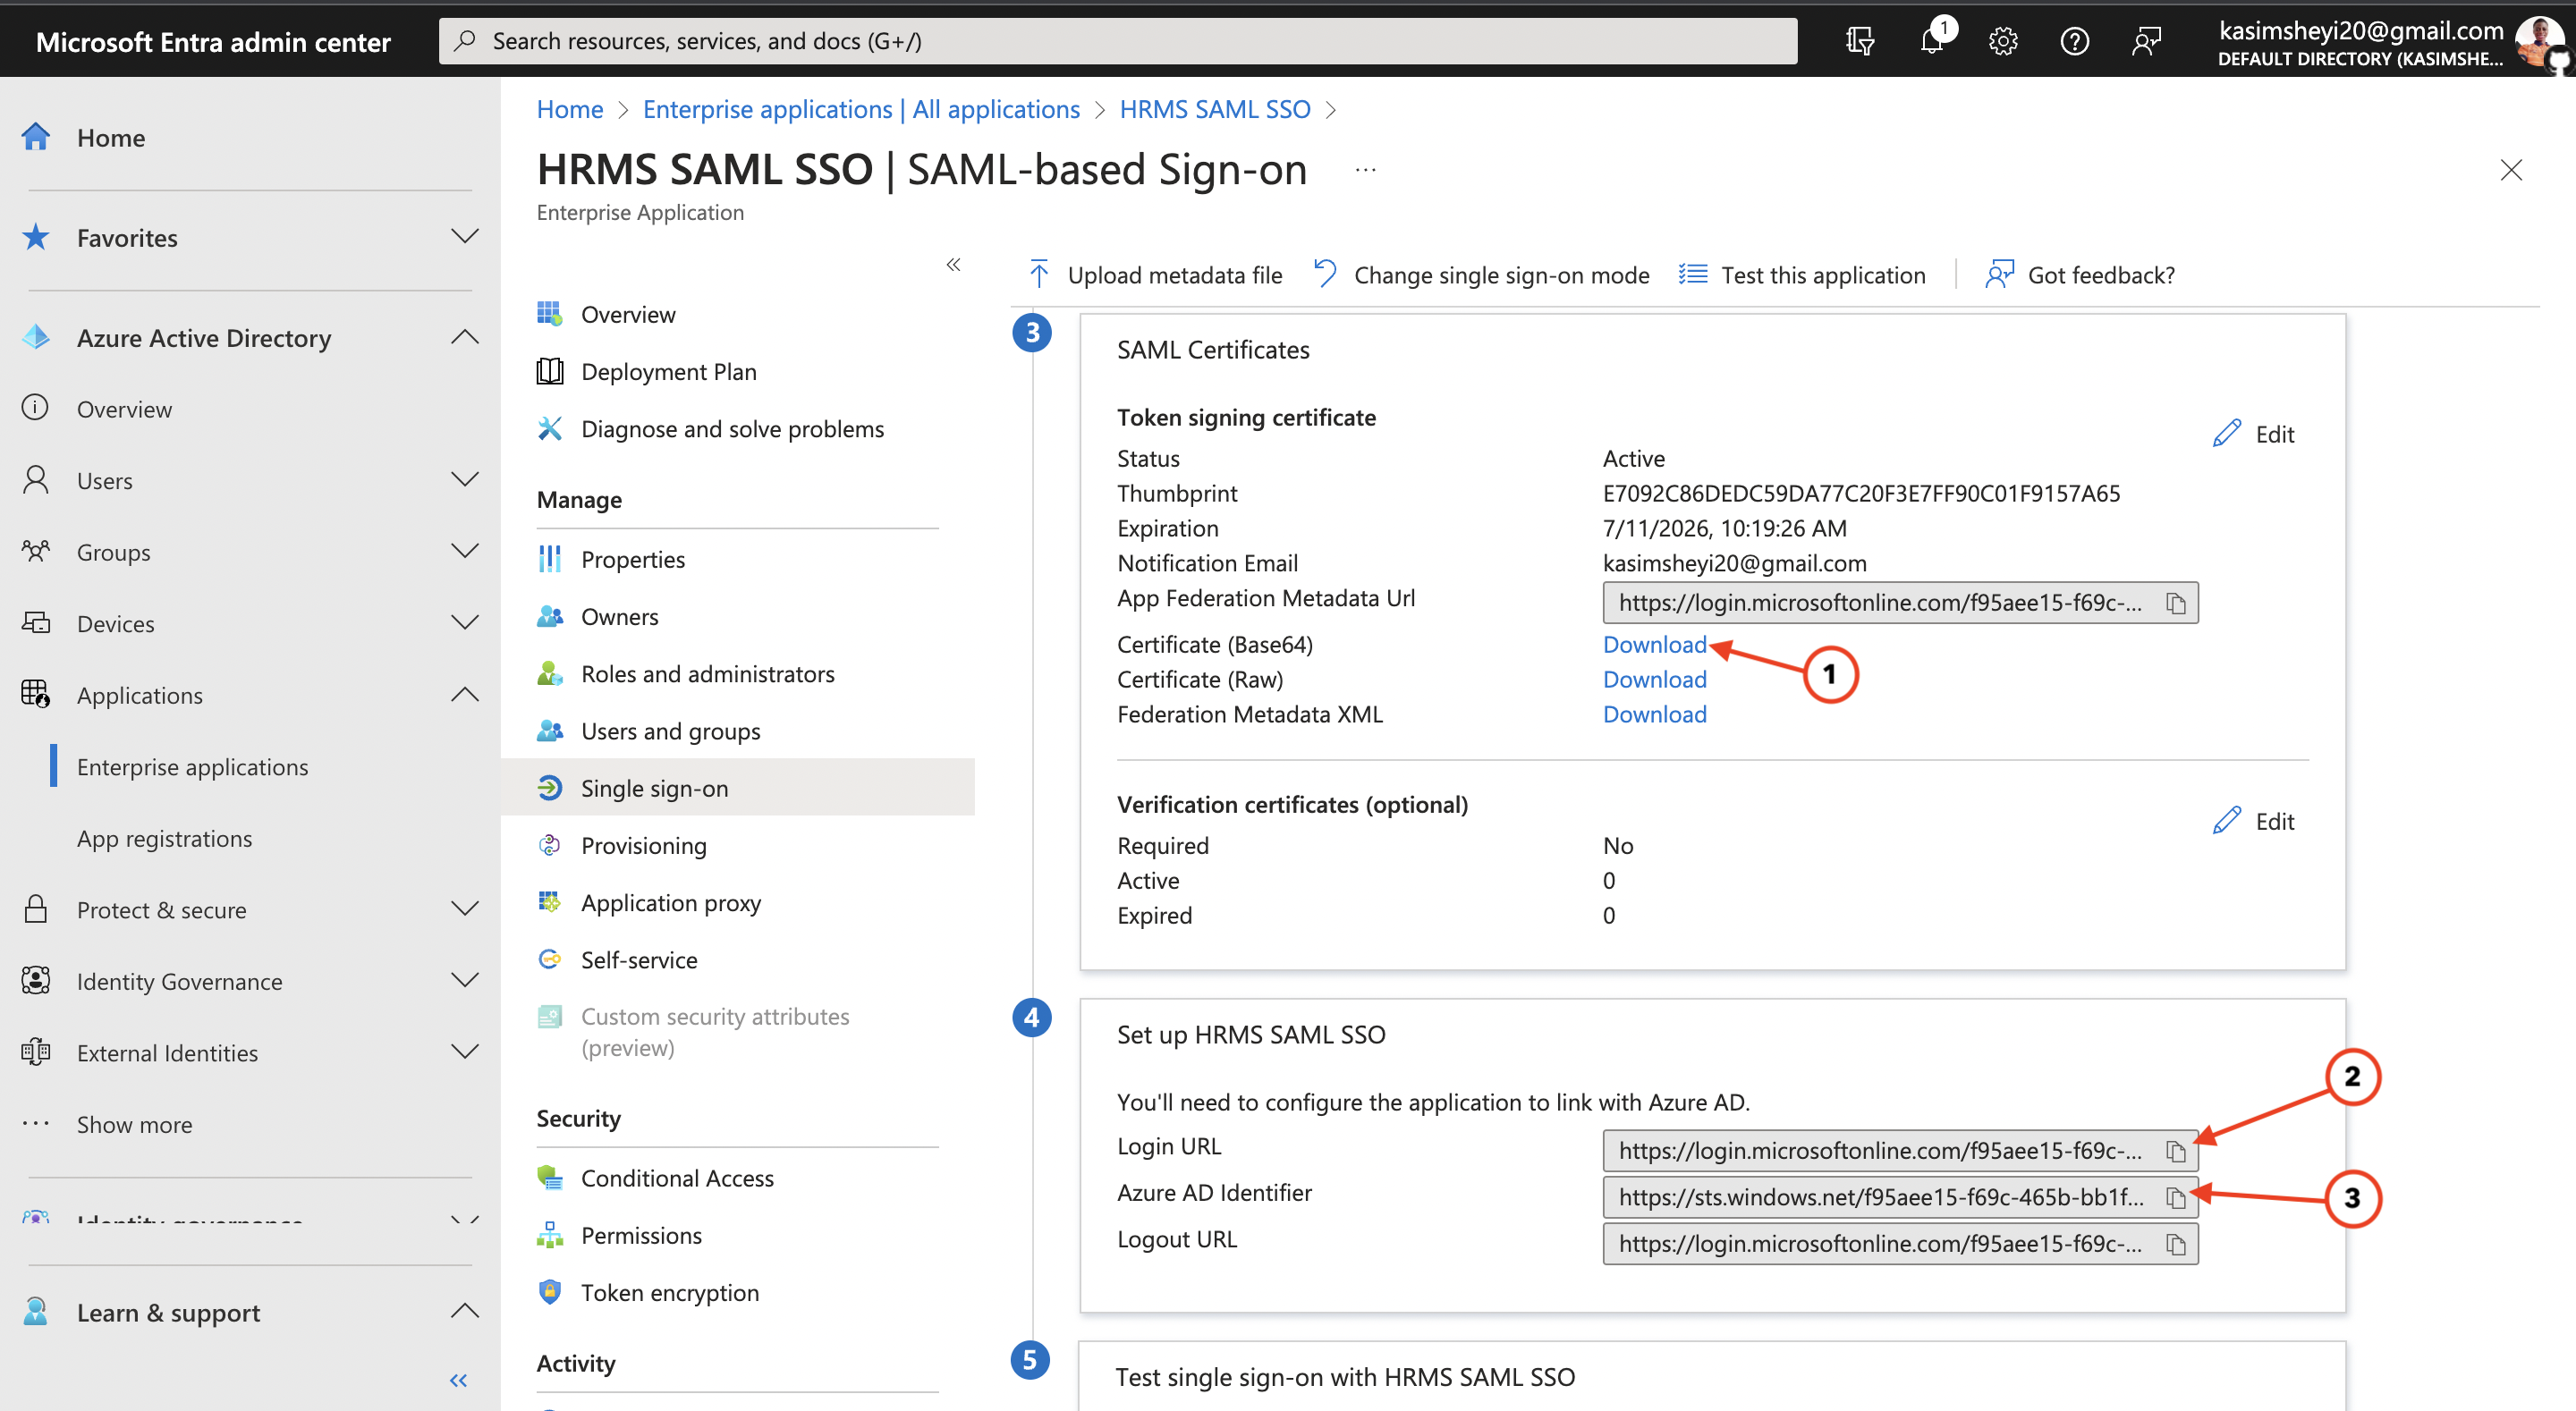
After saving the configuration, close the modal displayed and scroll down to Segment (3) - SAML Certificates and download the Base64 version of the certificate generated and copy both the Login URLand Azure AD Identifier as seen below.
The last step is to add users/staff to the newly created application so that they will be able to login into their SeamlessHRMS portal. You can do that by clicking on Users and groups and continuing to the next screen shown to you.