Azure AD Data Synchronization enables smooth integration of your company's employee data between SeamlessHR and Azure AD. This synchronization guarantees that employee information stays current across both platforms, boosting effectiveness and precision in data management.
What Data Syncs?
| SeamlessHR Field | Sync Direction | Azure AD Field | Field Logic or Notes |
|---|---|---|---|
| Employee Code | ===> | Employee ID | |
| Status | ===> | Account Enabled | |
| First Name | ===> | Given Name | |
| Last Name | ===> | Surname | |
| ===> | Display Name | This is derived by combining the LastName & FirstName. | |
| ===> | |||
| Mail NickName | Mail Nickname is derived by taking everything before the @ sign in the employee's email address. | ||
| Phone | ===> | Mobile Phone | |
| Employment Date | ===> | Employee Hire Date | |
| Exit Date | ===> | Employee Leave Date | |
| Job Role | ===> | Job Title | |
| Department | ===> | Department | |
| Company Name | ===> | Company Name | |
| Cost Center | ===> | Cost Center | On Azure, this is an element within the Employee Org Data field |
| Unit | ===> | Division | On Azure, this is an element within the Employee Org Data field |
| State of origin | ===> | State or province | |
| Residential Address | ===> | Street Address |
Getting Started
You will need the following credentials in other to configure the Azure AD Connector on the HRMS application.
- Tenant ID
- Application (Client) ID
- Client Secret Value
- Primary Domain
Registering an App on Azure AD
To register an app on the Azure platform, go to the link and sign in with your administrator account.
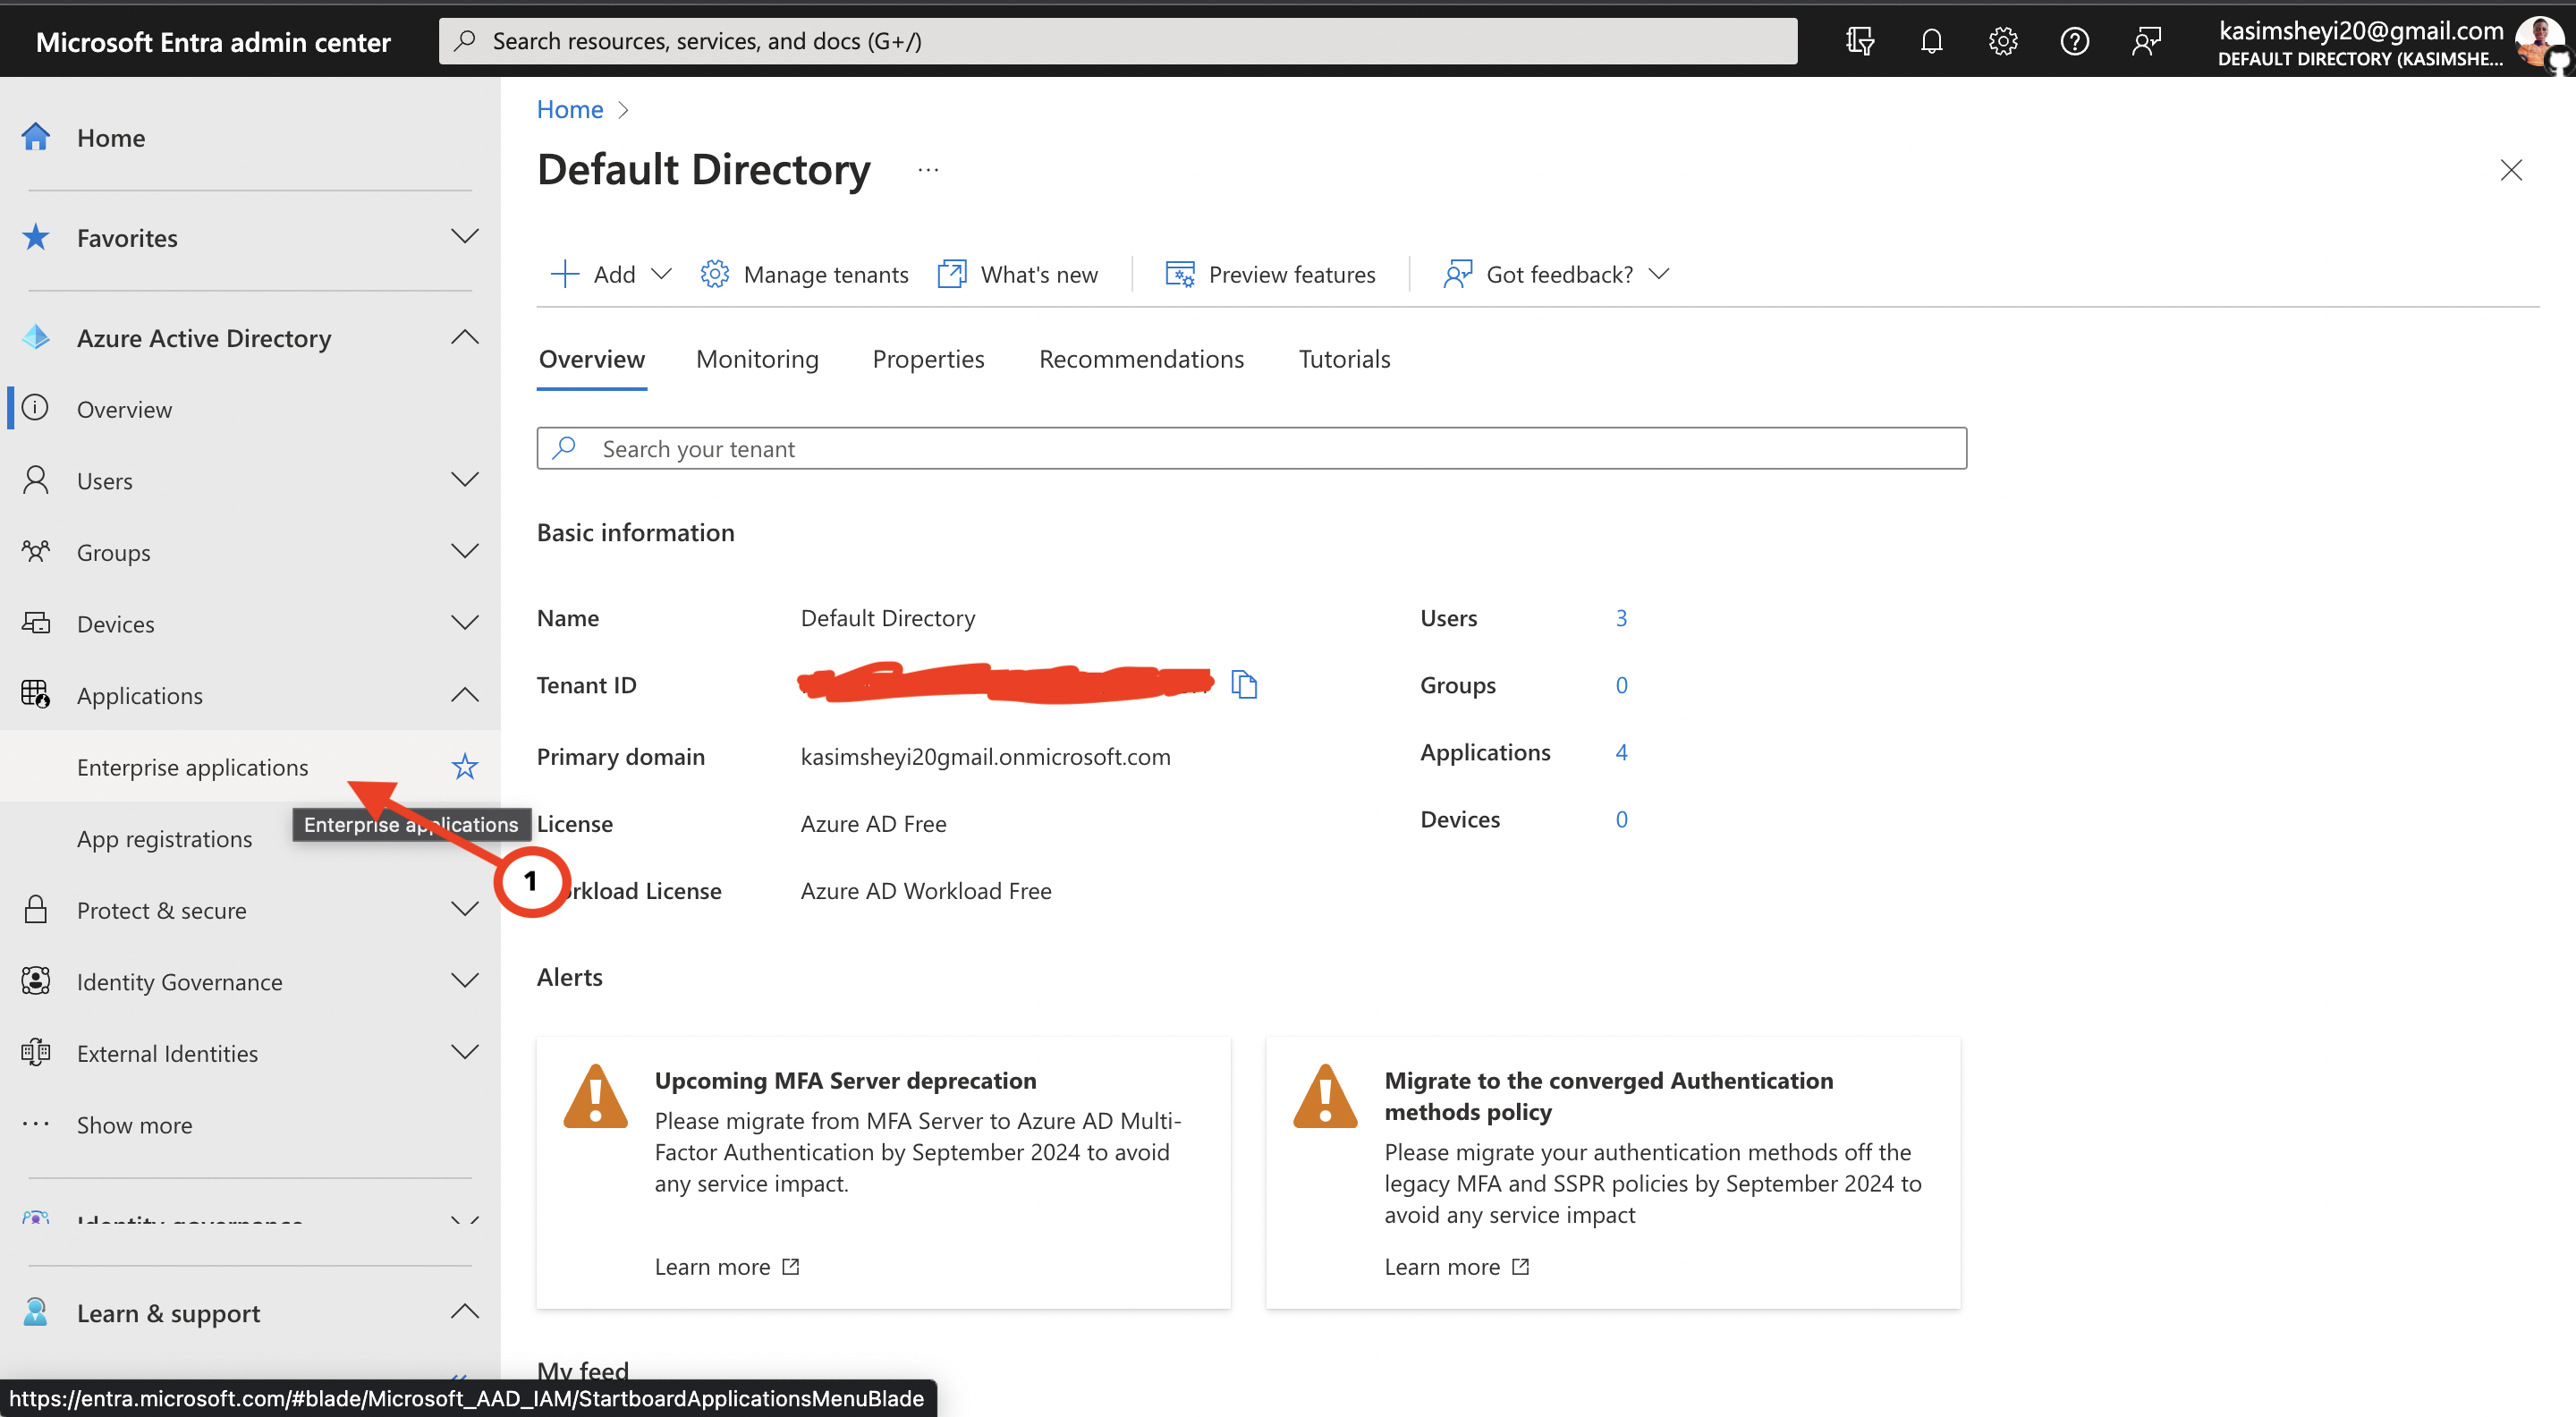
After successful sign-in, Select Azure Active Directory from the options on the sidebar then click on Applications then Enterprise applications.
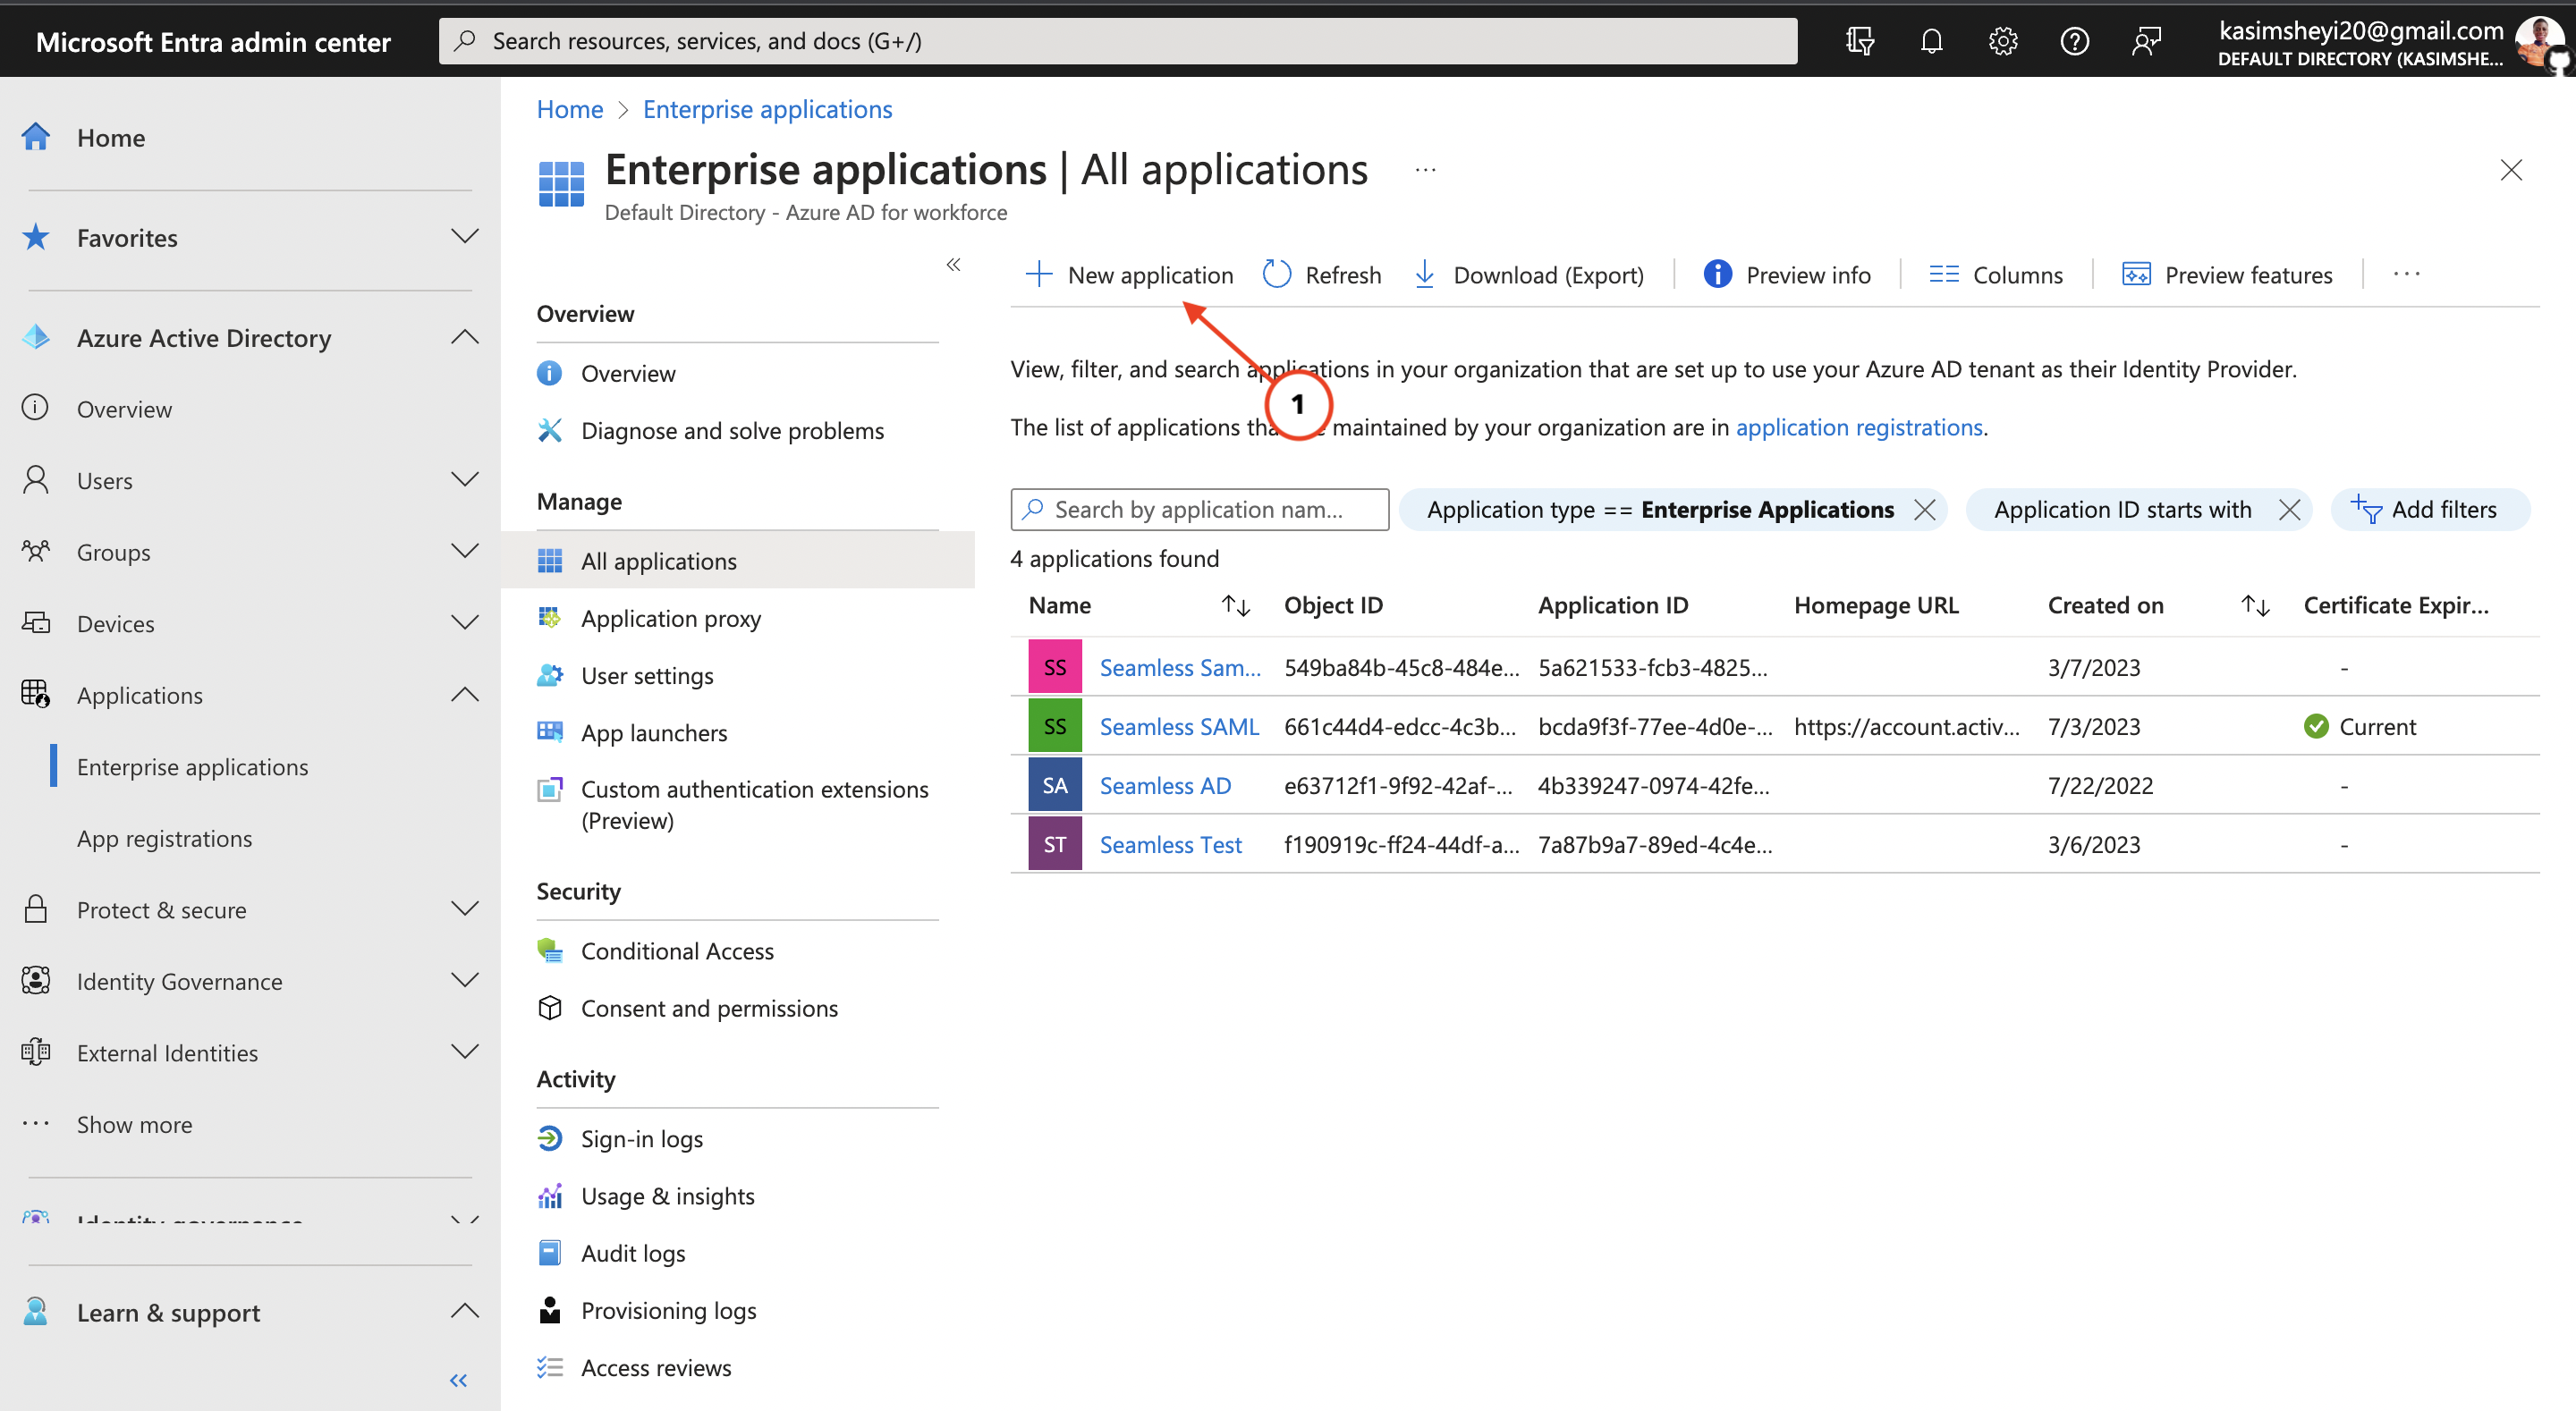
On the next screen displayed, click the New Application button at the top of your screen as seen in the image below.
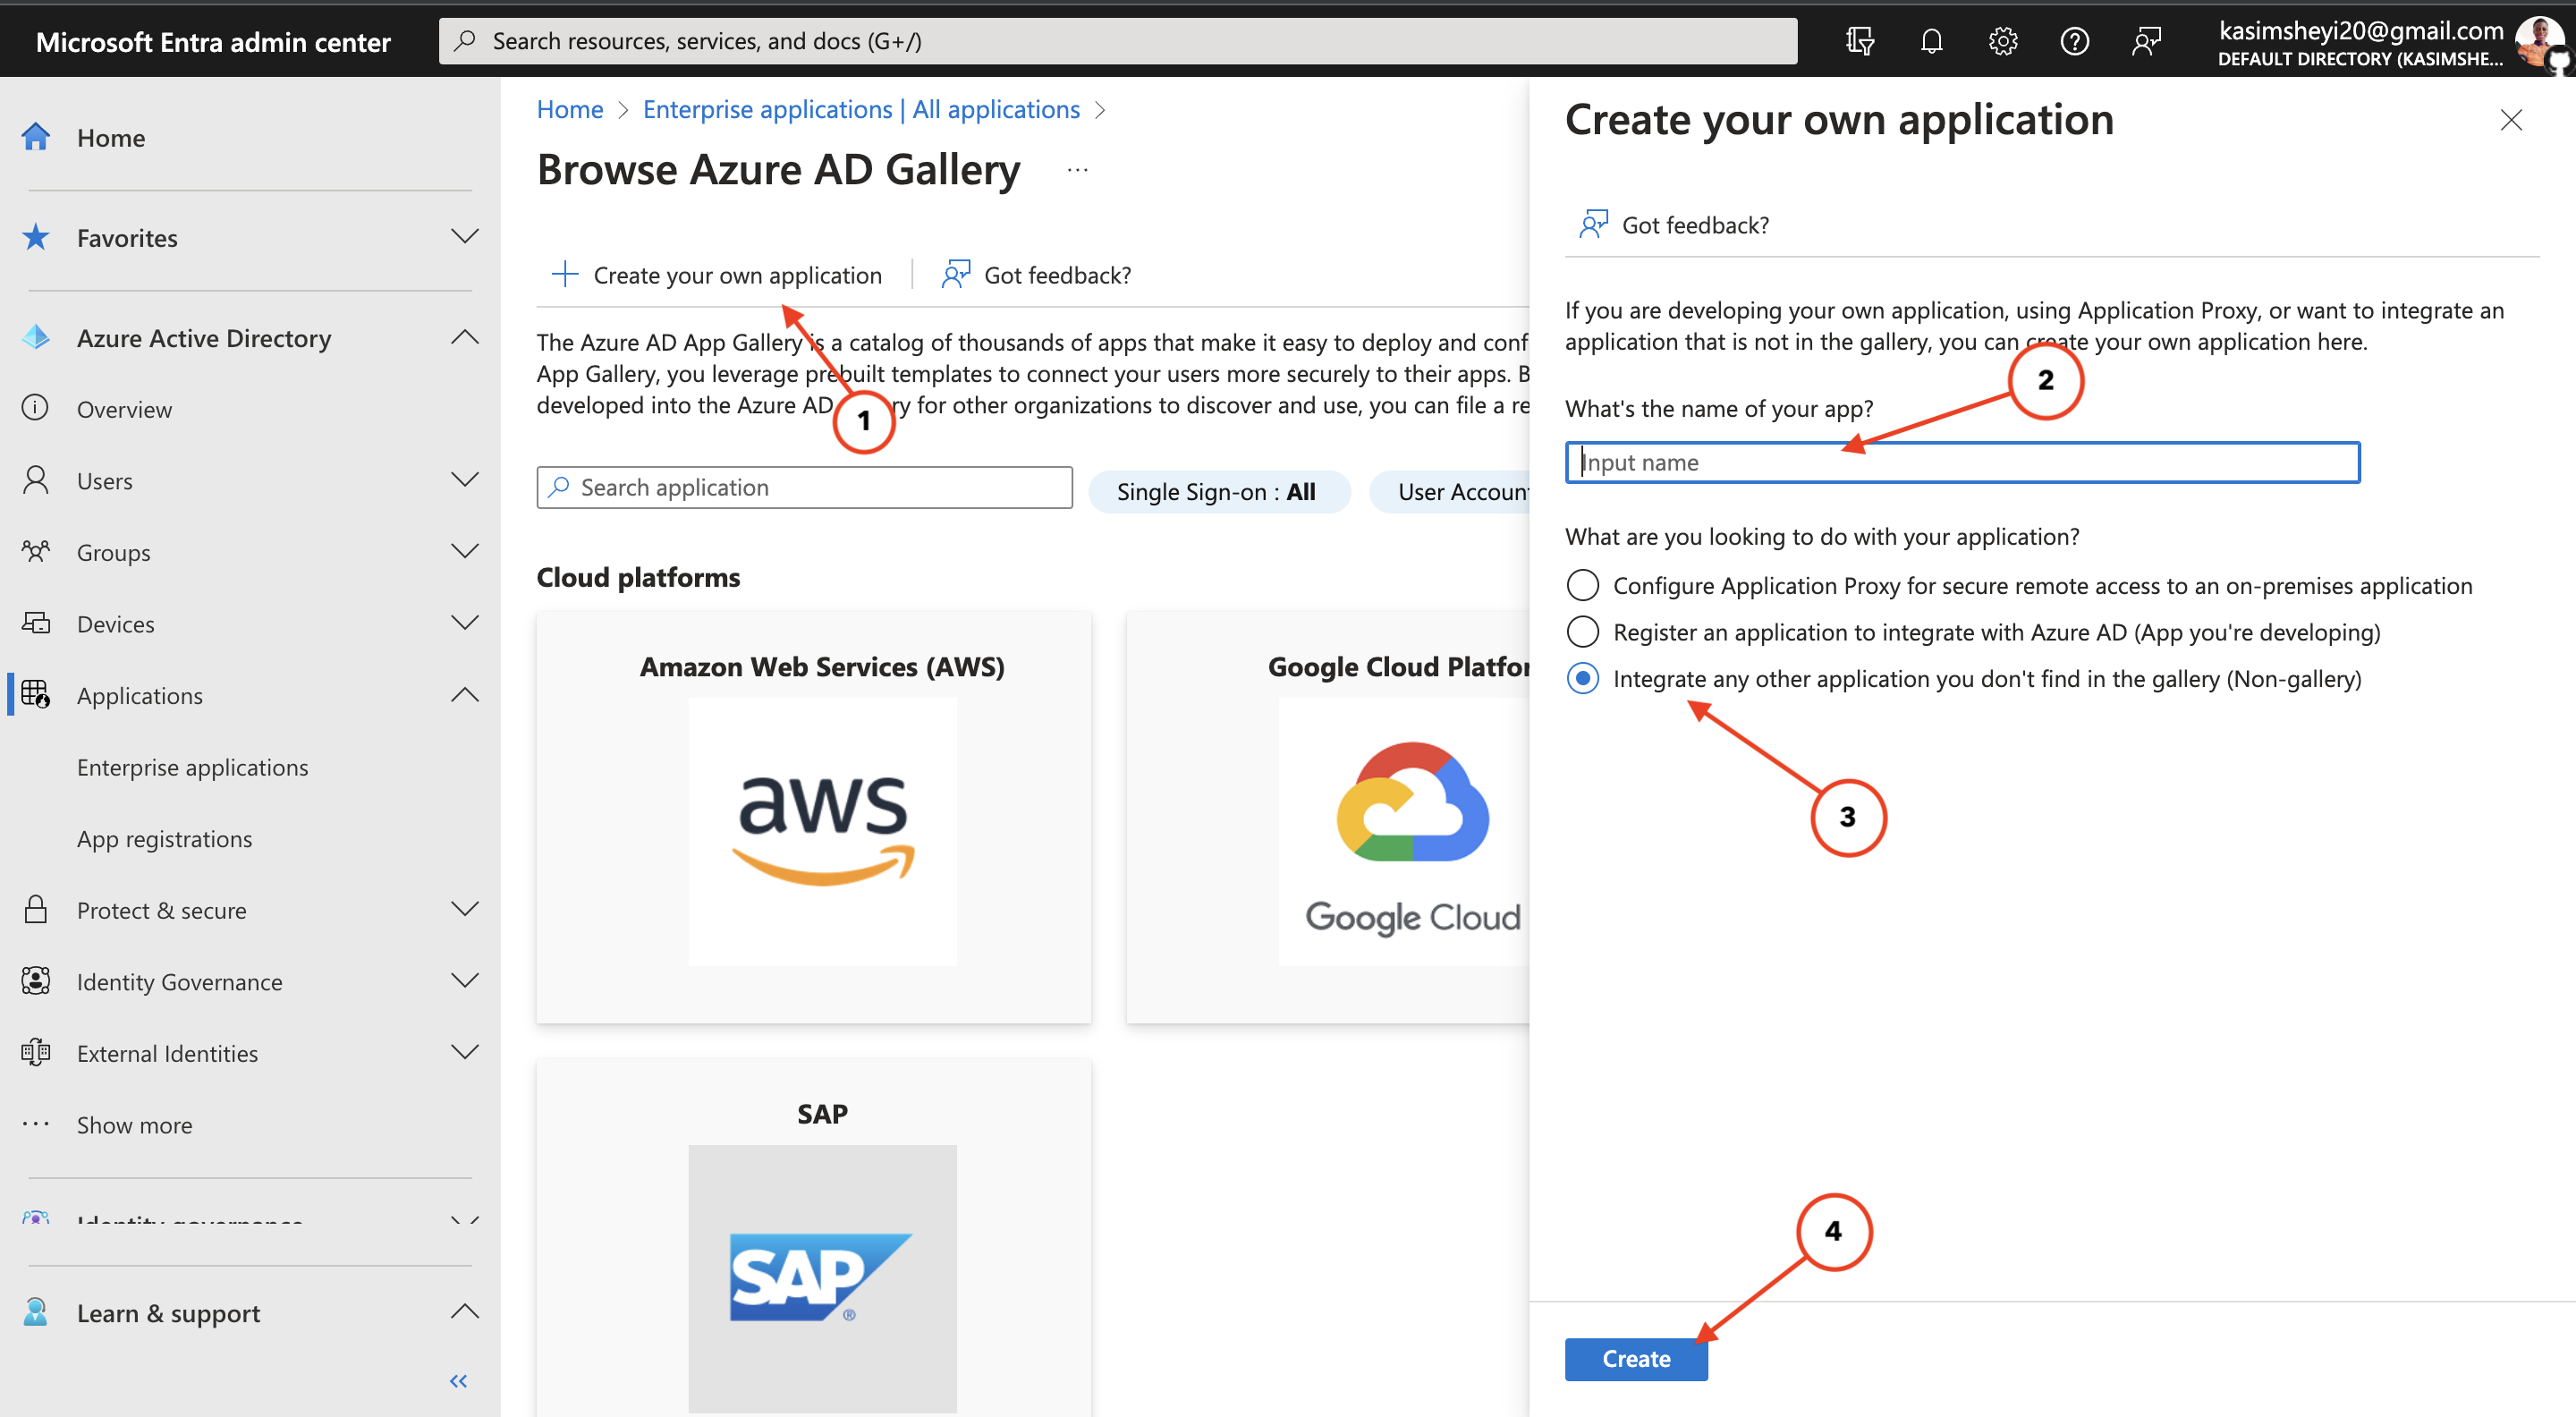
On the next screen, click the create your own application button at the top. You should have a modal displayed on the right side of your screen. Type in a name for the new application and select the third option then click the create button below the screen to register the application. You can find the steps in the image below.
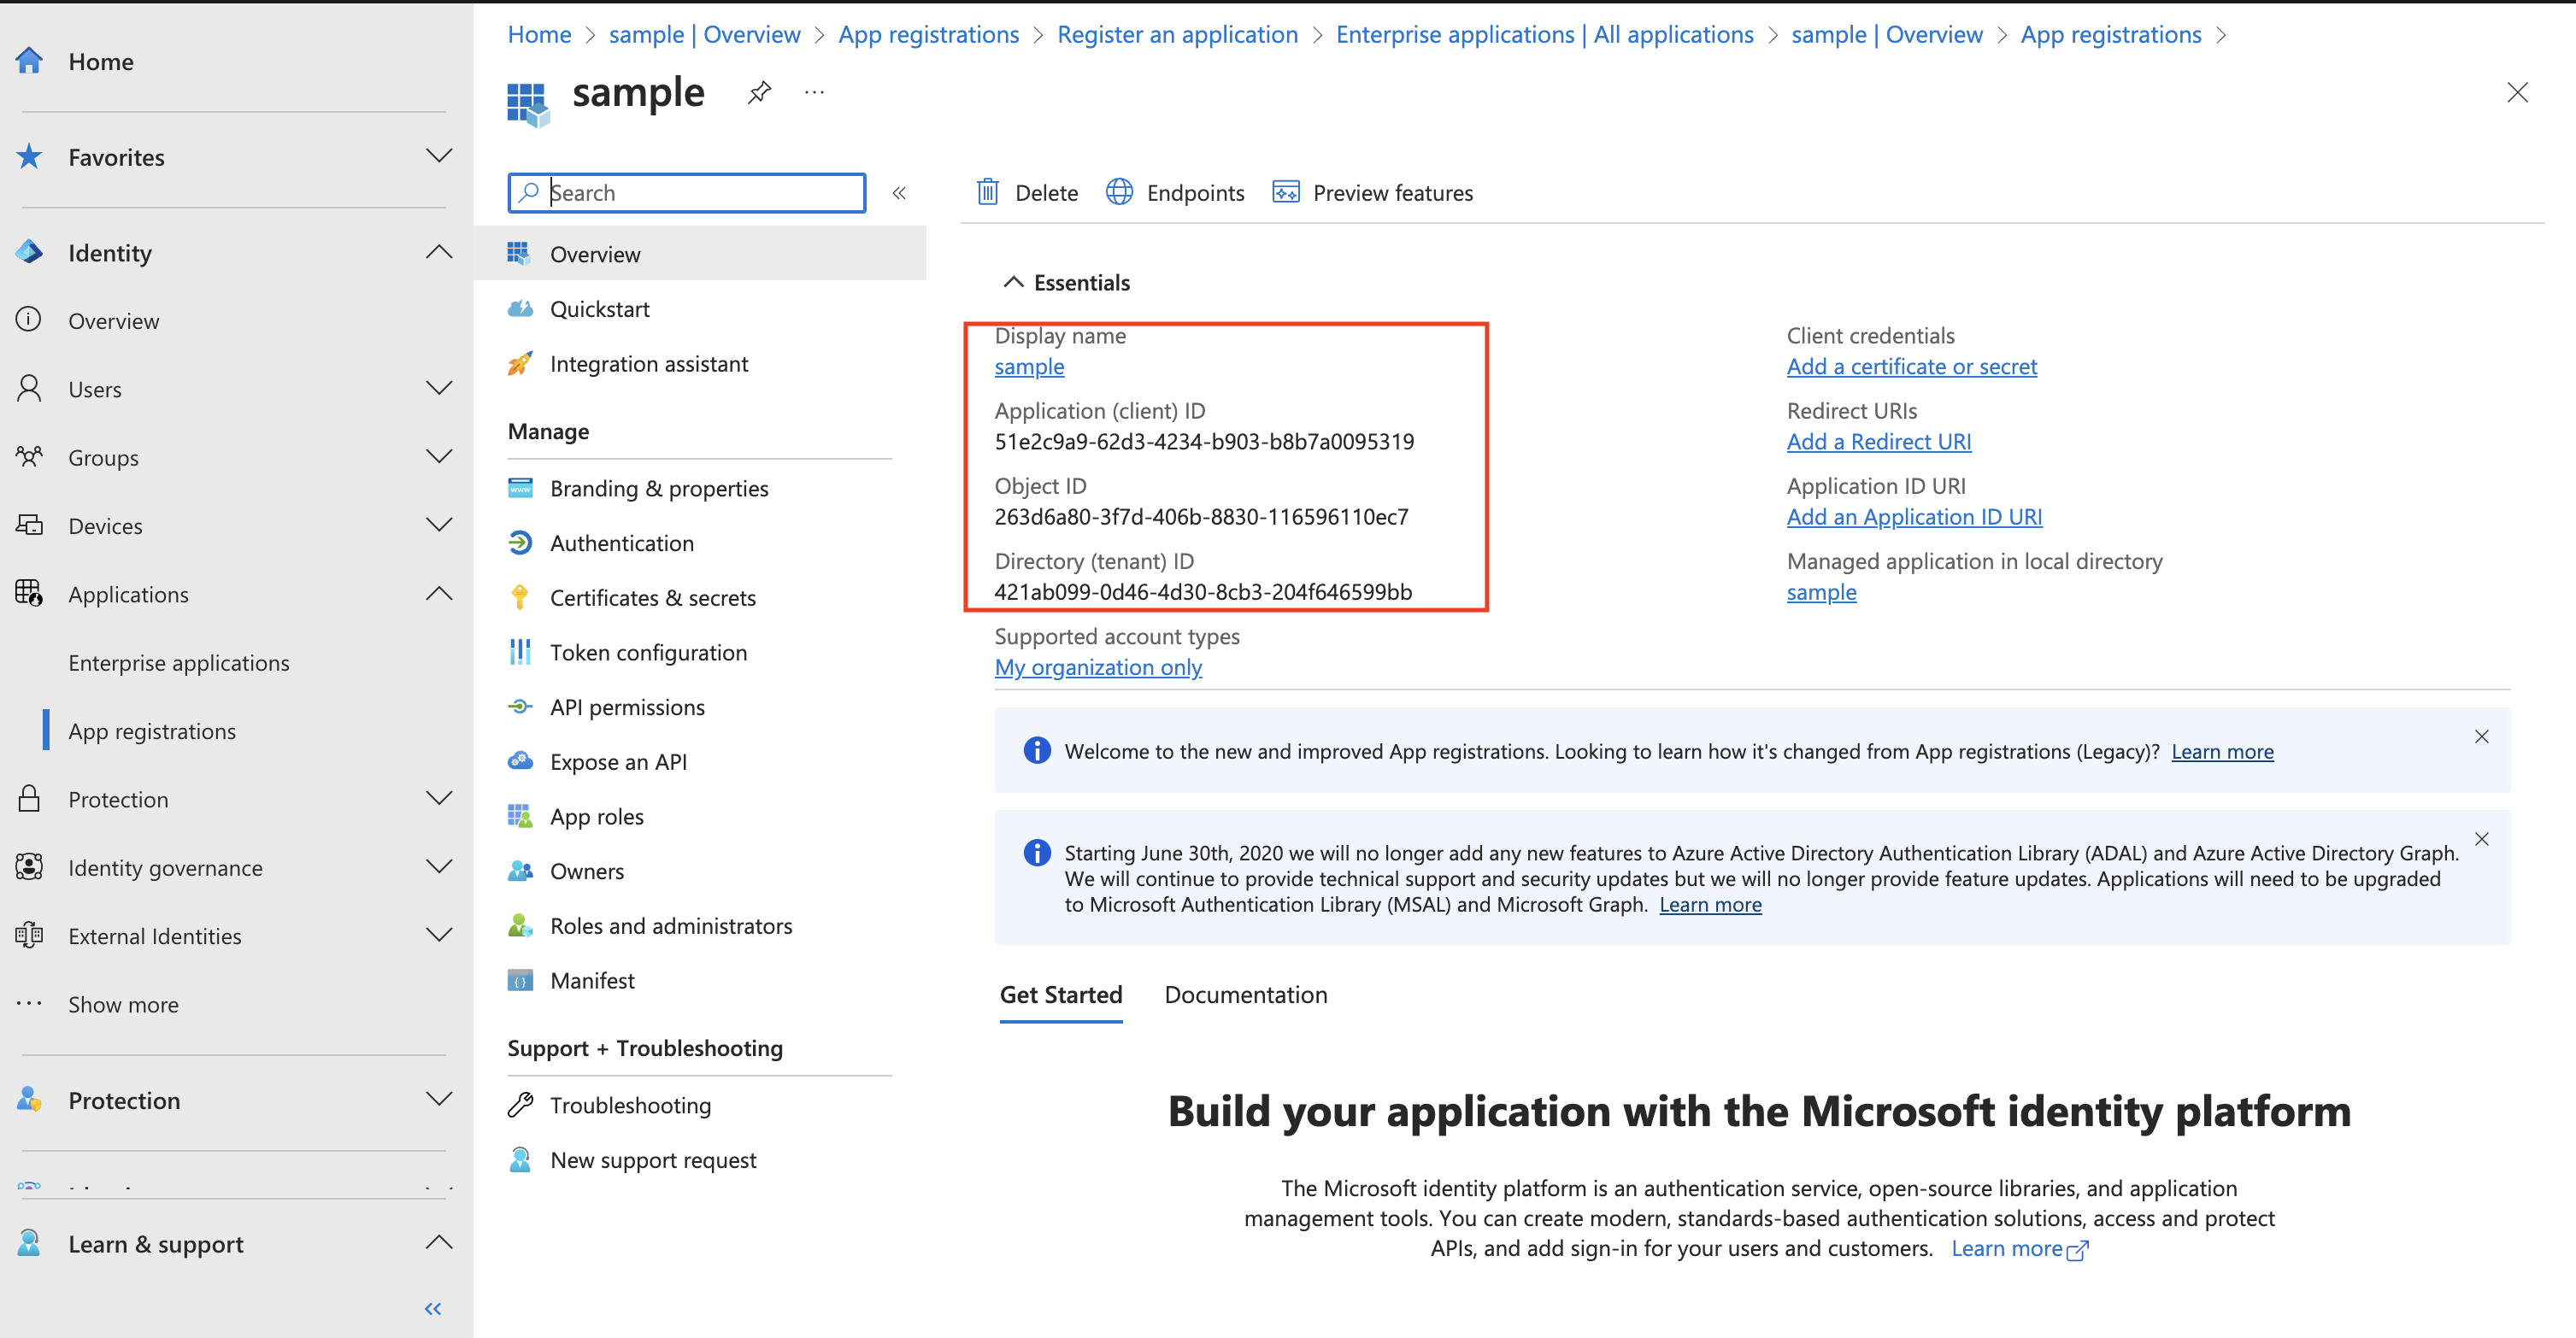
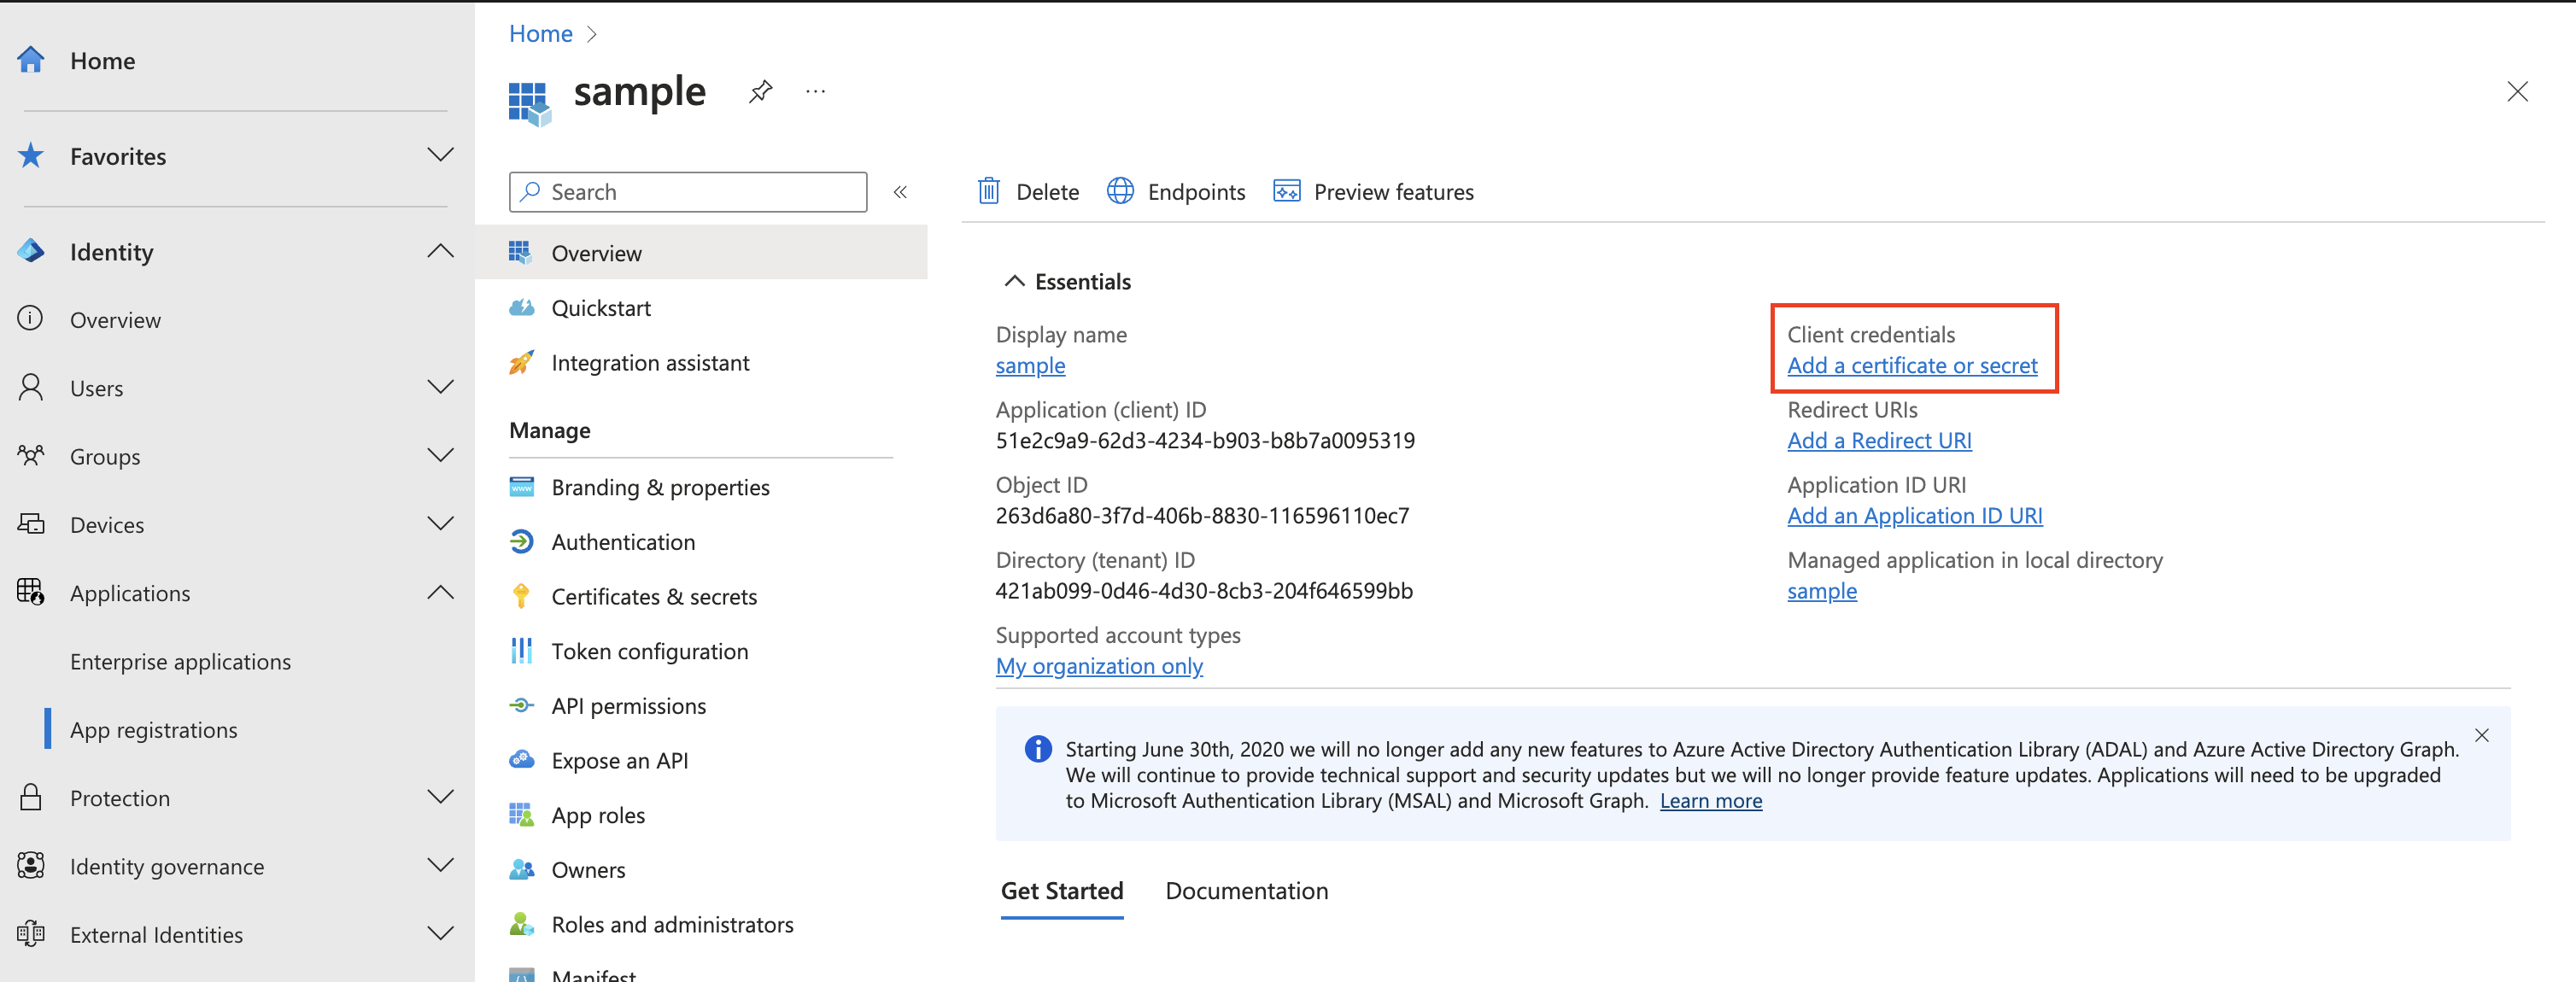
Once the application is registered, you will be directed to its overview page. Note down the Application (client) ID and Directory (tenant) ID; you'll need these later. The next thing to do is to generate the client secret .
Click on Add a certificate or secret as seen in the screenshot below
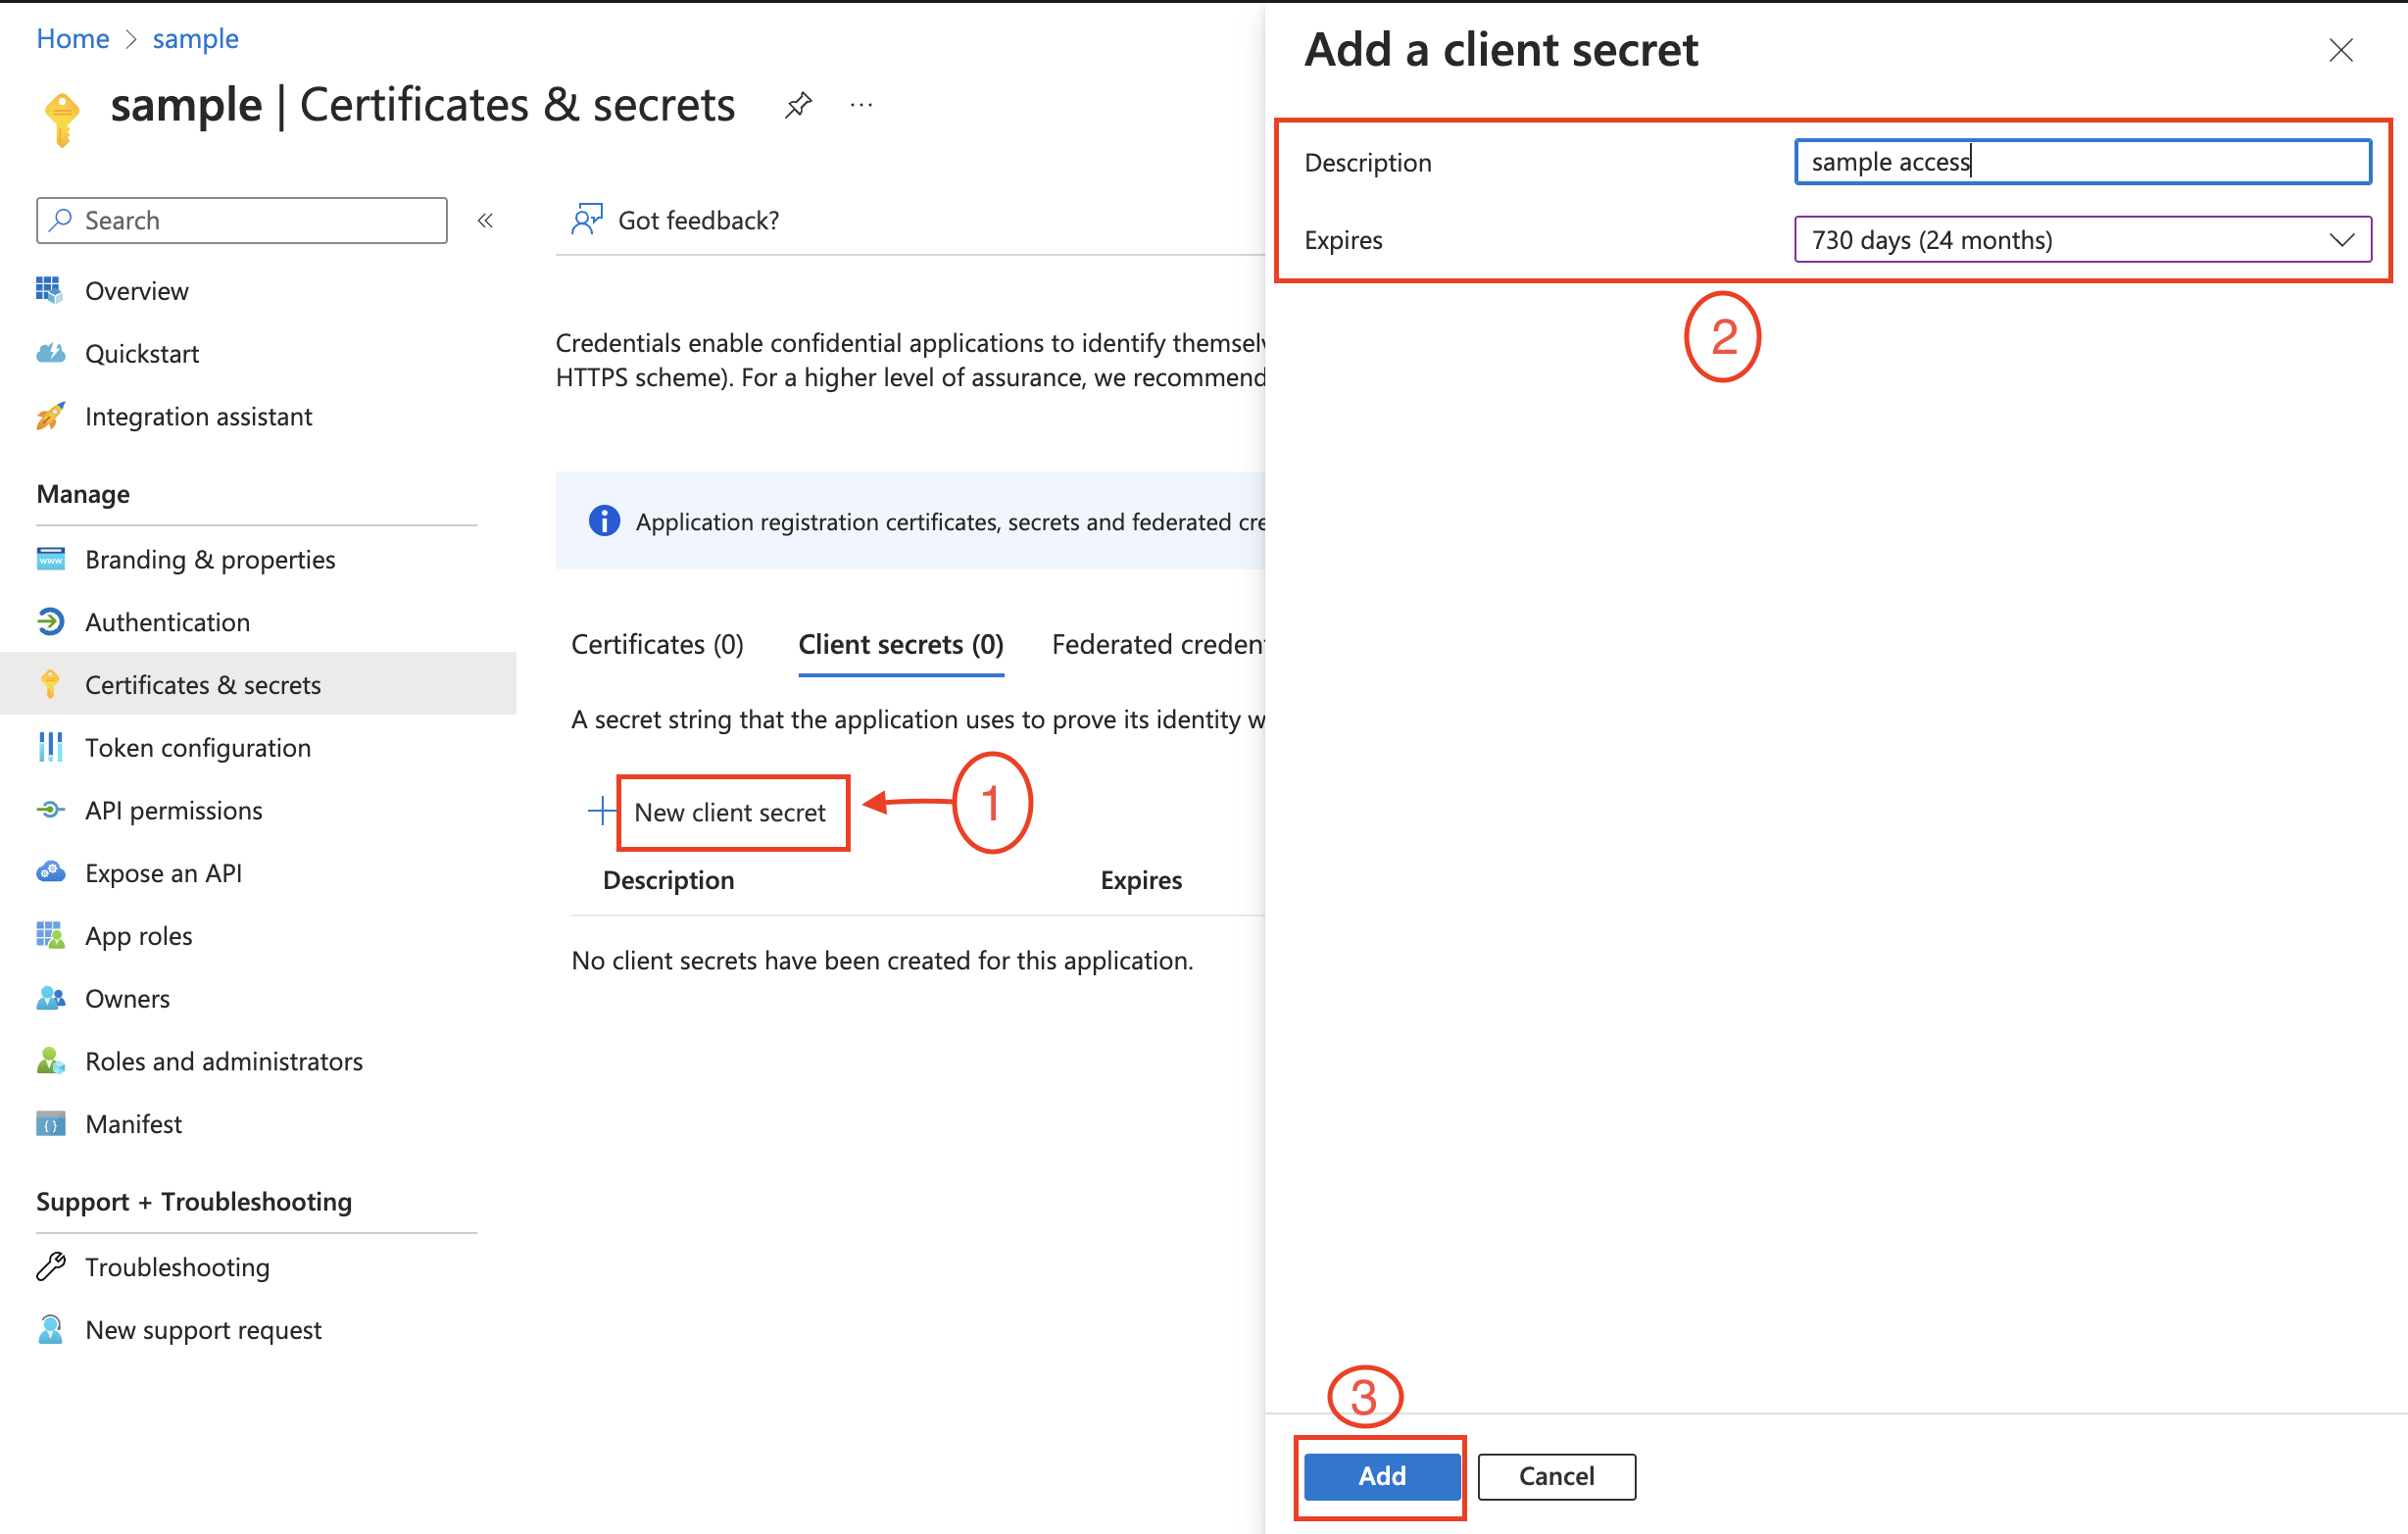
Click on New client secret, type a description, select the duration for your key, and then select Add
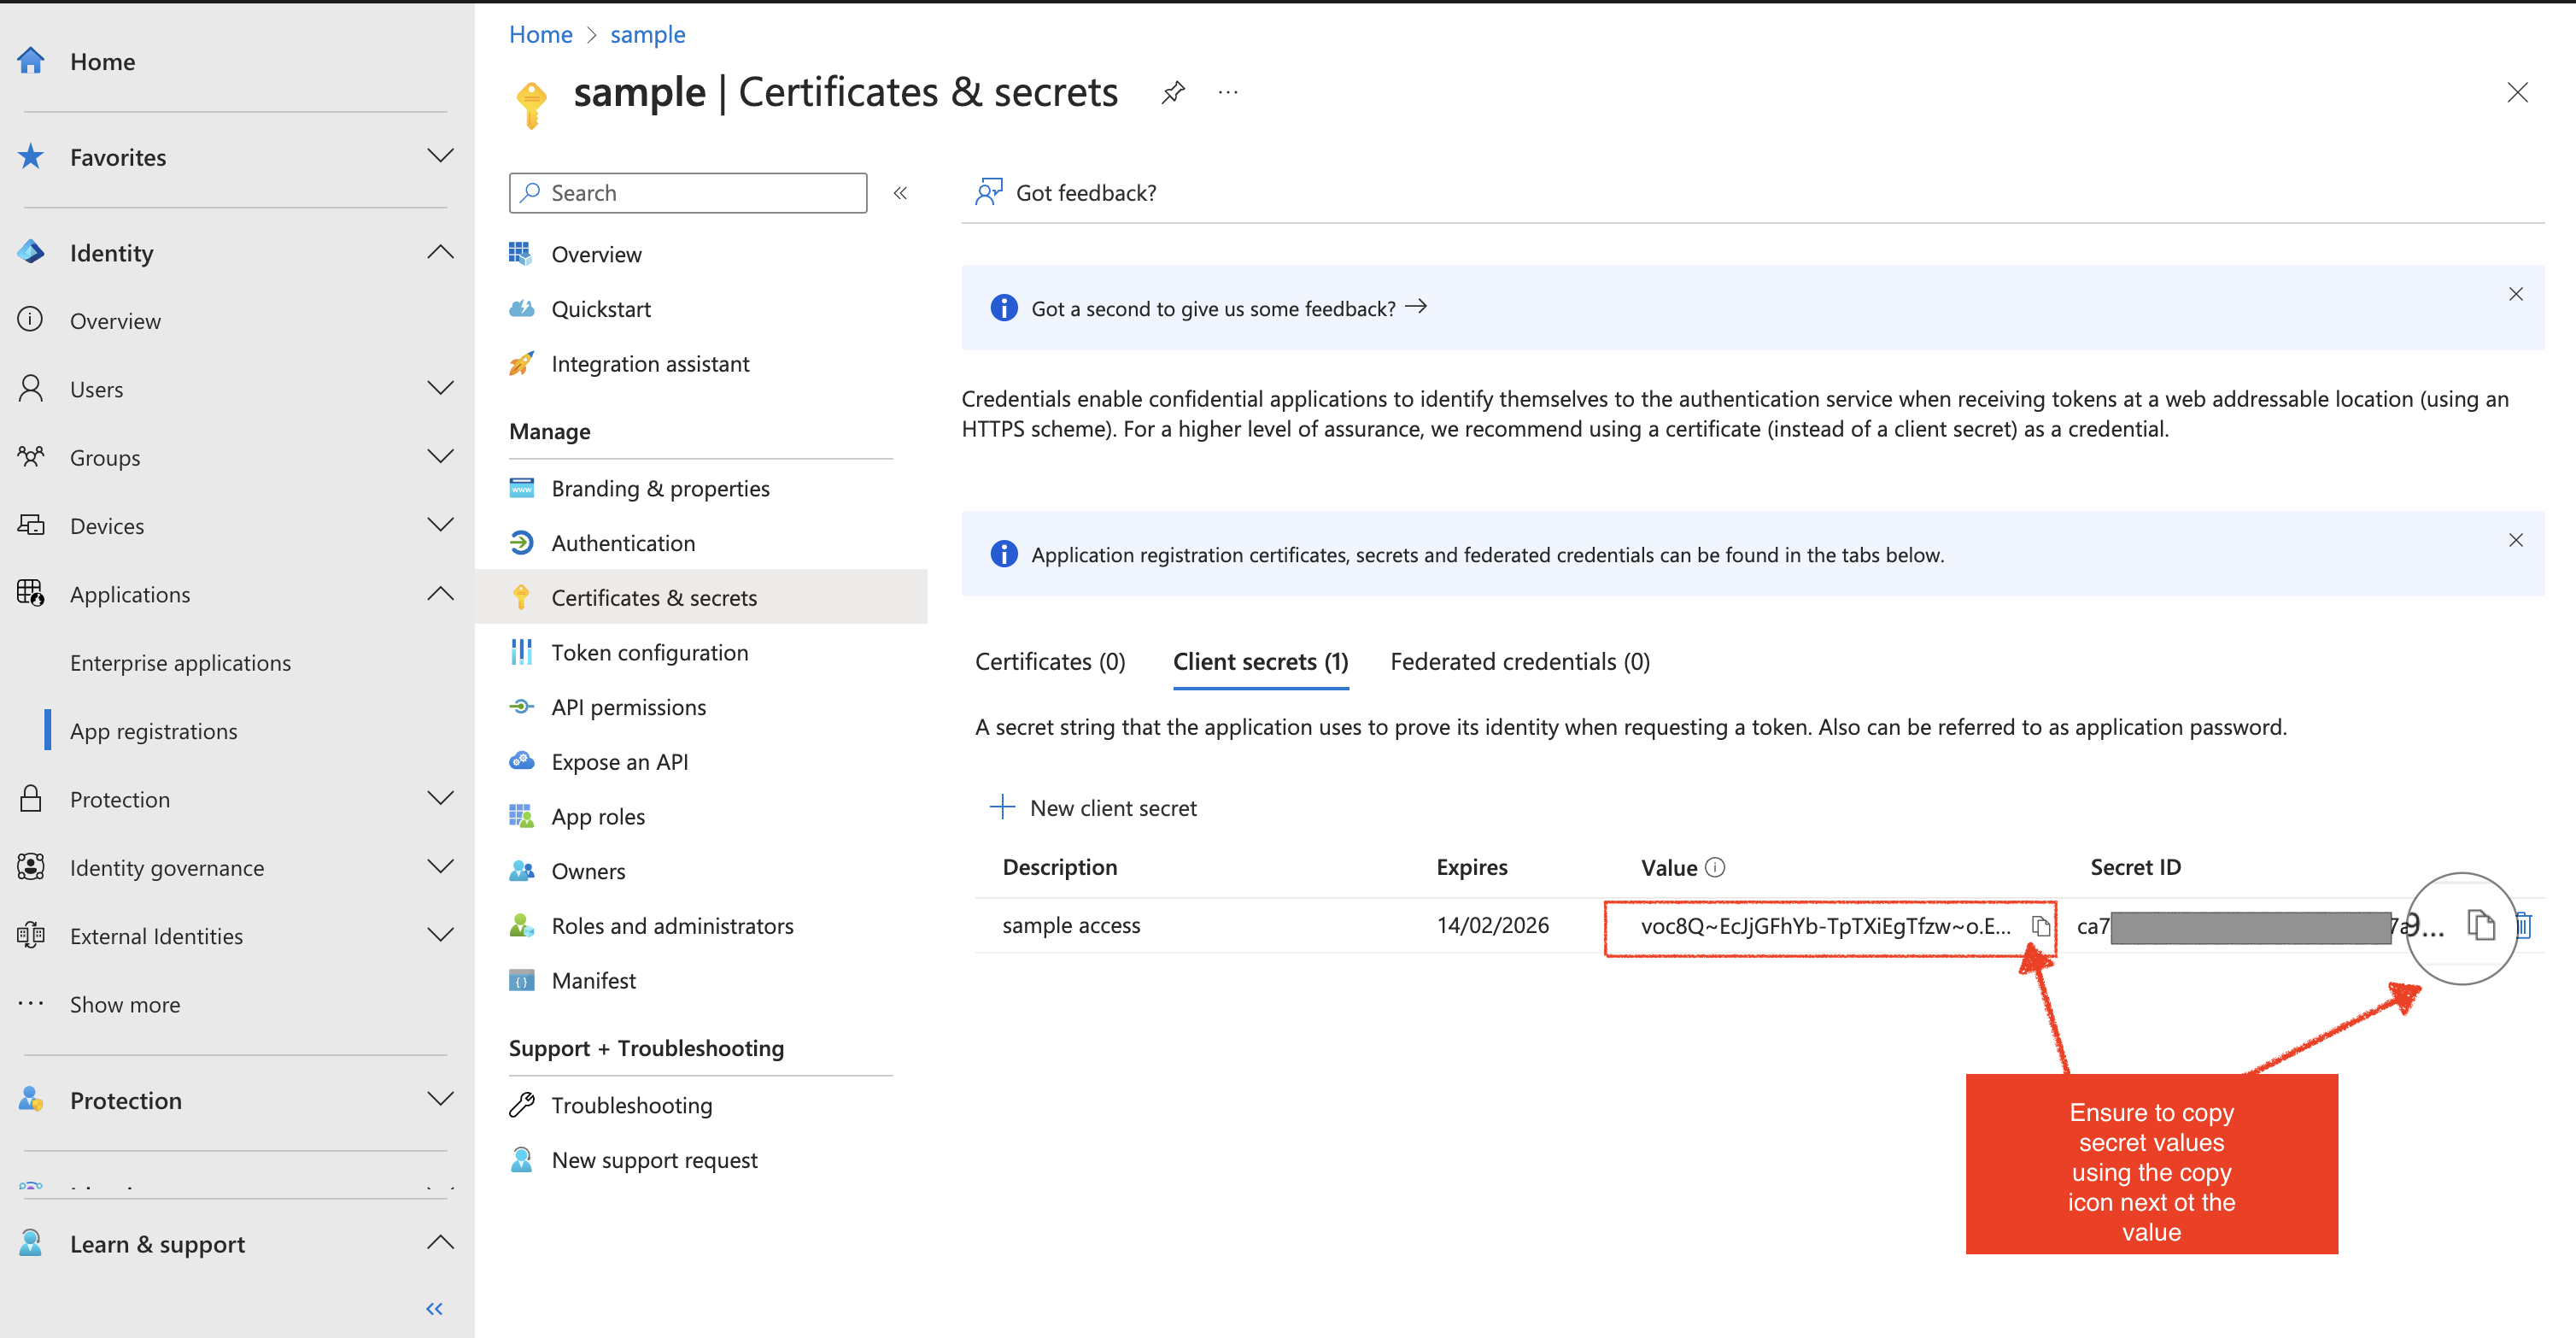
Copy the Secret Value as shown in the image. You will need this later as part of the requirements.
Note: Once you leave the screen, client secret value disappears and cannot be retrieved again.
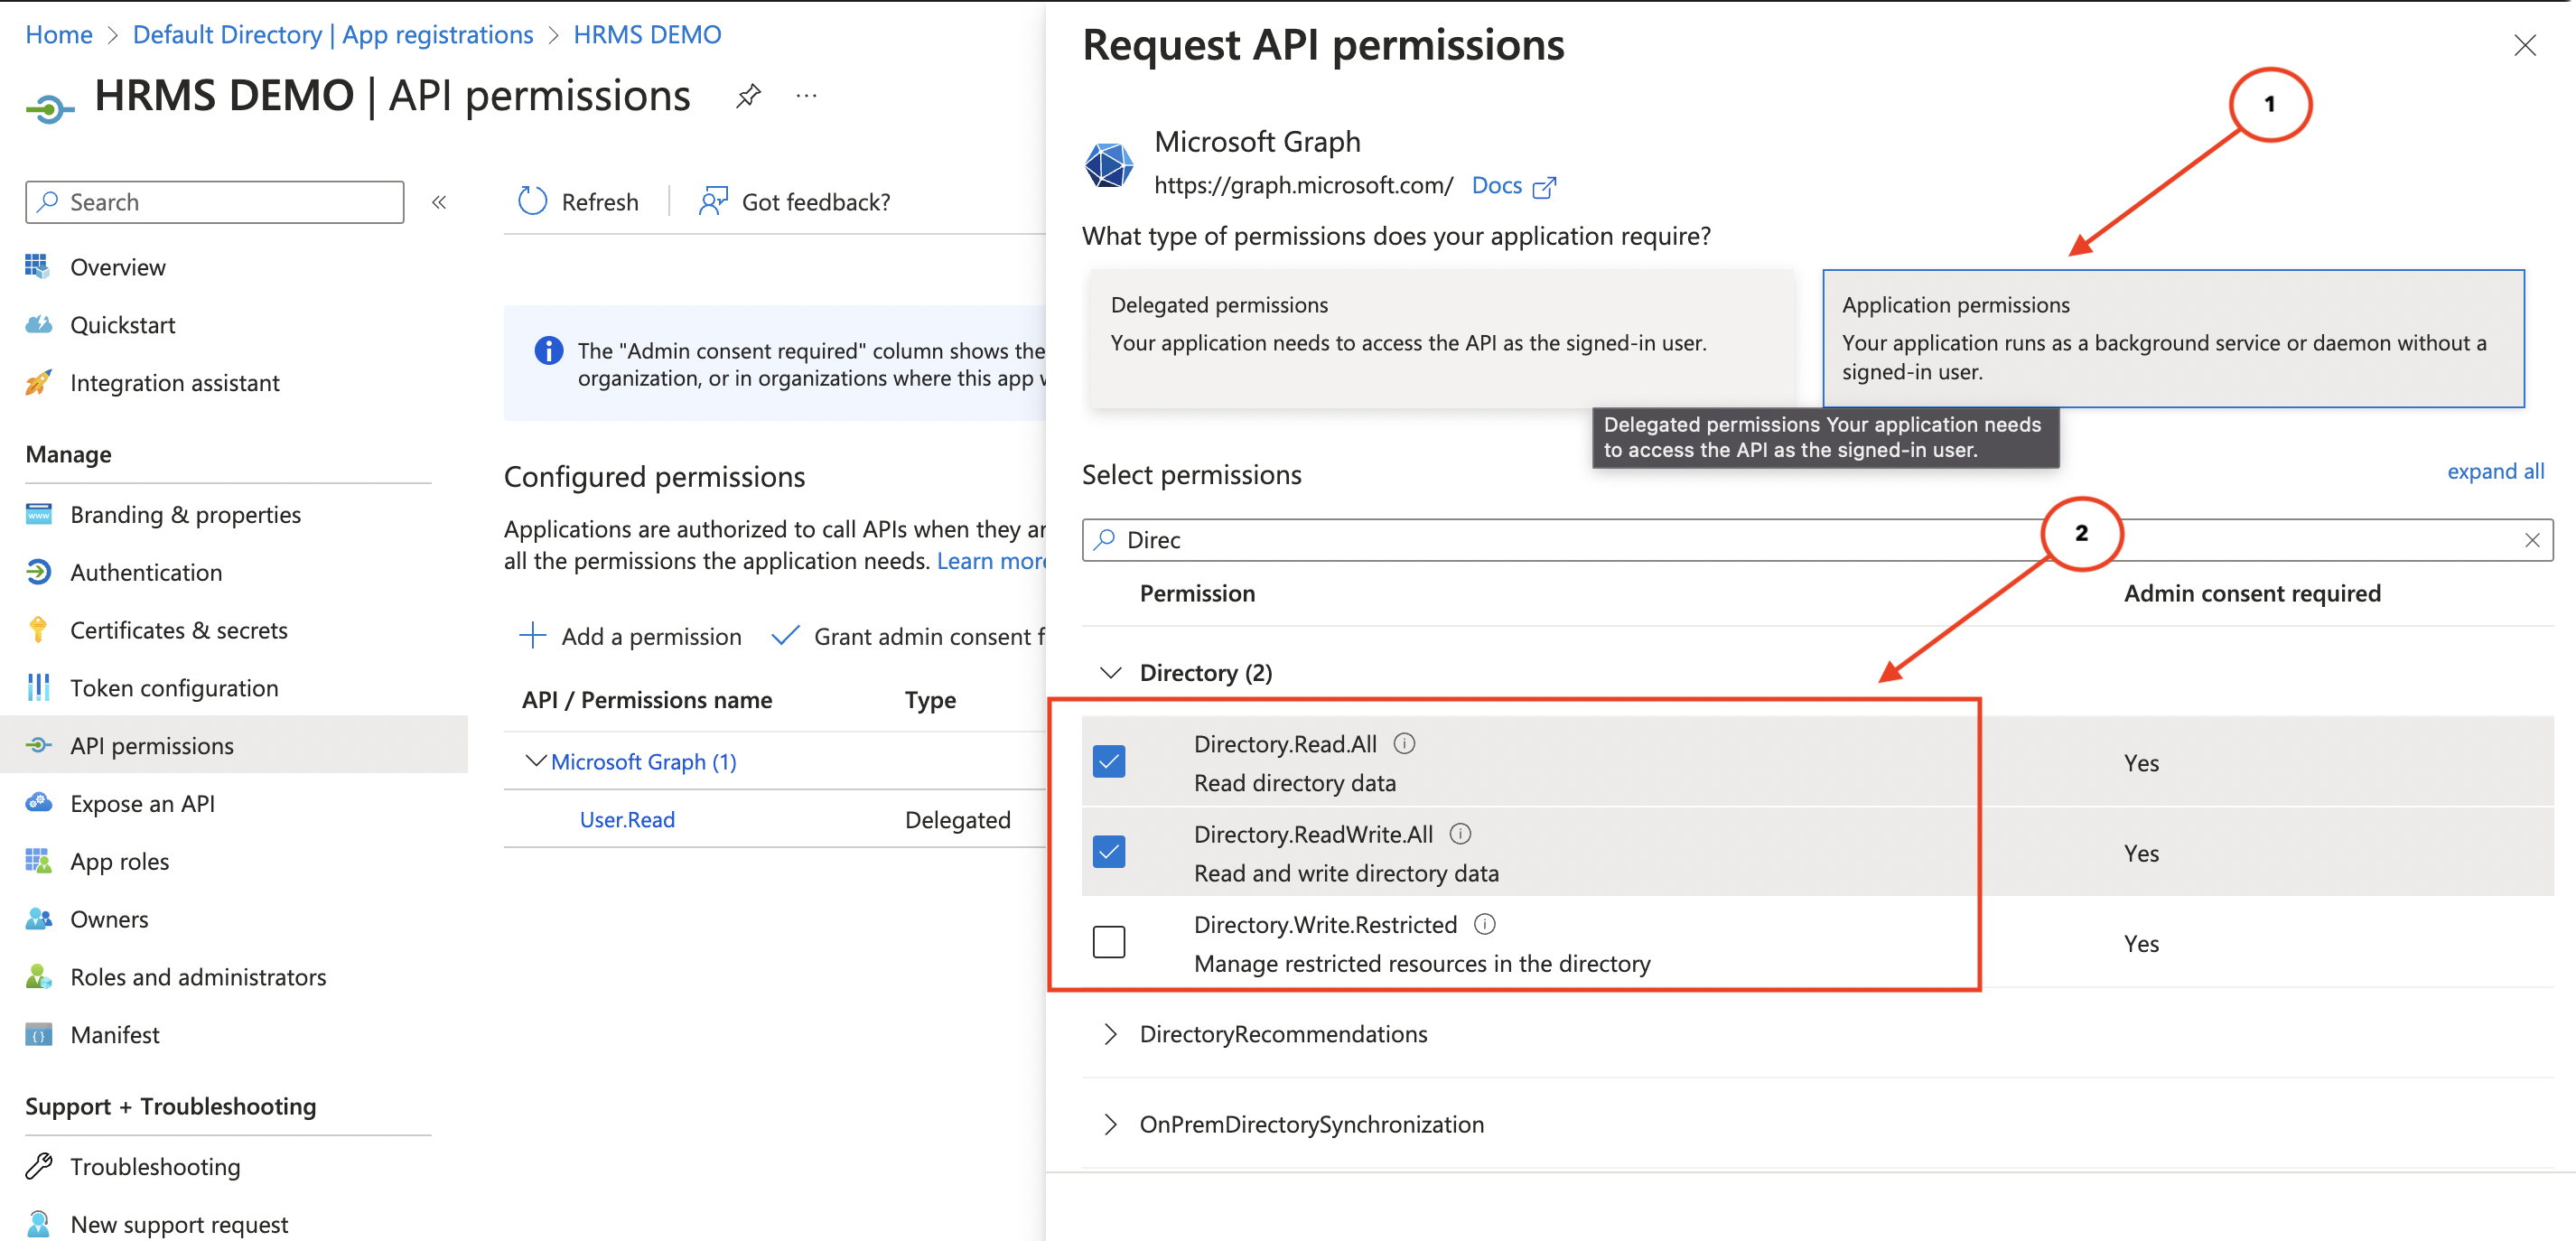
The next thing to do is to add the required permissions that the application will use. Click on API permissions from the sidebar then click on the Add a permission button as seen in the image below.
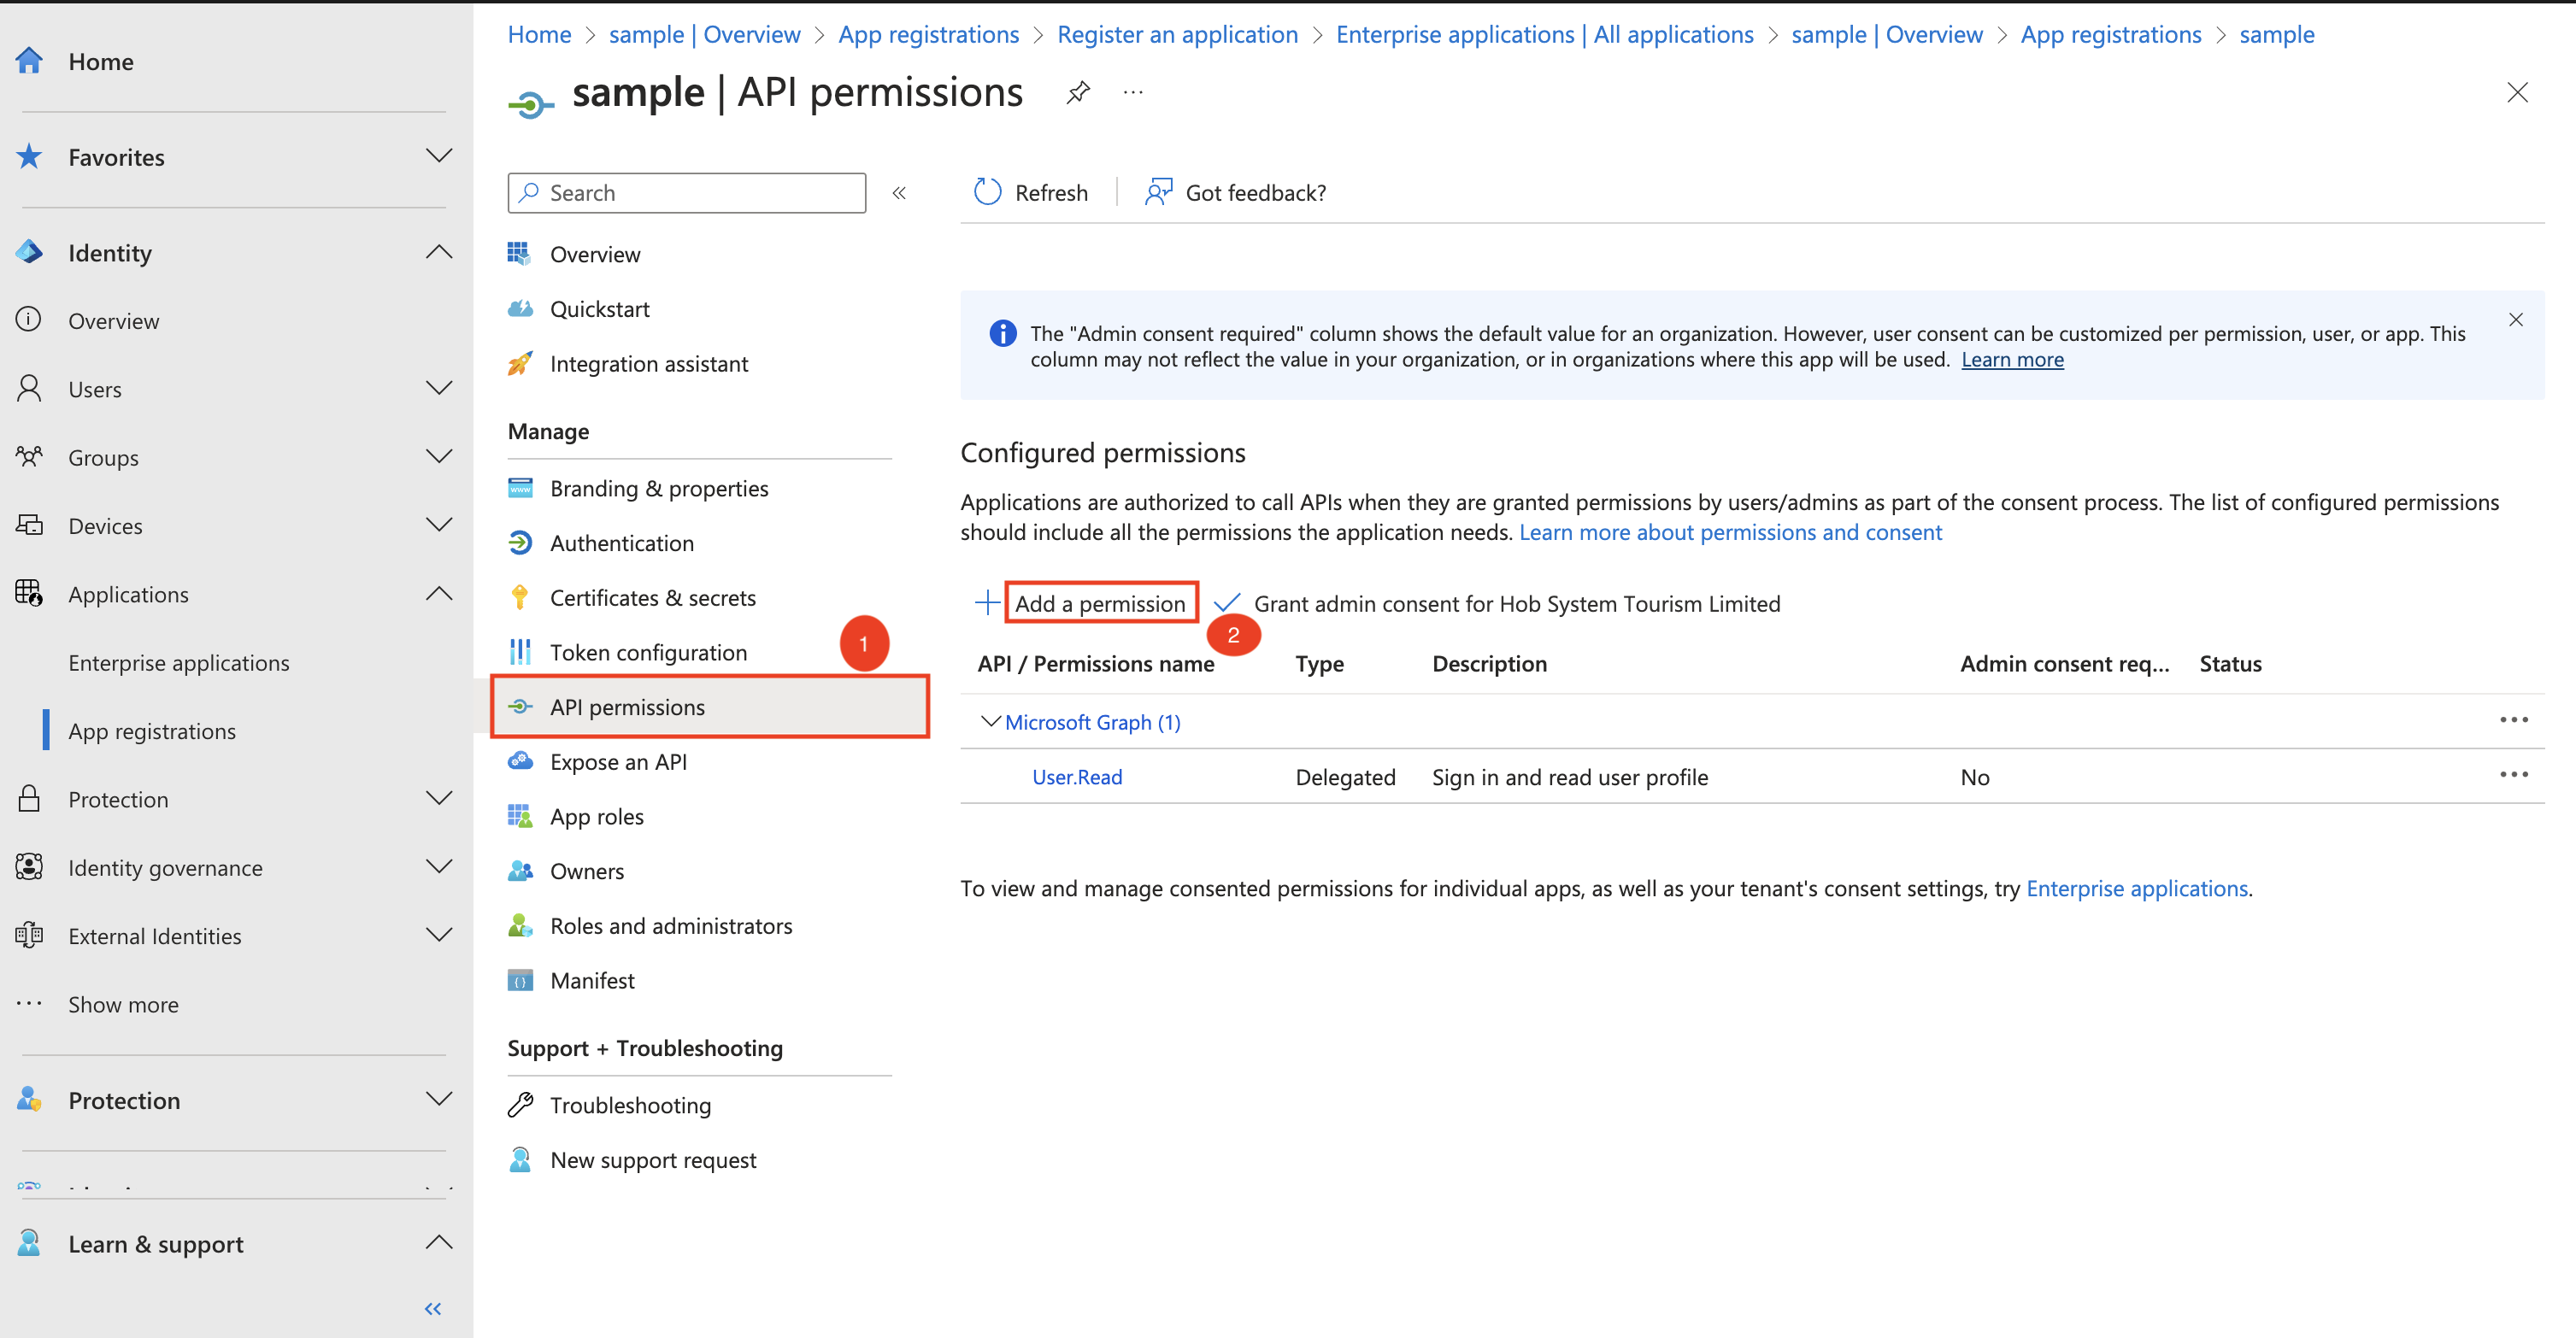
On the next screen, select Microsoft Graph then select Application Permissions then under Directory tick the following:
- Directory.Read.All
- Directory.ReadWrite.All
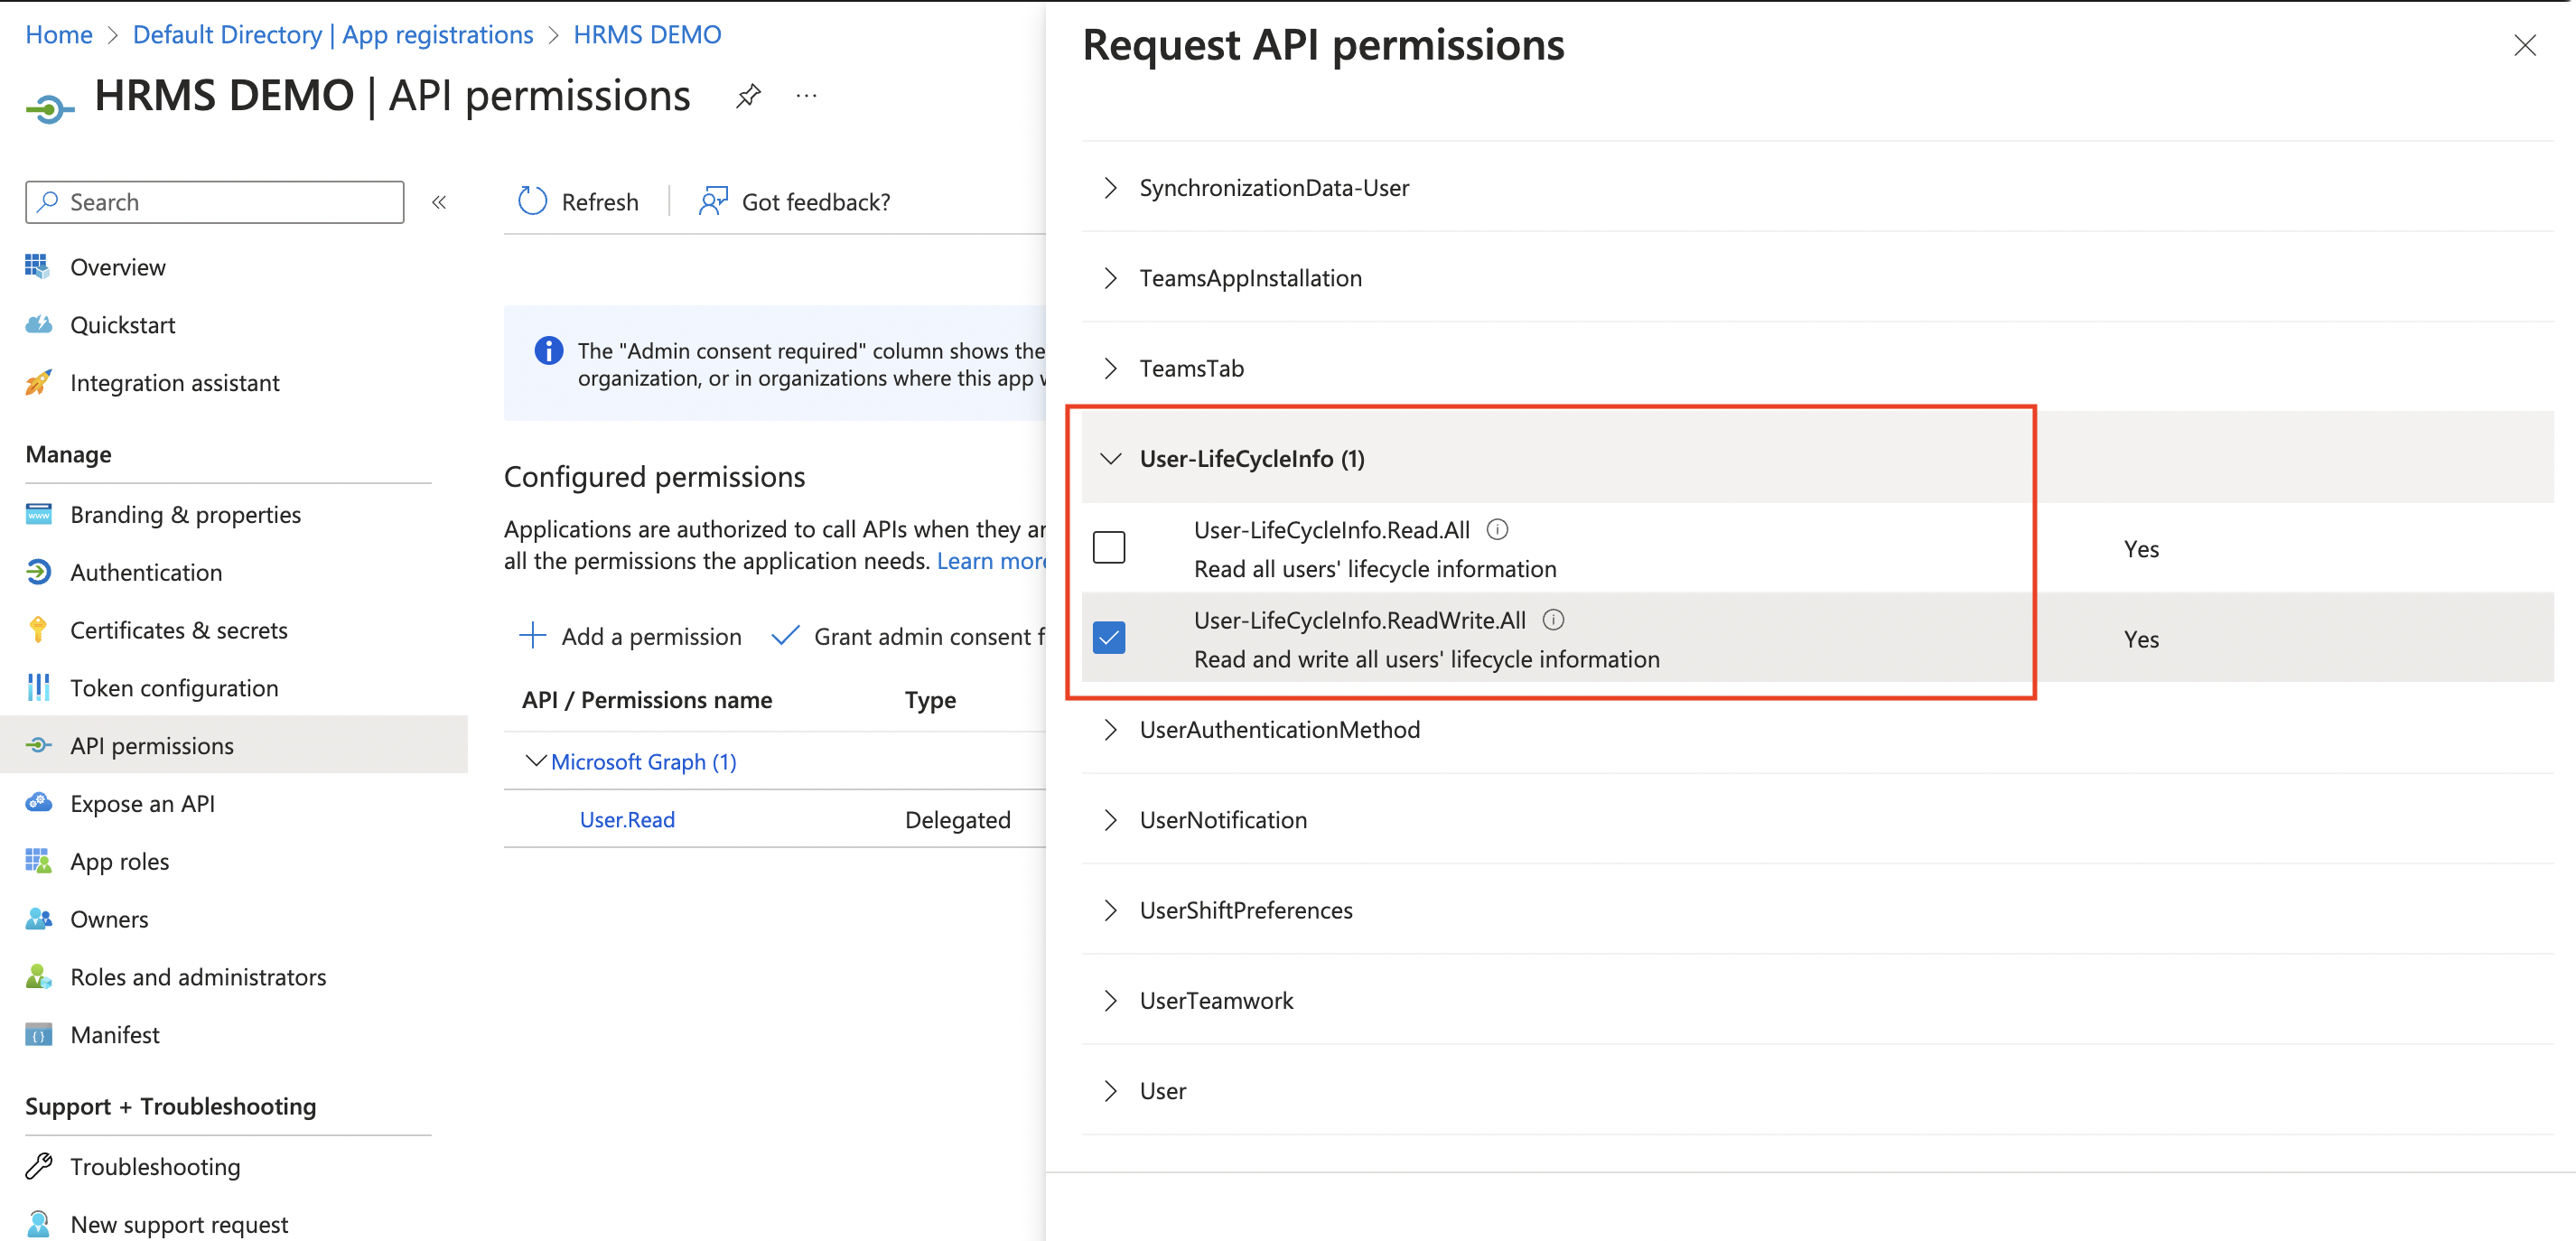
Then scroll down to the User-LifeCycleInfo section and tick the following:
- User-LifeCycleInfo.ReadWrite.All
Then scroll down to the User section and check the following:
- User.ReadWrite.All
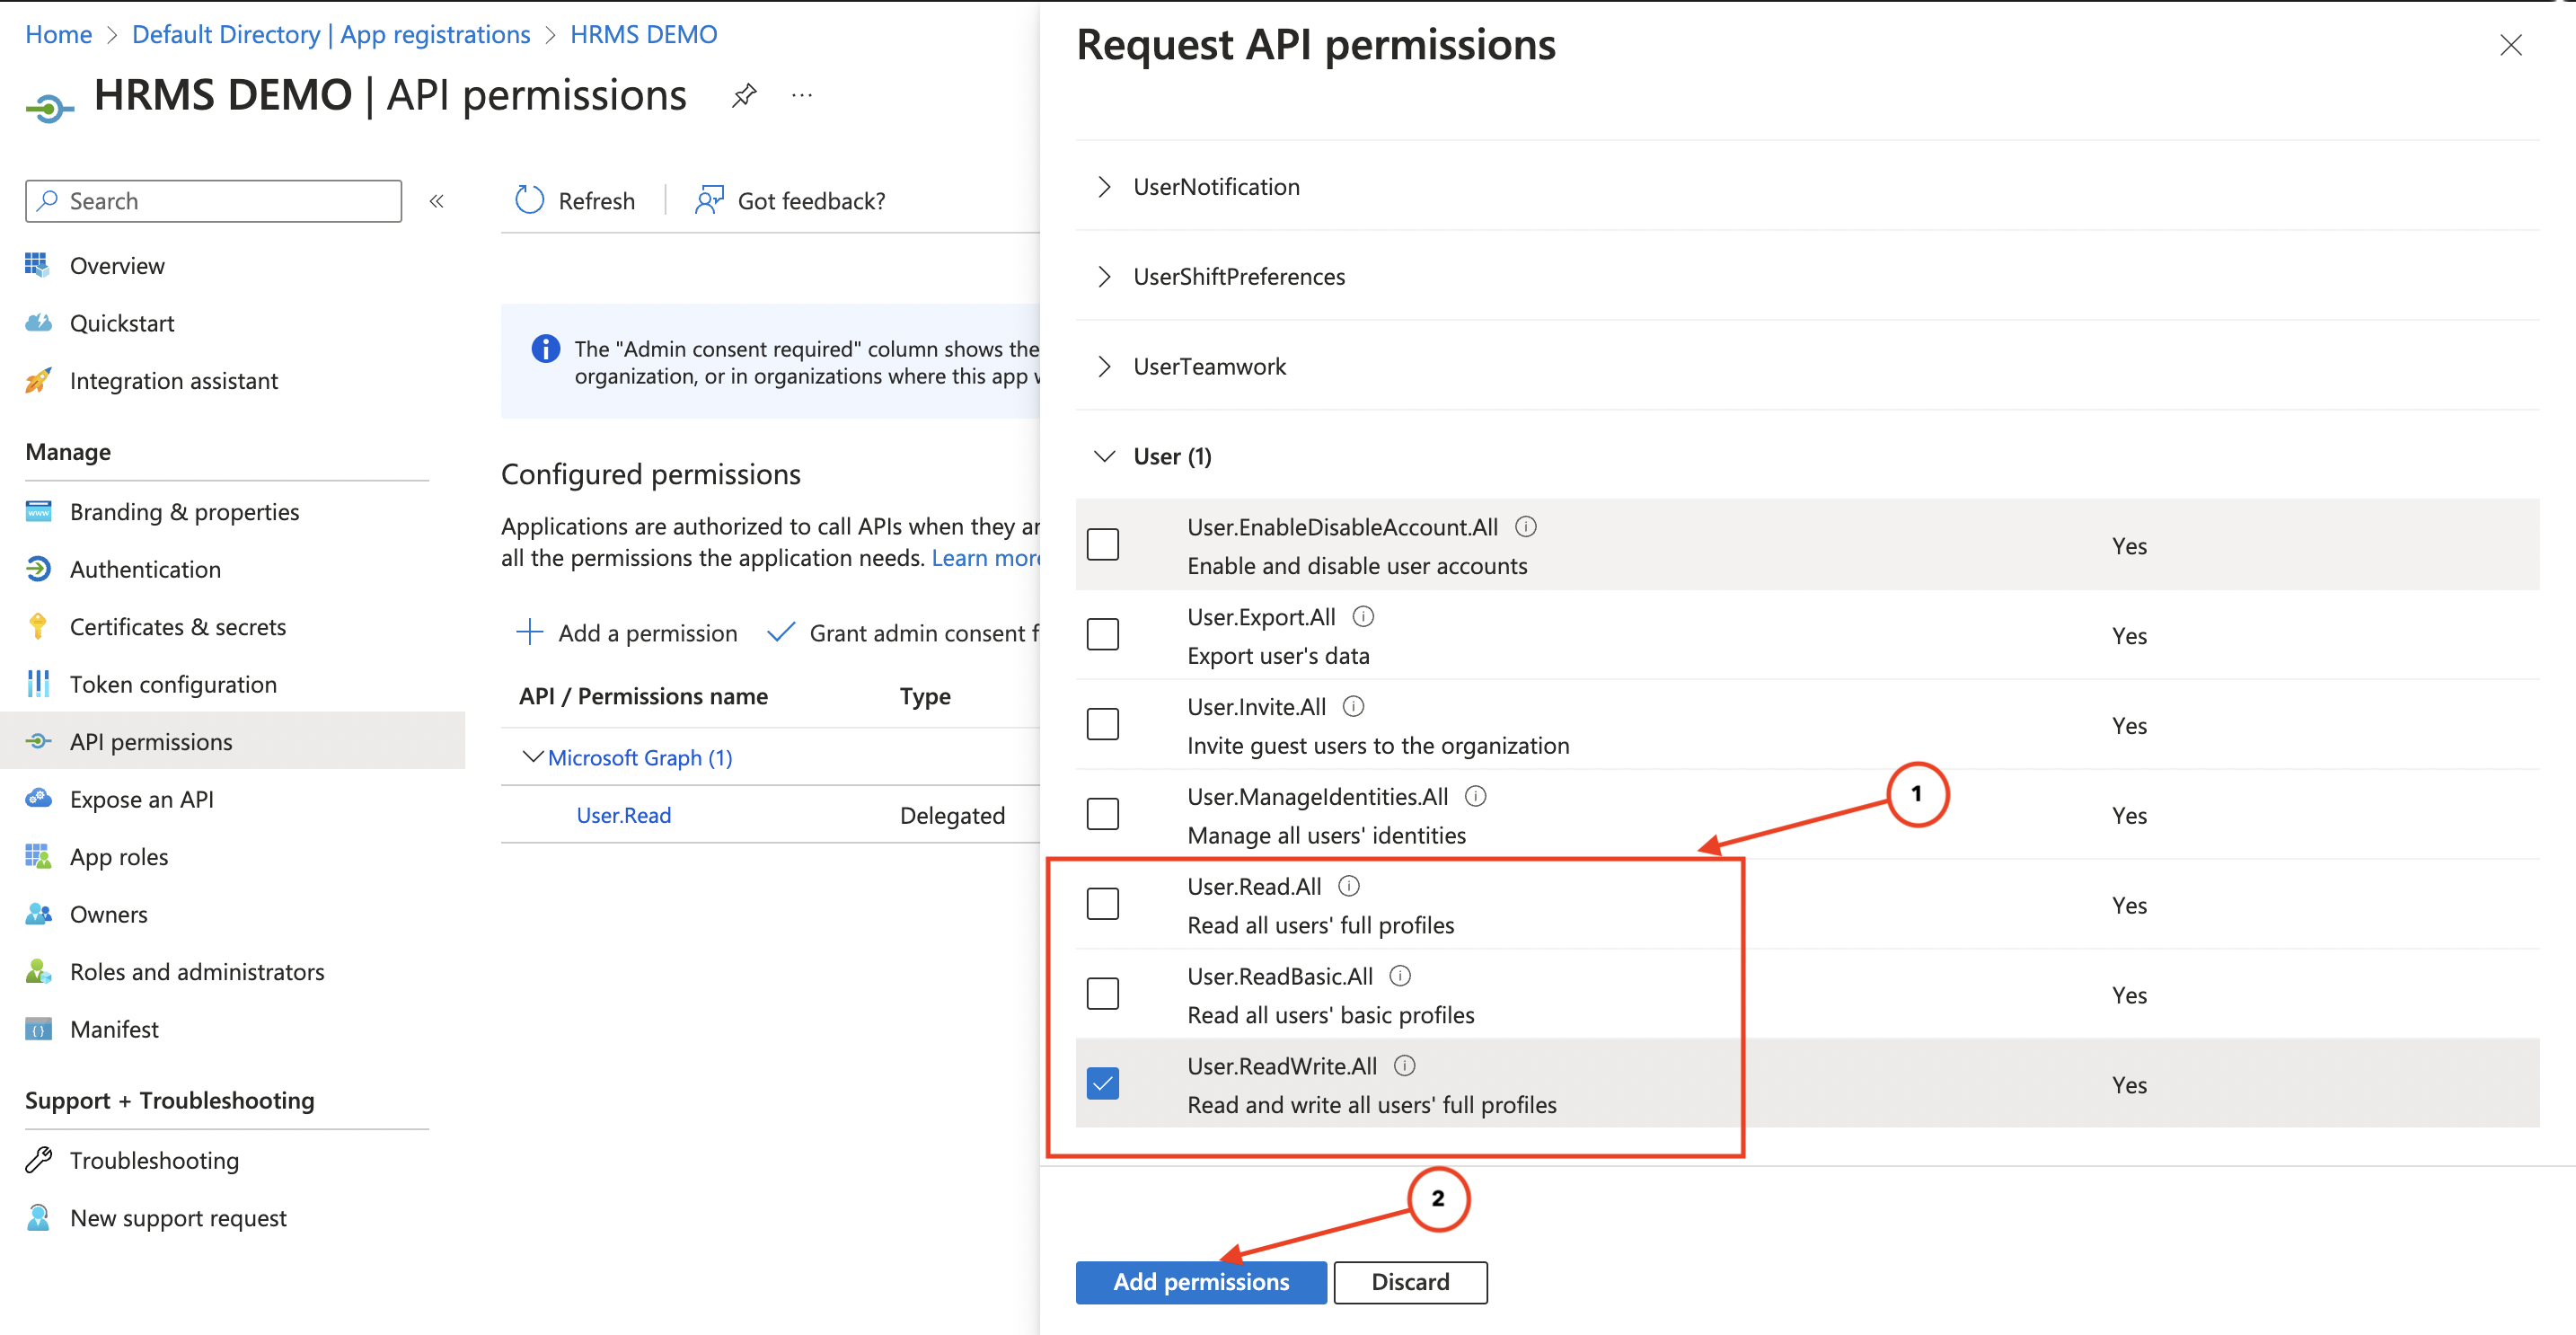
Then click on the Add permissions button as seen in the image above. On the next screen shown to you, click on the Grant admin consent for Default Directory and confirm it by clicking the Yes button as seen in the image below.
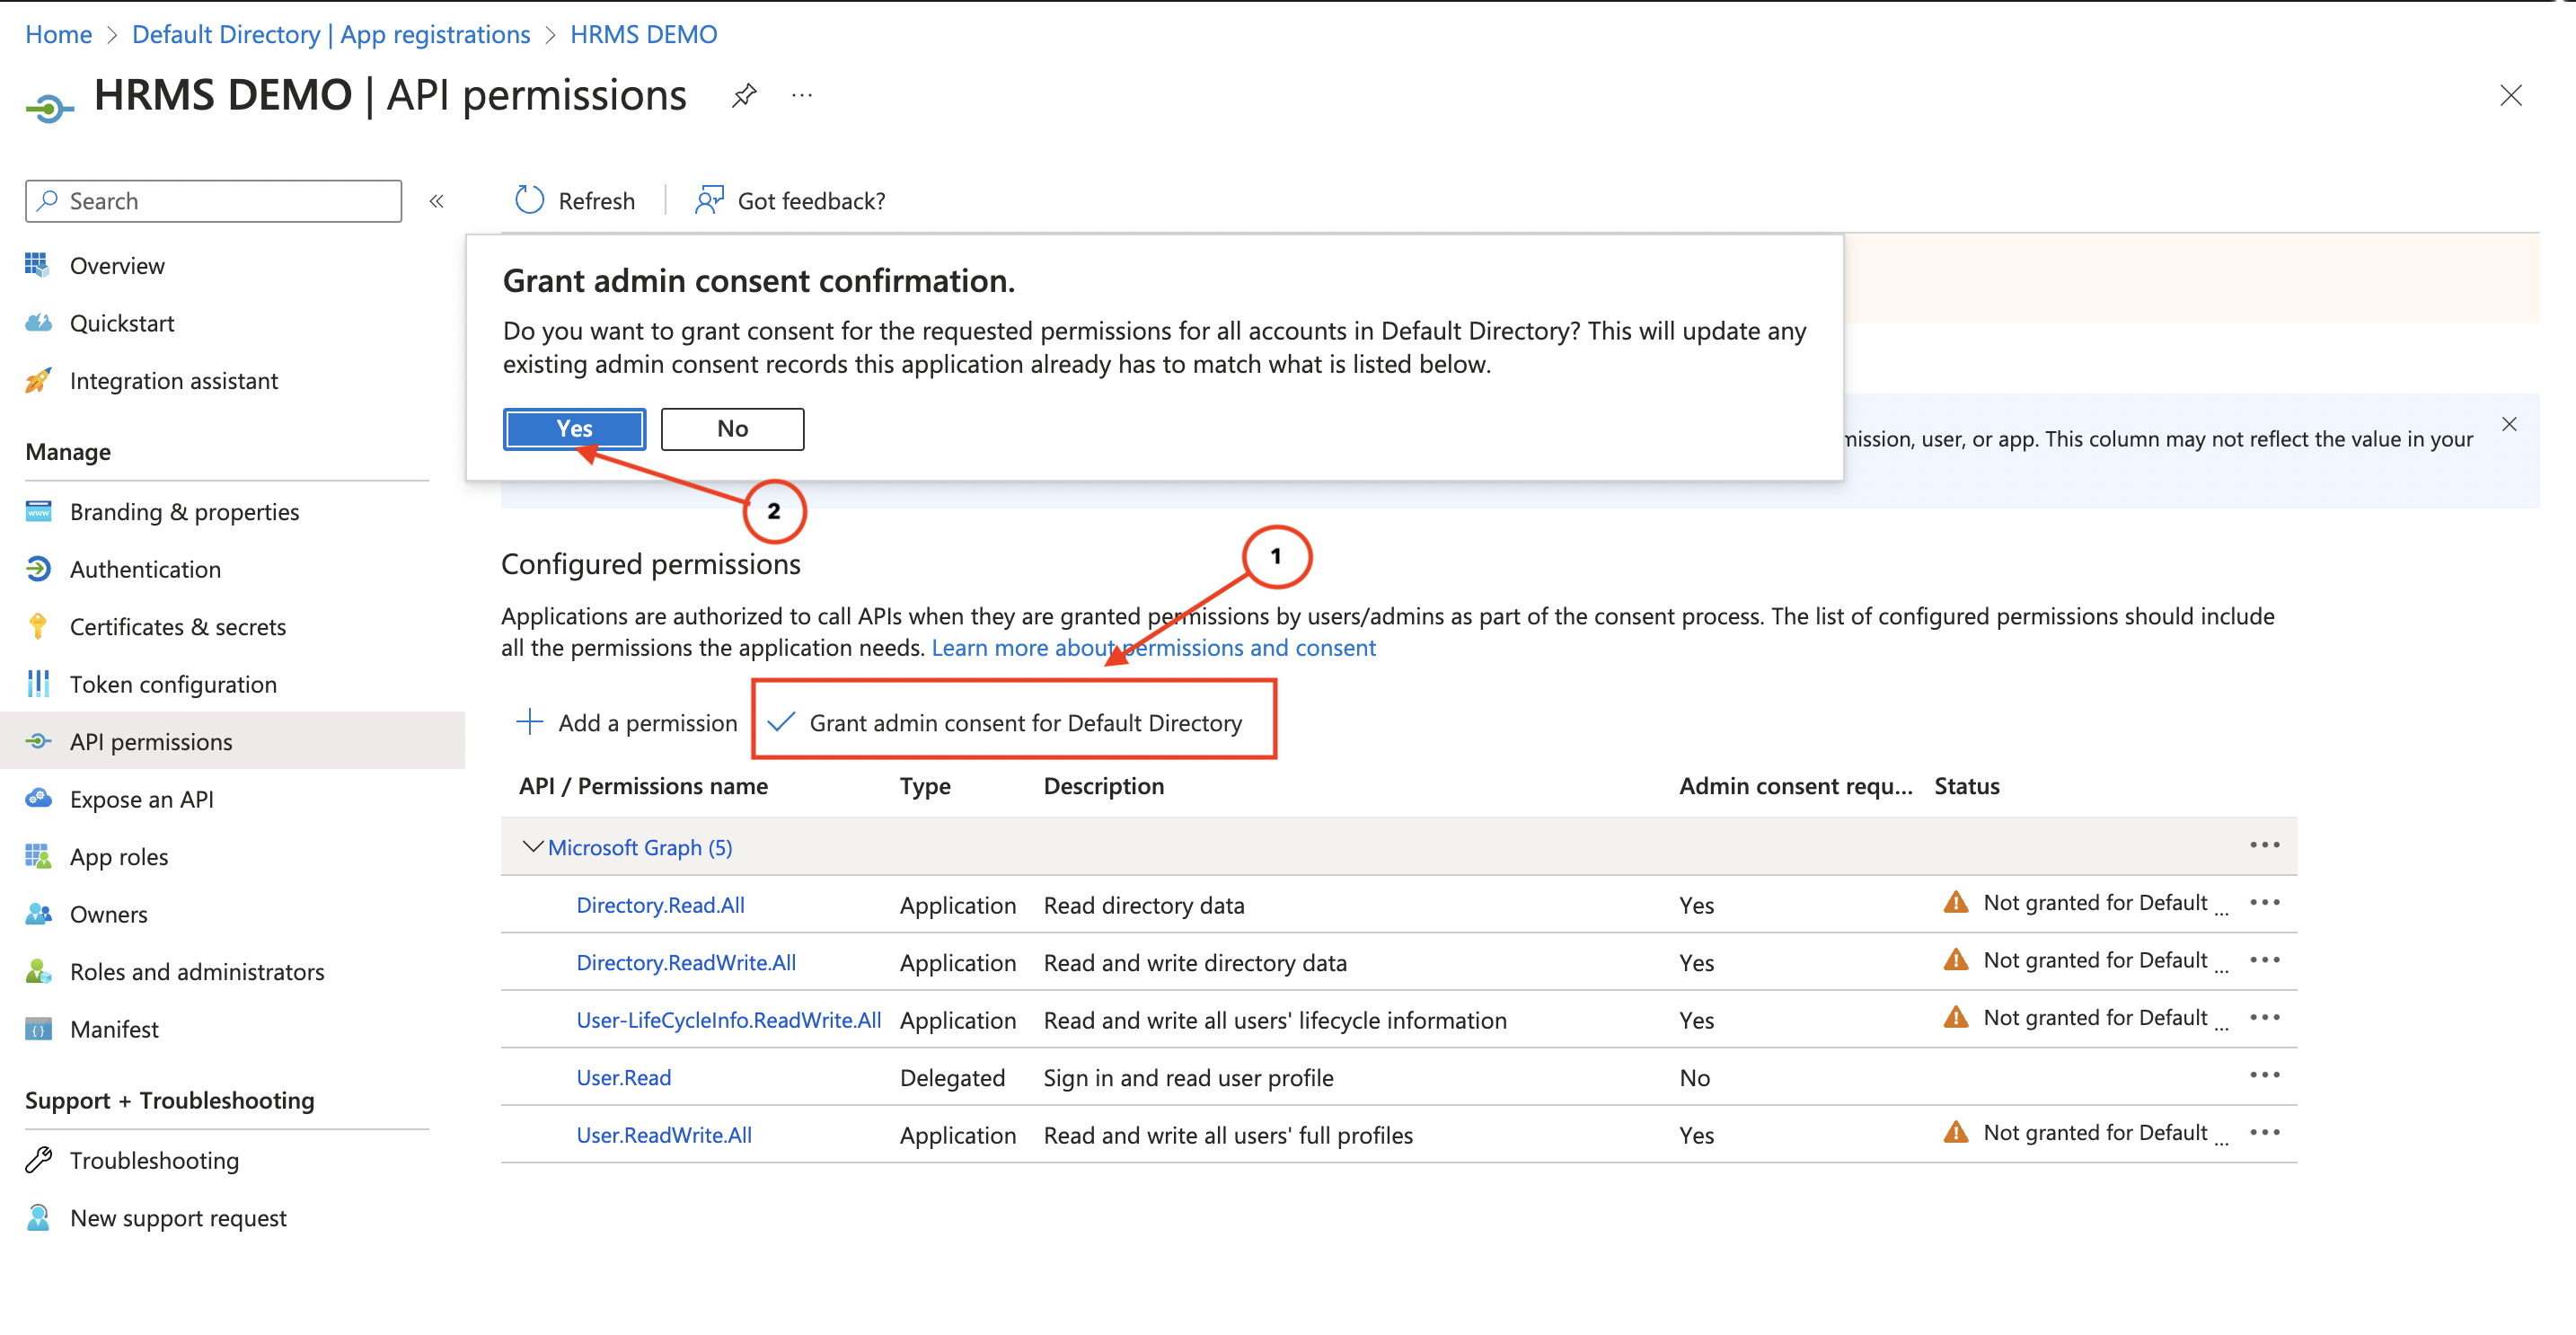
Voila!!!